Create a Scheduled Task

FlexNet Manager Suite 2020 R1 (On-Premises)

The XenApp server agent must be run locally on the XenApp server, where it collects inventory and transfers the data immediately either to the staging database, or to an inventory beacon for upload to the central compliance database. This is triggered by a Windows scheduled task on the XenApp server.

Because the XenApp server agent, as its first action for each inventory collection, clears all old data from the staging database, it is important that the XenApp server agent does not run at the same time as the inventory beacon collects data from the staging database (otherwise, corrupt or incomplete data may result). A buffer of 2 hours provides a good safety margin (depending on the scale of your Citrix Virtual Apps implementation).

Another consideration is that you want your Citrix Virtual Apps inventory uploaded to the central FlexNet Manager Suite database before the system import and compliance calculations take place. Typically, this process starts around 2am central server time. A two-hour upload buffer should be more than adequate.

These considerations suggest (within a single time zone) a collection schedule around 10pm, an inventory beacon connection around midnight, and everything in place for the nightly compliance calculation.

The process for setting up Windows scheduled tasks varies across different editions of Windows Server. The following example is for Windows Server 2012. Adjust for your XenApp server's conditions.

To create the scheduled task (Windows Server 2012 example):

  1. In Windows Explorer, navigate to Control Panel > System and Security > Administrative Tools, and double-click Task Scheduler.
    The Task Scheduler window appears.
  2. In the navigation tree on the left, select Task Scheduler Library, and then in the Actions list on the right, click New Folder....
    A dialog appears for entering the folder name.

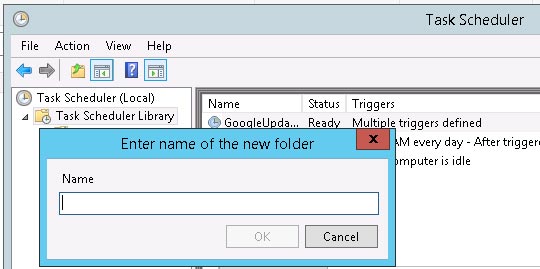
    A suggested value is FlexNet Manager Suite.
  3. Click OK, and select the new folder in the navigation tree.
  4. Select Action > Create Task....
    The Create Task dialog appears.
  5. Enter an appropriate Name, such as XenApp server agent, and add any Description to help future maintenance of this task.
    Your description may be something like Collects application and access information from a Citrix XenApp server and transfers this information to a staging database.
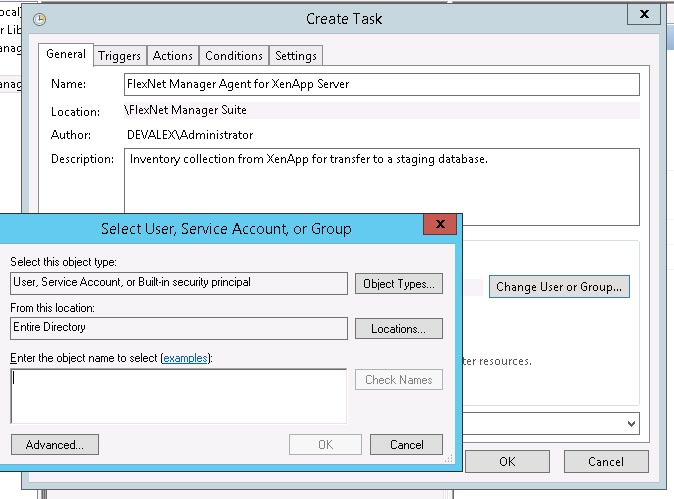
  6. Click Change User or Group....
    The Select User, Service Account, or Group dialog appears.

  7. Enter the account name that is to run the scheduled task, and click OK.
    This is the account you identified in Installing the XenApp Server Agent, and you can check the requirements for this account there.
  8. Further down in the Security options group, select Run whether user is logged in or not.
  9. Switch to the Triggers tab, and click New....
    The New Trigger dialog appears.
  10. Ensure that the default setting Begin the task On a schedule is selected, set the parameters for the schedule, and from the Advanced settings group, be sure that Enabled is selected.
    The suggested schedule is daily at 10pm local time, but be sure that this suits the upload procedures for your enterprise.
  11. Switch to the Action tab, and click New....
    The New Action dialog appears.
  12. Ensure that the default Action, Start a program, is selected, and browse to your local copy of FnmpXenAppServerAgent.exe.
  13. In the Add arguments (optional) field, specify all the command-line arguments you need for the agent.
    All command line arguments are documented in XenApp Server Agent Command Line Options. For common implementations, you will either define the connection string to your staging database, or provide the URL, account, and password for direct transfer to an inventory beacon. In addition, if you are using Citrix XenApp 7.5 (or later), or Citrix Virtual Apps 7.1808 (or later) and want a single agent to collect inventory from multiple servers, you need the option to define those servers.
    Example 1: Command line arguments to connect to your staging database.
    -d "Data Source=192.168.13.38;Initial Catalog=MyStaging;
                    User ID=accountName;Password=password"
    Example 2: For Citrix XenApp 7.5 (or later) and Citrix Virtual Apps 7.1808 (or later), accessing multiple XenApp servers and recording their details in a common staging database (all on one line):
    -d "Data Source=192.168.13.38;Initial Catalog=MyStaging;
                    User ID=accountName;Password=password"
    -s "localhost, xda01.fqdn.com"
  14. Click OK.
  15. Optionally, make any preferred adjustments to the Conditions or Settings tabs (normally the defaults are acceptable).
  16. Click OK to close the Create Task dialog.
    The new task appears in the list of scheduled tasks for this server.
  17. Right-click the new task, and click Run in the context menu.
    This checks that the scheduled task completes successfully.
  18. Validate operations in the following ways:
    • Review the log file (FnmpXenAppAgent.log in the same folder as the agent’s executable file) for any errors or warning messages.
    • Use Microsoft SQL Server Management Studio to check the contents of the staging database.

FlexNet Manager Suite (On-Premises)

2020 R1