Editing a Schema.ini File
A schema.ini file defines the columns for a text file, overwriting
all other settings.
The OLE-DB driver for a text file looks for a
schema.ini file in the
same directory as the text file to be imported. This can define all aspects of the
processing of the text file:- Column names
- Data types for all columns
- The character set
- Data conversions.
The easiest way to work with a schema.ini file is to use the
Microsoft Windows facilities to create it, and then edit the file to suit your
requirements.
To edit a schema.ini file:
-
Depending on your machine architecture:
- On a 32-bit operating system, open the Control Panel and start ODBC.
- On a 64-bit operating system, open a Command Window and
run:
C:\Windows\SysWOW64\Odbcad32.exe
The ODBC Data Source Administrator dialog appears.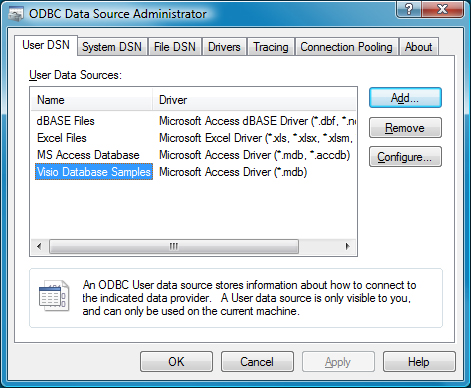
-
Click Add....
The Create New Data Source dialog appears.
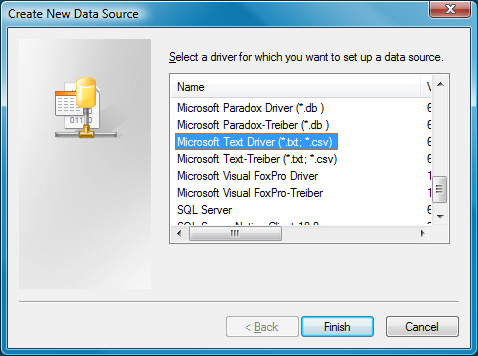
-
Select Microsoft Text Driver (*.txt; *.csv), and
click Finish.
The ODBC Text Setup dialog appears.
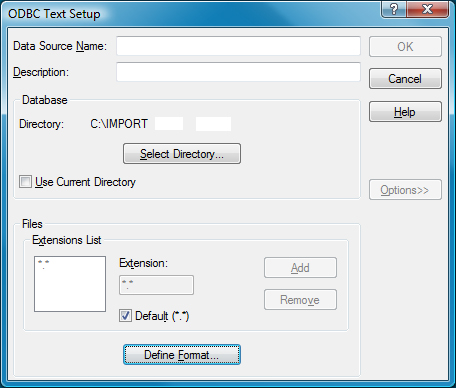
-
Still in the ODBC Text Setup dialog, click
Define Format....
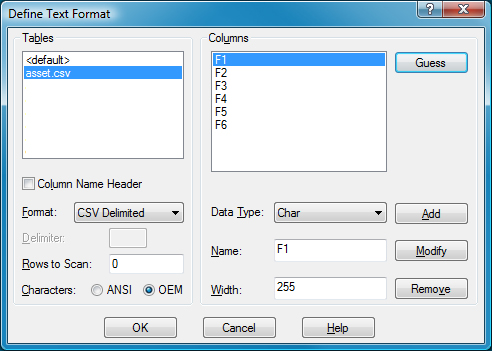
The Define Text Format dialog appears.
schema.ini file, see http://msdn.microsoft.com/en-us/library/ms709353(VS.85).aspx2021 R1