Creating and Editing Global Conditions
AdminStudio 2023 | 25.0 | Application Manager
In addition to using the Requirements Wizard to create global conditions, you can create new global conditions and edit existing global conditions on the Global Conditions dialog box, which can be opened by clicking the Global Conditions button on the Home tab of the Application Manager ribbon.
To edit global conditions:
|
1.
|
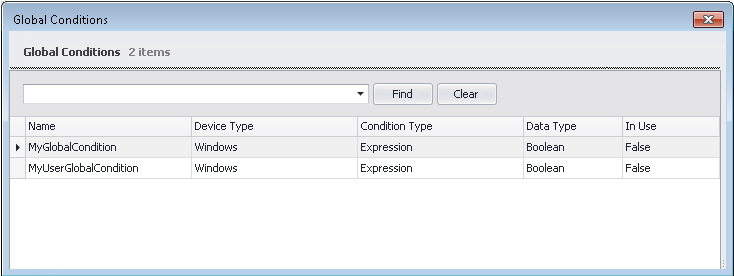
On the Home tab of the Application Manager ribbon, click the Global Conditions button. The Global Conditions dialog box opens, listing all of the global conditions present in the current Application Catalog. |

On the Global Conditions dialog box, the name, device type, condition type, and data type of each condition is listed, as well as whether the condition is in use or not.
|
2.
|
On the Global Conditions dialog box, you can edit or delete an existing global condition or create a new global condition: |
|
•
|
Editing an existing global condition—Right-click on the condition and then select Edit Condition from the shortcut menu. The Create Global Condition dialog box opens, where you can edit the condition. |
|
•
|
Deleting an existing global condition—Right-click on the condition and then select Delete Condition from the shortcut menu. |
|
•
|
Adding a new global condition—Right-click anywhere on the list of conditions and select Create New Condition from the shortcut menu. The Create Global Condition dialog box opens, where you can define a new condition. |
|
•
|
View references—If a condition is in use, right-click on the condition and select References from the shortcut menu to open the References dialog box, which lists the referring applications and the referring global conditions of the selected global condition. |
|
3.
|
If you have a large list of global conditions and would like to perform a search, you can use the search box and Find button to filter the list. |
See Also
Global Conditions Dialog Box
Create Global Condition Dialog Box
