Monitored Directory for Package Automation
The Monitored Directory is a single directory were the packages will be executed on-demand and through scheduled automation. To configure the Monitored Directory, perform the following steps.
To configure the Monitored Directory:
| 1. | On the Application Catalog tab menu, select Options. The Options dialog box opens. |
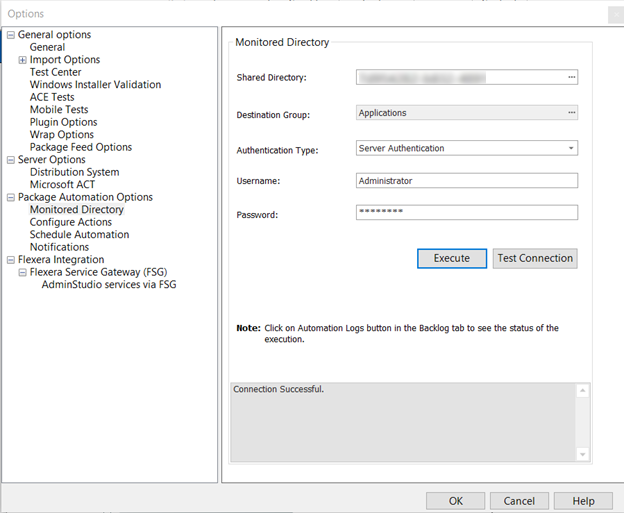
| 2. | Under Package Automation Options, select Monitored Directory. The Monitored Directory tab opens. |
| 3. | In the Shared Directory field, enter the path or click the browse button (...) to browse to the path. |
| 4. | In the Destination Group field, click the browse button (...). The Select Destination Group dialog box opens. |
| 5. | Click the New Group button, enter name of the group, and then click Ok. |
Note:Multiple groups can be created.
| 6. | Click the Create subgroup based on source folder structure check box, if you want to create subgroups in the folder structure. |
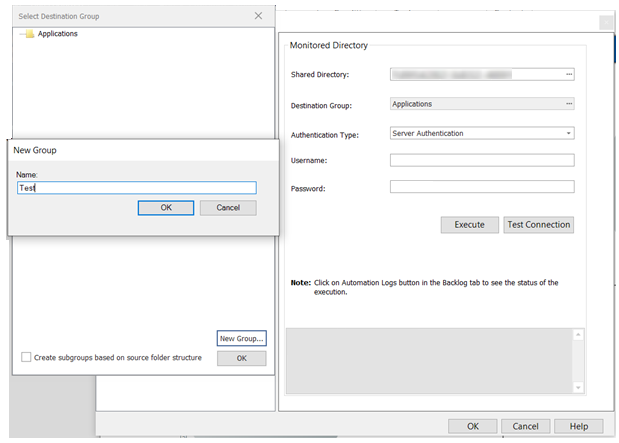
| 7. | Click Ok button to exit the dialog box. |
| 8. | In the Authentication Type field, select one of the following type: |
| • | Server Authentication— Choose to use server login identification for authentication. |
| • | Windows Authentication— Choose to use Windows network authentication (your network login ID) to log into this Application Catalog. |
| • | Username and Password— If you chose Server Authentication, enter the appropriate Username and Password. |
| 9. | Click Test Connection to validate the Monitored Directory connection information. Upon successful validation, the Connection Successful message will appear at the bottom. |
Note:If validation is failed, Connection Failed message will be appeared.
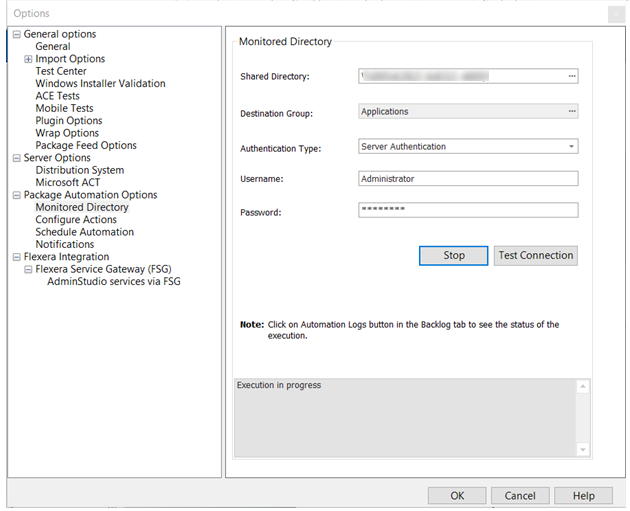
| 10. | Click Execute button and confirm the popup for the execution. Upon successful execution, you can see the status of the execution under Automation Logs in the Backlog tab. |
| 11. | Packages in the Monitored Directory will be executed based on the package types, as shown in the below table. |
|
Package Type |
Import |
Test |
Wrap |
Convert |
Publish |
|
ThinApp |
Yes |
|
|
|
|
|
SFT |
Yes |
Yes |
|
Yes (only App V) |
Yes |
|
PS1 |
Yes |
Yes |
|
Yes |
Yes |
|
PKG |
Yes |
Yes |
|
|
|
|
MSP |
Yes |
|
|
|
|
|
MSIX |
Yes |
|
|
|
Yes |
|
MSI |
Yes |
Yes |
Yes |
Yes |
Yes |
|
IPA |
Yes |
Yes |
|
|
Yes |
|
Intunewin |
Yes |
|
|
|
Yes (only Intune) |
|
EXE |
Yes |
Yes |
Yes |
Yes |
|
|
DMG |
Yes |
Yes |
|
|
|
|
AppX |
Yes |
Yes |
|
|
Yes |
|
App-V |
Yes |
Yes |
|
|
Yes |
|
APP |
Yes |
|
|
|
|
|
APK |
Yes |
Yes |
|
|
Yes |
| 12. | During execution, (if required) you can stop by clicking Stop button. |
| 13. | After selecting the above fields, click OK. |