Configure Import Action for Automation
To configure the import actions, perform the following steps:
Note:Import is prerequisite for Automation therefore it is a mandatory action. This action will be executed as a first step during automation execution.
To configure import actions:
|
1.
|
On the Application Catalog tab menu, select Options. The Options dialog box opens. |
|
2.
|
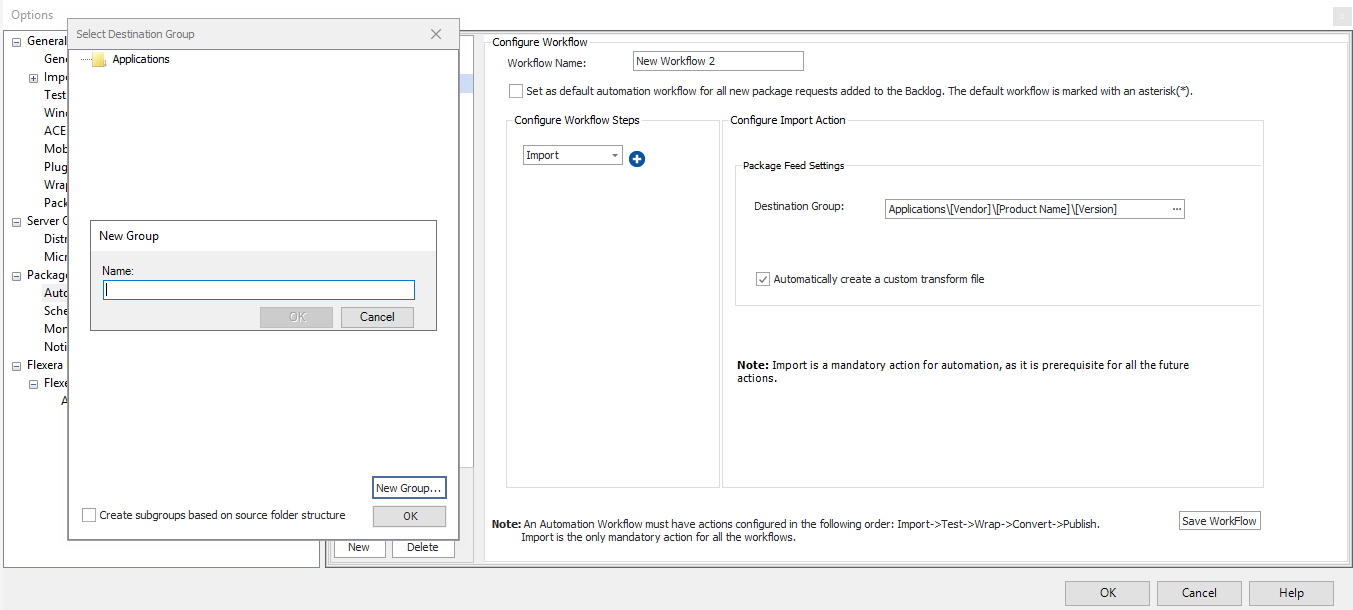
Under Package Automation Options, select Automation Workflows. The Configure Workflow dialog box appears |
|
3.
|
By default, Import action will be selected in the Configure Workflow Steps drop down. The Configure Import Action details appears on the right pane. |
|
4.
|
In the Destination Group field: |
|
a.
|
By default, Applications\[Vendor]\[Product Name]\[Version] placeholders will be selected in the Destination Group field. |
|
b.
|
To change the Destination Group, click the browse button (...). The Select Destination Group dialog box opens. |
|
c.
|
Click the New Group button, in the New Group popup, enter name of the group, and then click OK. |
Note:Nested groups can be created.
|
d.
|
Click the Create subgroup based on source folder structure check box, if you want to create subgroups in the folder structure. |
|
e.
|
Click OK button to exit the dialog box. |
The possible placeholders are: [ProductName]\[Version]\[Vendor]\[Platform]\[SetupType]\[Language]. This order can be rearranged.
Based on the details provided, the package will go to the destination group in the Application Manager Catalog.
|
5.
|
Select Automatically create a custom transform file check box if you want a transform (.mst) file to be create based on the selections made in the package customization wizard. |
|
6.
|
After entering the above details, click on the Save Workflow button to validate and save the Import action details. |
Note:Import workflow step cannot be deleted.