Creating a New Distribution System Connection Setting
AdminStudio 2021 | 21.0 | Application Manager
Edition:Application Manager is included with AdminStudio Professional and Enterprise Editions.
To create a new named connection to a distribution system, perform the following steps:
To create a new named connection to a distribution system:
|
1.
|
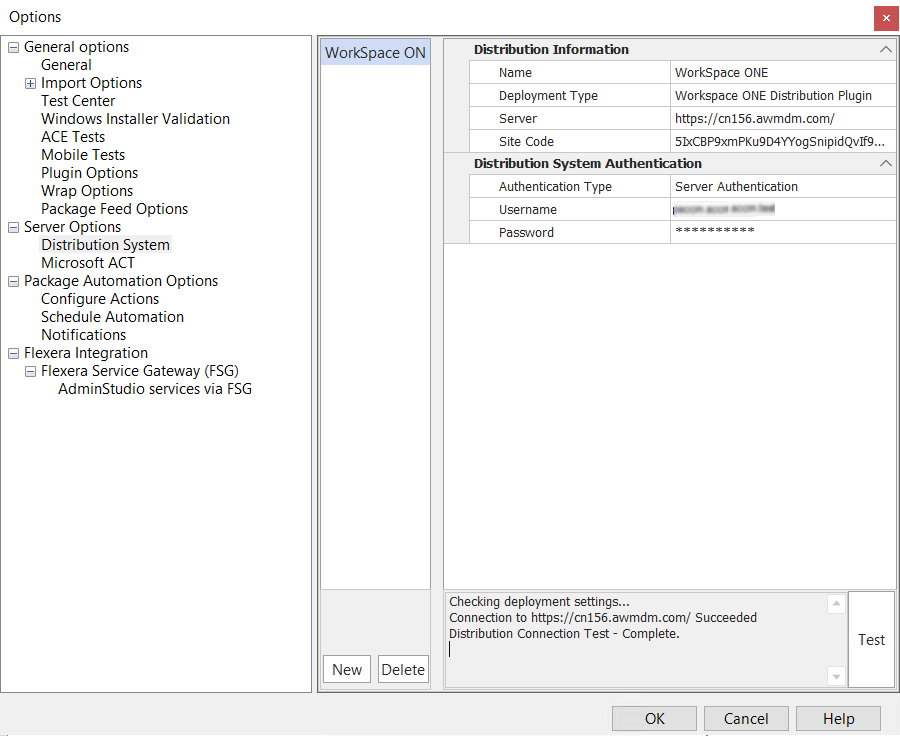
On the Application Catalog tab menu, select Options. The Options dialog box opens. |
|
2.
|
Under Servers Options, select Distribution System. The Distribution System tab opens, and lists all defined connections. |
|
3.
|
Click New. A new set of empty connection setting fields is displayed. |
|
4.
|
In the Name field, enter a name to identify this new named connection to a distribution system. |
|
5.
|
From the Deployment Type list, select one of the following to identify the distribution system technology of this new named connection: |
|
•
|
Workspace ONE Distribution Plugin
|
|
•
|
Altiris Distribution Plugin |
|
•
|
App-V Server Distribution Plugin |
|
•
|
Casper Distribution Plugin |
|
•
|
Intune Distribution Plugin |
|
•
|
ConfigMgr Deployment Plugin |
|
•
|
XenApp Distribution Plugin |
|
6.
|
In the Server field, enter the name of your distribution system server. |
|
7.
|
In the Site Code field, enter the code that identifies your distribution system site. |
Note:If you are creating a named connection to a XenApp, Altiris, or App-V server, leave the Site Code field blank. If you are creating a named connection to Casper, this field will not be displayed.
|
8.
|
Under Distribution System Authentication, set the Authentication Type field to either Windows Authentication or Server Authentication to identify the authentication type you are going to use to access the specified distribution system. |
If you selected Server Authentication, you need to also enter a Username and Password.
|
9.
|
Under Share Information, set the Authentication Type field to either Windows Authentication or Server Authentication to identify the authentication type you are going to use to access the shared location where you will be publishing packages during distribution. |
If you selected Server Authentication, you need to also enter a Username and Password.
|
10.
|
(Casper only) In the Distribution Point field, enter the Casper distribution point you want to distribute packages to. |
Note:Casper supports multiple server infrastructures, but AdminStudio only supports the File Share Distribution Points infrastructure, and copies packages to a UNC File Share Distribution Point in Casper. AdminStudio currently does not support copying packages to JDS Instances, Cloud Distribution Points, Software Update Servers, or NetBoot Servers.
|
11.
|
In the Location to Publish Package field, enter or browse to the shared location where you will be publishing packages during distribution. |
Note:The fields in the Share Information section are not required when setting up a connection to Workspace ONE Server. Applications are published directly to the Workspace ONE Server, not to a shared location.
|
12.
|
If you want to add another named connection, click New and repeat the above process. |
|
13.
|
Click OK to close the dialog box. |
See Also
Server Options / Distribution System Tab