Setting Up Package Auto Import
AdminStudio 2021 | 21.0 | Application Manager
Note:To use the Package Auto Import feature, you must have AdminStudio Administrator permission.
The Package Auto Import feature enables you to automatically import or re-import all selected package types in specified network directories into your Application Catalog.
You initiate Package Auto Import by entering information on the Import Options / Package Auto Import tab of the Application Manager Options dialog box.
To initiate the automatic import of packages from a network directory:
|
1.
|
On the Application Catalog tab menu, select Options. The Options dialog box opens. |
|
2.
|
Open the Import Options / Package Auto Import tab. The Package Auto Import tab opens. |
|
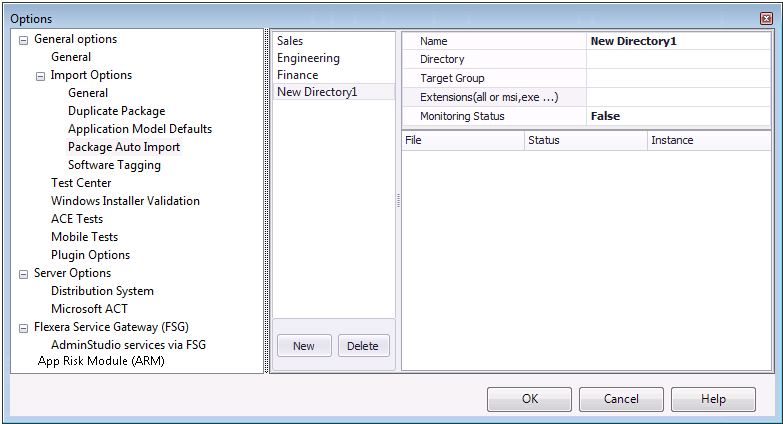
3.
|
Click New. Fields to define a new directory are listed. |
|
4.
|
In the Name field, enter a name to define this new directory to monitor. |
|
5.
|
In the Directory field, you can either enter a directory path or click the browse button and select a directory. |
Important:The directory must be in UNC format and it must be a shared directory.
|
6.
|
In the Target Group field, specify the group in the Application Manager tree into which the packages will be imported. |
|
7.
|
In the Extensions field, click the browse button to open the Select Watcher Extensions dialog box. |
.png)
|
8.
|
Select the package types that you want to monitor and then click OK to close the dialog box. |
|
9.
|
To begin monitoring this directory for new and updated packages, set the Monitoring Status field to True. |
Note:To stop monitoring this directory, set the Monitoring Status field to False.
|
10.
|
Set the Create Subgroup option to one of the following options to determine the location of the imported packages in the Application Manager tree: |
|
•
|
True—Subgroups of the selected group will be created in the Application Manager tree that mimic the directory structure of the selected directory, and the packages will be imported into those subgroups. |
|
•
|
False—All of the packages in the selected directory (and its subdirectories) will be imported into the root of the selected group. |
|
11.
|
Click OK to save these settings for the selected directory to monitor. After 30 minutes, the import of packages in the specified directories will begin. |
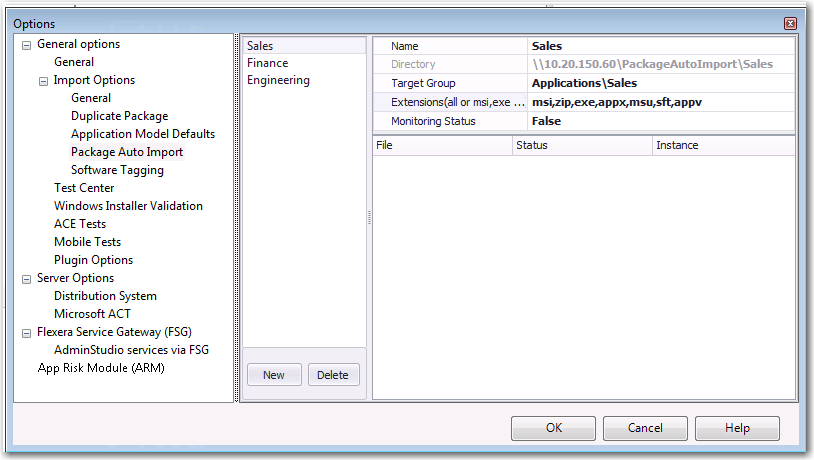
Viewing the Status of a Monitored Directory
After a directory’s Monitoring Status has been set to True, the packages (of the selected package type) in that directory are listed on the Package Auto Import tab.
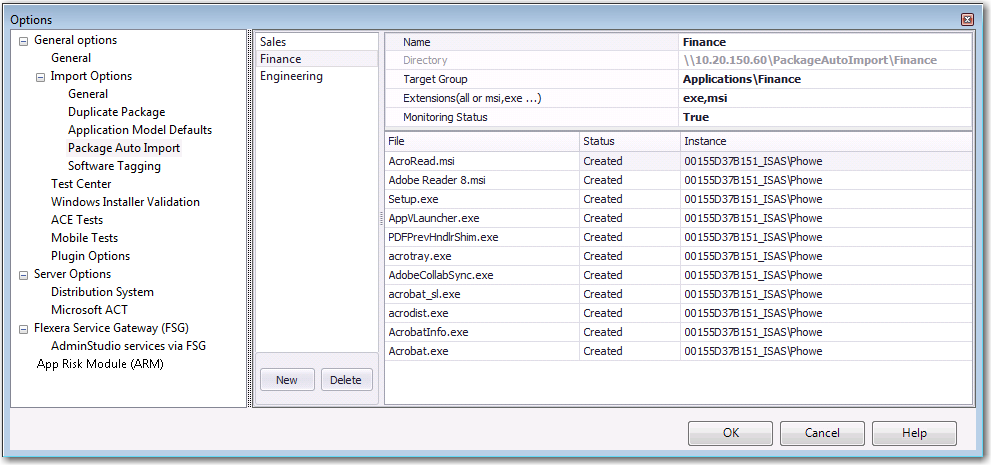
Figure 1: Monitoring the Import of Packages in a Directory on the Package Auto Import Tab
In the Status column, packages will have one of the following statuses:
|
•
|
Created—Package will be imported as soon as one of the AdminStudio Host processes connected to this Application Catalog is running but is not currently being used. |
|
•
|
Imported—Package has been imported into the Application Catalog. |
|
•
|
Canceled—User canceled the import of the package into the Application Catalog. |
|
•
|
Error—There was an error during import of the package into the Application Catalog. |
|
•
|
Fatal—Something is wrong with the package and import failed. |
|
•
|
FileNotExists—File does not exist in the specified location. |
|
•
|
AccessDenied—Access to the file being imported was denied. |
See Also
About Package Auto Import
Package Auto Import and Duplicate Package Names
Import Options / Package Auto Import Tab
Automatically Importing Packages from a Network Directory