Creating Custom Reports
AdminStudio 2021 R2 | 22.0 | Application Manager
Edition:Application Manager’s Reports tab is included with AdminStudio Enterprise Edition.
You can create your own custom reports that are generated using Microsoft SQL Reporting Services. Creating a custom report involves the following three steps:
| • | Write a stored procedure to obtain data from the AdminStudio Application Catalog database. |
| • | Create an .rdlc file to format the display of the data in the desired manner. After you create an .rdlc file, using either Microsoft SQL Server Business Intelligence Development Studio or Visual Studio 2012, you need to copy that file to the AdminStudio installation directory. |
| • | Edit the AdminStudio.Reports.xml file to add a reference to your custom report. The AdminStudio reporting framework uses the information in the AdminStudio.Reports.xml file to present the reporting view. This file includes the location, name, icons, and ribbon location of the report files. It also identifies the SQL queries or stored procedures that need to be run to populate the data for the report. |
Reports Tab Report Groups
When you add a reference to your report to the AdminStudio Report Definition file, you need to specify where you want the report to be displayed on the Reports tab ribbon. By default, AdminStudio reports are grouped into eight groups, and each group has a drop-down list of reports:
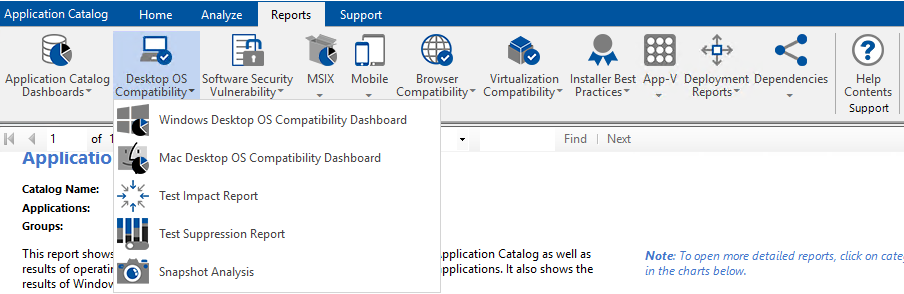
AdminStudio Report Groups
Before you begin to edit the AdminStudio Report Definition file, as described in Creating a Custom Report, you need to decide in which of these groups you want your new custom report to be listed. or whether you want your report to be listed in a new group. The parameters used to define a report’s location in the ribbon are the Group, GroupIndex, and OrderIndex parameters of the <Report> element.
To create a custom AdminStudio report, perform the following steps:
To create a custom report and add it to the Reports tab ribbon:
| 1. | Write an SQL stored procedure to obtain the data for the report from the AdminStudio Application Catalog database. |
For reference on writing stored procedures, you can open the following file and look at the stored procedures for the existing AdminStudio reports:
[AdminStudio_Installation_Directory]\Support\SQL_Scripts\Reporting.StoredProcedures.sql
For example, if you first find the name of an existing report in the AdminStudio.Reports.xml file (such as Test Impact Report), and then identify the stored procedure used to generate that report (such as sp_asrpt_GetOsCompatTestImpactTopLevel), you can then open the Reporting.StoredProcedures.sql file and look at that stored procedure.
| 2. | Design a custom report in an .rdlc file using either Microsoft SQL Server Business Intelligence Development Studio or Visual Studio 2012, along with .rdlc files for each drill-through sub-report that you want to include. |
Tip:An easy way to make sure that your custom report matches the layout of existing reports is to copy one of the .rdlc files in the [AdminStudioInstallDirectory]\Common\ReportDefinition\RDLC directory and use it as your starting point.
| 3. | Copy your new .rdlc file(s) to the following directory on the machine where AdminStudio is installed: |
[AdminStudioInstallDirectory]\Common\ReportDefinition\RDLC
| 4. | Open the AdminStudio.Reports.xml file, found in the following location, in a text editor: |
[AdminStudioInstallDirectory]\Common\ReportDefinition
| 5. | In the AdminStudio.Reports.xml file, locate and copy the code for an existing report that is listed in the group on the Reports tab ribbon that you want your report to be listed in. You need to copy all of the code between the <Report> and </Report> elements, including the code for drill-through sub-reports. |
For example, if you want your report to appear in the Windows Installer Best Practices group, you could copy the code for the Shared Extensions report (and its drill-through report):
01 <Report Name="Shared Extensions" RdlcPathType="Relative"
RdlcPath="RDLC\SharedExtensions.rdlc" Group="Windows Installer Best Practices"
GroupIndex="5" OrderIndex="3" Icon="33120" GroupIcon="33138" >
02 <DataSources>
03 <DataSource DataSourceName="ds_asrpt_SharedExtensions"
SqlCommandType="StoredProcedure"
SqlCommandString="sp_asrpt_SharedExtensions">
04 <SqlParameters>
05 <SqlParameter/>
06 </SqlParameters>
07 </DataSource>
08 </DataSources>
09 <Report Name="Shared Extensions By Product" RdlcPathType="Relative"
RdlcPath="RDLC\SharedExtensionsByProduct.rdlc">
10 <DataSources>
11 <DataSource DataSourceName="ds_asrpt_SharedExtensionsByProduct"
SqlCommandType="StoredProcedure"
SqlCommandString="sp_asrpt_SharedExtensionsByProduct">
12 <SqlParameters>
13 <SqlParameter DrillThroughParameterName="Extension"
SqlParameterName="@extension" SqlParameterValue=""/>
14 </SqlParameters>
15 </DataSource>
16 </DataSources>
17 </Report>
18 </Report>
Important:Line numbers have been added to this example.
| 6. | Use the information on the following table to replace the highlighted text above with the correct information for your new custom report, including information for all of your custom report’s drill through reports: |
|
Line |
Element/Parameter |
Values |
|
01 |
<Report |
Opens the definition of the main report. |
|
01 |
Name |
Enter the name of the custom report. This name will be listed in the drop-down menu that opens when you click on the report group icon in the ribbon. |
|
01 |
RdlcPathType |
Valid values are Relative or Absolute. |
|
01 |
RdlcPath |
Enter the name of the custom report .rdlc file. |
|
01 |
Group |
Enter the name of the report group that this report will be listed in. In this example, the Group parameter is set to Windows Installer Best Practices. Note:All of the reports in this group will have the same value for this parameter. Note:This parameter is not necessary for drill-through reports. |
|
01 |
GroupIndex |
Set this parameter to a number to specify the order that this group will appear in the Reports ribbon. In this example, the GroupIndex parameter is set to 5, meaning that it will be the fifth group listed in the Reports ribbon, counting from left to right. Note:All of the reports in this group will have the same value for this parameter. Note:Not necessary for drill-through reports. |
|
01 |
OrderIndex |
Set this parameter to a number to specify the order that this report will appear in drop-down list that opens when you click on this report’s group icon in the Reports ribbon. In this example, the OrderIndex parameter is set to 3, meaning that it will be the third report in the list. Note:Not necessary for drill-through reports. |
|
01 |
Icon |
This icon specifies the icon that is displayed to the left of the report name in the drop-down list. For the reports shipped with AdminStudio, this parameter is set to a five-digit code to specify an image resource in the AdminStudio binary file. For your custom report, set this parameter to an absolute path to the icon that you want to use for this report. Note:All of the reports in this group will have the same value for this parameter. Note:Not necessary for drill-through reports. |
|
01 |
GroupIcon |
This icon specifies the icon that is displayed to the Reports ribbon for this group. For the groups defined in the XML file shipped with AdminStudio, this parameter is set to a five-digit code to specify an image resource in the AdminStudio binary file. If you are creating a custom group, set this parameter to an absolute path to the icon that you want to use for this group. |
|
02 |
<DataSources> |
Element that opens the list of data sources for this report. |
|
03 |
<DataSource |
Element that opens a data source for this report. |
|
03 |
DataSourceName |
This name should match the data source specified in the RDLC file. |
|
03 |
SqlCommandType |
Valid values are StoredProcedure or SQL. |
|
03 |
SqlCommandString |
Enter the stored procedure name or an SQL string. |
|
04 |
<SqlParameters> |
Element that opens the list of SQL parameters. |
|
05 |
<SqlParameter> |
A parameter to pass to the stored procedure. This is usually used for drill-through reports to convey the context of what was clicked. |
|
09 |
<Report |
Because this element is nested within the first <Report> element, it defines a drill-through report for the first report. It will not be listed in the drop-down list; it is opened by clicking on a link in the original report. Define this report using the same parameters you used to define the parent report. However, it is not necessary to define the following parameters: Group, GroupIndex, GroupIcon, Icon, OrderIndex. |
| 7. | After you save this file, open the Reports tab and this locate this report, which should be listed in the location you specified. |