Publishing Packages to ConfigMgr (Formerly called as System Center Configuration Manager)
AdminStudio 2021 R2 | 22.0 | Package Distribution Wizard
Using AdminStudio’s Package Distribution Wizard, you can publish individual Windows Installer (.msi), Microsoft App-V 4.x (.sft), or legacy setup (.exe) packages to ConfigMgr. You can use the Package Distribution Wizard to publish packages on your file system or from your the Application Catalog tree in Application Manager.
Important:To publish applications to System Center 2012 Configuration Manager, you need to use the application-based Distribution Wizard, as described in Distributing Applications Using the Distribution Wizard.
Note:Using the Package Distribution Wizard, App-V 4.x packages can only be published to System Center 2007 Configuration Manager. However, Windows Installer and legacy setups can be published to both System Center 2007 Configuration Manager and System Center 2012 Configuration Manager using the Package Distribution Wizard.
You can launch the Package Distribution Wizard from Application Manager by selecting a package in the tree and then clicking the Distribute button in the Home tab of the ribbon or by right-clicking on the package and selecting Distribute Package from the shortcut menu. You can also launch the Package Distribution Wizard from the Windows Start menu.
To publish a Windows Installer, App-V, or legacy package from the Application Catalog to a ConfigMgr server, perform the following steps.
To publish a package to ConfigMgr:
|
1.
|
Select the package that you want to publish in the Application Catalog tree and click the Distribute button in the Application Manager ribbon (or right-click on the package and select Distribute Package from the shortcut menu). The Welcome panel opens. |
Tip:You can also launch the Package Distribution Wizard from the AdminStudio Tools Gallery or from the Windows Start menu.
|
2.
|
Click Next. The Distribution Type panel opens. |
|
3.
|
Select Configuration Manager and click Next. The Package Information panel opens. |
|
•
|
If you launched Package Distribution Wizard with a package selected, information about that package is listed. |
|
•
|
If you launched Package Distribution Wizard without having a package selected, click the Browse button and locate the Windows Installer Package (.msi), Microsoft App-V Package (.sft), or Legacy Setup Package (.exe) that you want to distribute. |
|
4.
|
(Windows Installer packages only) If there are transforms associated with the package, click the New button ( ) in the Windows Installer Transform Files (*.mst) area and navigate to the transform you want to add. Repeat as necessary. ) in the Windows Installer Transform Files (*.mst) area and navigate to the transform you want to add. Repeat as necessary. |
|
5.
|
(Windows Installer packages only) If desired, add additional Windows Installer properties in the Specify Additional MSI Properties field. |
|
6.
|
Click Next. The Connect to a ConfigMgr Server panel opens. |
|
7.
|
In the Server field, enter the name of your ConfigMgr server. |
|
8.
|
In the Site Code field, enter the code that identifies your Configuration Manager site. |
|
9.
|
From the Authentication list, choose one of the following options: |
|
•
|
Server Authentication—Choose this option if you want to use ConfigMgr server login identification to log into this server. Then enter the appropriate User Name and Password. |
|
•
|
Windows Authentication—Choose this option if you want to use Windows network authentication (your network login ID) to log into this ConfigMgr server. |
|
10.
|
Click Next. The Select Destination Folder panel opens prompting you to select a location that the ConfigMgr server has access to where you want to publish the selected packages. |
|
11.
|
In the Location to Publish Packages field, enter a target path, in UNC format (\\Server\Share), of the location where you want to publish the selected packages. Make sure that you enter a location that the ConfigMgr server has access to. |
|
12.
|
From the Authentication list, select one of the following options: |
|
•
|
Windows Authentication—Choose this option if you want to use Windows network authentication (your network login ID) to log into this location. |
|
•
|
ConfigMgr Authentication—Choose this option if you want to use ConfigMgr server authentication (your ConfigMgr server login ID) to log into this location. |
|
•
|
Server Authentication—Choose this option if you are publishing to an alternate file server that requires credentials. Then enter the appropriate User Name and Password. |
|
13.
|
Click Next. The Select Group panel opens. |
|
14.
|
Select the Target Group on the Configuration Manager Server where you want to publish the package and click Next. The Distribution Summary panel opens. |
|
15.
|
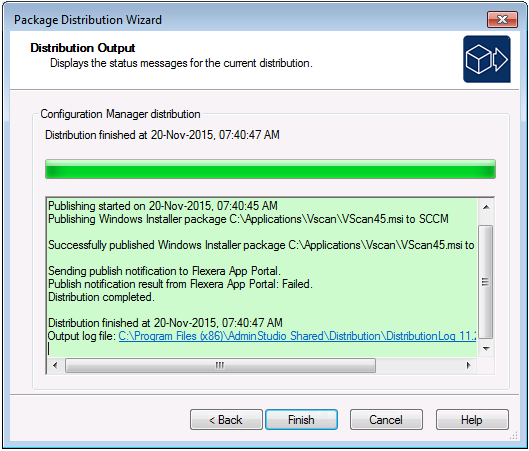
On the Distribution Summary panel, review the selections you made. If you are satisfied with them, click Next to distribute the package. The Distribution Output panel displays progress during distribution. When distribution is successful, the message Successfully published ... is listed and the background color of the output window turns green. |
|
16.
|
Click Finish to exit the Package Distribution Wizard. |