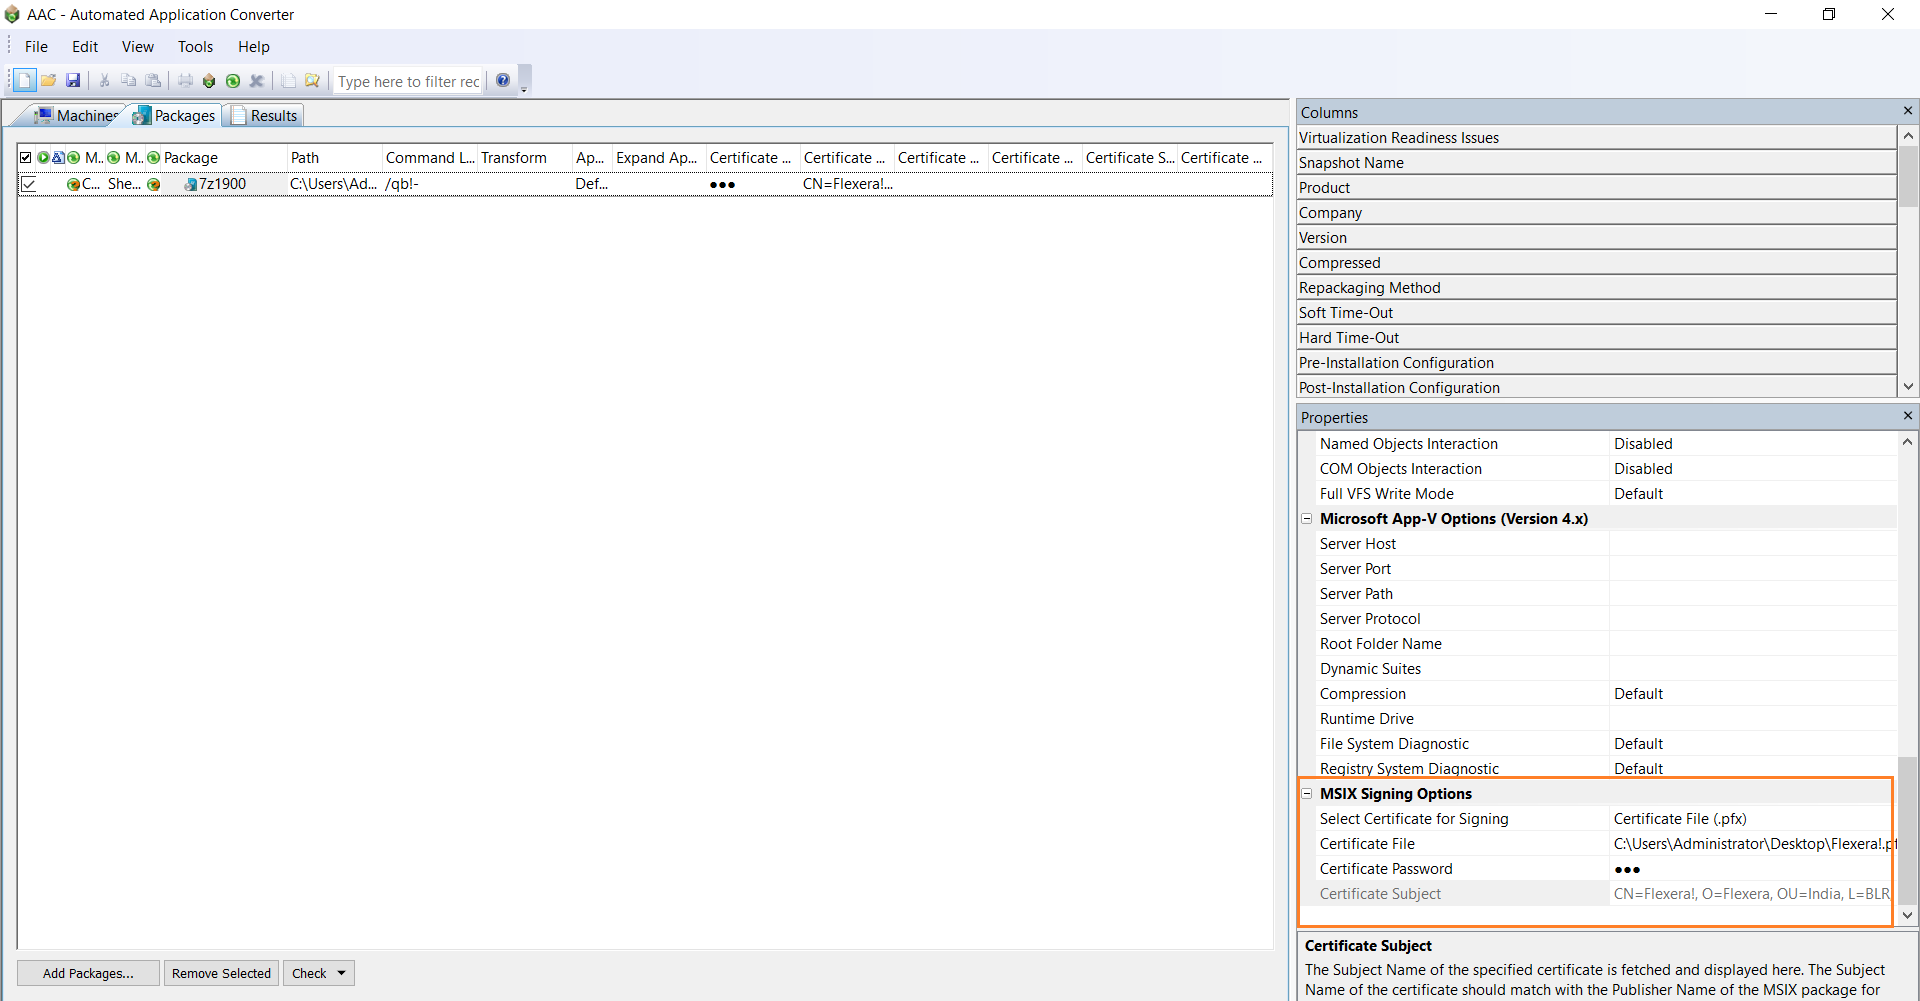
Setting MSIX Signing Options
Before you use Automated Application Converter to convert a Windows Installer packages and legacy setup packages (.exe) to a MSIX packages, you must select either one of the following:
| • | Certificate File (.pfx) |
| • | Certificate Store |
In the Properties window, under MSIX Signing Options, select Certificate File (.PFX) from the Select Certificate for Signing list.
Enter the Certificate File path or browse and select the certificate path and then enter the Password.
Certificate Subject auto populates the certificate subject details.
Select Certificate File as Signing Option
Note:If different Certificate details are provided in both places, ie. under Properties window and Tools >> Option, then the package level certificate details will be taken as a priority.
Note:Before conversion make sure that the Company Name is matching with the Certificate Subject.
Error Message
Before MSIX conversion, if Certificate File and Password details are invalid, the below error message appears.

Note:If you select the Certificate Store option, make sure that the Certificate has been imported. For more details on importing the certificate, see Import Certificate.
In the Properties window, under MSIX Signing Options, select Certificate Store from the Select Certificate for Signing list.
Enter the below details:
| • | From the Certificate Store Location drop down, select either User or Machine. |
| • | From the Certificate Store Name drop down, select store name from the list. |
| • | From the Certificate Subject drop down, select certificate subject from the list. |
Note:Before conversion make sure that the Company Name is matching with the Certificate Subject.
