Profile Files Page
AdminStudio 2022 | 23.0 | Citrix Assistant
On the Profile Files page of the Citrix Assistant, you can perform the following tasks:
| • | View Files and Folders |
| • | Add Files and Folders |
| • | Delete Files and Folders |
| • | Set Isolation Options |
| • | Modifying the Display of Predefined Folders |
On the Profile Files page, you can view all of the files and folders that are currently in your Citrix profile.
Folders are listed in the Citrix Profile tree on the left, and all of the files in the selected folder are listed on the right.
| • | The directories in the tree represent how your application will look when it is installed on to your customer’s machine. |
| • | Blue folders are the supported MSI standard folders. |
| • | The folder with the check mark is INSTALLDIR, which represents the main product installation directory. |
On the Profile Files page, you can use the Add Files and Add Folders buttons to add new files and folders to include in the Citrix profile. See Adding, Deleting, and Moving Files and Folders in an App-V Package.
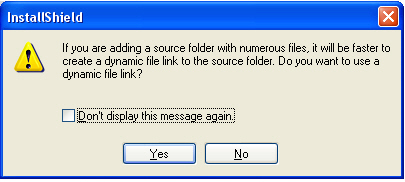
If you are editing an InstallShield project (not a Windows Installer package), and you are adding a folder to this profile, you are prompted to choose whether you want to create a dynamic file link to the source folder.

Dynamic File Link Option Dialog Box
Indicate whether you want to create a dynamic file link by selecting one of the following:
| • | No—For more flexibility with Citrix options, it is recommended that you select No to indicate that you do not want to use a dynamic file link, because you would then not be able to customize isolation options for any of the items in this folder. |
| • | Yes—If you wish to use the default isolation options for all the files and folders under this folder, then select the dynamic file link option by clicking Yes. The Dynamic File Link Settings dialog box would then open, prompting you to specify the source folder for your dynamic link, and to set options regarding which files and folders to include in the dynamic link. See Dynamic File Link Settings Dialog Box. |
You can delete files and folders from the Citrix profile by selecting the file or folder you want to delete, and selecting Delete from the context menu. For more information, see Deleting Files and Folders.
Caution:If you choose to delete a folder, you are also deleting all of the files and subfolders that the folder contains.
Note:You cannot delete predefined folders. You can only turn of the display of those folders. For more information, see Controlling the Display of Predefined Folders.
Tip:To select multiple files, use the Shift key (for contiguous files) or the Ctrl key (for non-contiguous files).
The Citrix XenApp uses isolation environments to control application compatibility and accessibility. The isolation option that is assigned to a file, folder or registry key specifies how the isolation environment will provide access to system resources requested by the application.
The default settings for isolation environments are set on the Citrix XenApp, and those defaults are adequate for most environments. However, in the Citrix Assistant, you can override the default settings for selected files, folders, or registry keys to exert control over application interactions with client operating system resources.
You set isolation options by selecting a file or folder and then selecting Isolation Options from the context menu. For an overview of the available isolation options, and for instructions on how to set them, see Setting Isolation Options.
Modifying the Display of Predefined Folders
You can specify which of the Windows Installer predefined folders are listed in the Citrix Profile tree. See Controlling the Display of Predefined Folders.
See Also
Adding, Deleting, and Moving Files and Folders in an App-V Package