Setting up Intune Connection for the Distribution System
To set up Microsoft Intune connection in the Distribution Systems, perform the following steps:
To set up the Intune connection:
|
1.
|
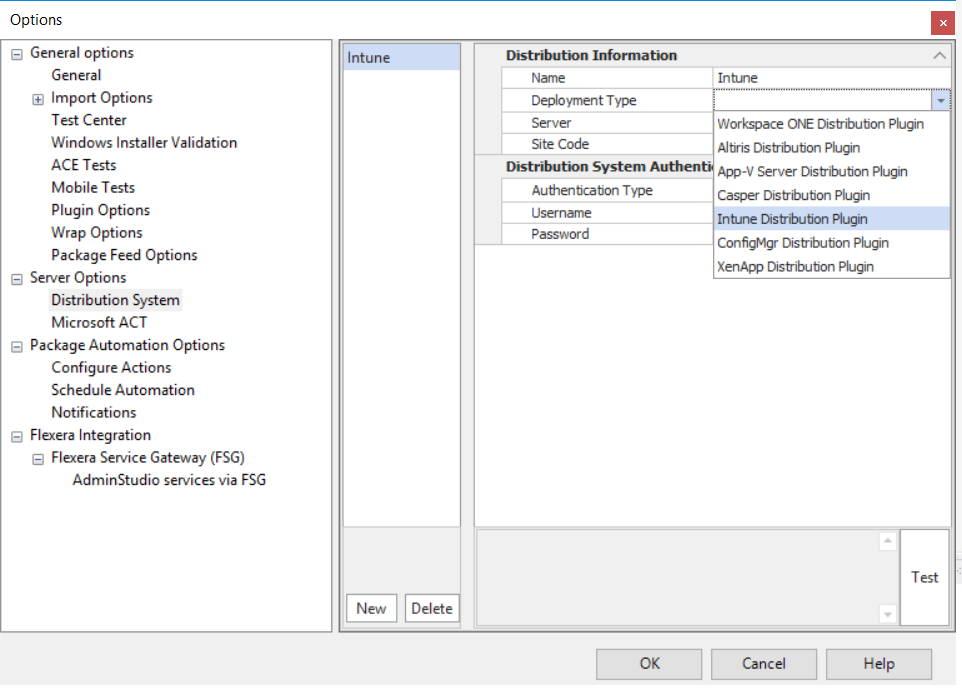
On the Application Catalog tab menu, select Options. The Options dialog box opens. |

|
2.
|
Under Servers Options, select Distribution System. The Distribution System tab opens and lists all defined connections. Click New, an empty connection setting field appears. |

|
3.
|
In the Name field, enter a name to identify this new named connection to a distribution system. |
|
4.
|
From the Deployment Type list, select Intune Distribution Plugin. |
|
5.
|
Under Distribution System Authentication, set the Azure Environment field to either Global or Government. |

|
6.
|
In the Authentication Type field set to either Client Secret or User Account. |
|
7.
|
If you select authentication as User Account, then enter Client Id and Tenant ID/Name in the respective text field. To know more details on configure Intune credentials, see Setting Up a Distribution Connection for Microsoft Intune. After entering the details, click Test to make sure that the authentications are correct. A Sign in window opens, enter the valid credentials and then click Sign in. |
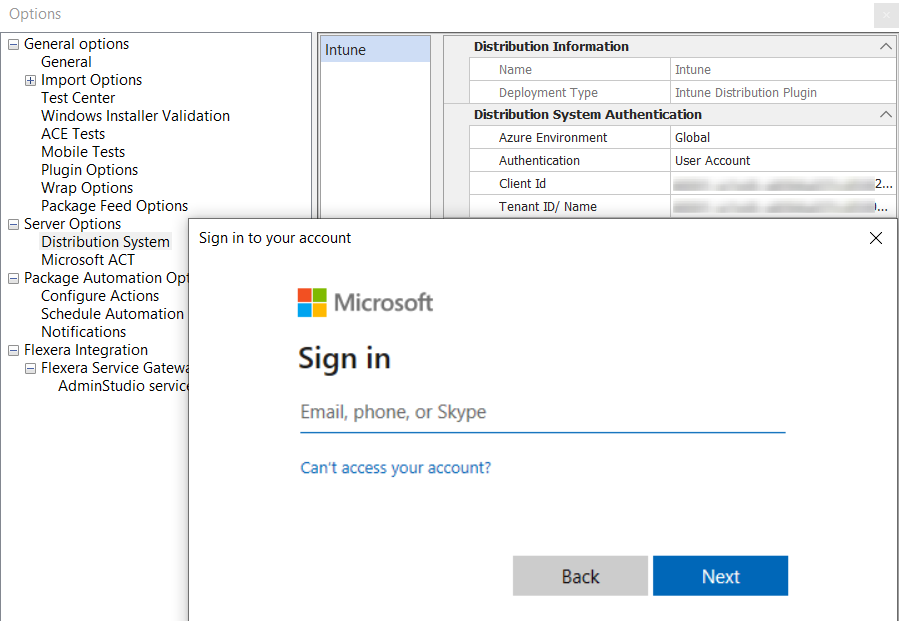
Note:Sign in window popup every 24 hours.
|
8.
|
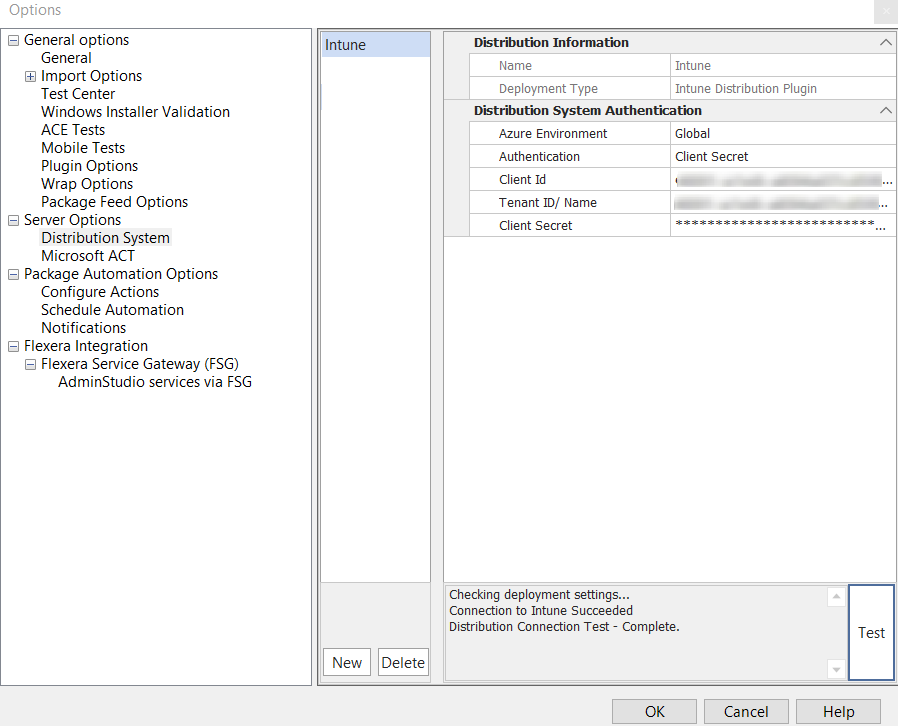
After successful testing of the distribution connection, click OK for the deployment of the connection. |
|
9.
|
If you select authentication as Client Secret, enter Client Id, Tenant ID/Name, and Client Secret in the respective text field. To know more details on configure Intune credentials, see Setting Up a Distribution Connection for Microsoft Intune. Click Test to make sure that the authentications are correct. |
|
10.
|
After successful testing of the distribution connection, click Ok for the deployment of the connection. |