Connecting to Box, Salesforce, and Office 365
App Portal 2020 R1
App Portal can be integrated with cloud applications so that App Portal can offer a catalog item that will either automatically create an account for the requester in that cloud application, or submit a request in an ITSM system to create an account for the requester in that cloud application.
App Portal provides out-of-the-box support for three cloud applications—Box, Salesforce, and Microsoft Office 365—and automatically creates these three catalog items.
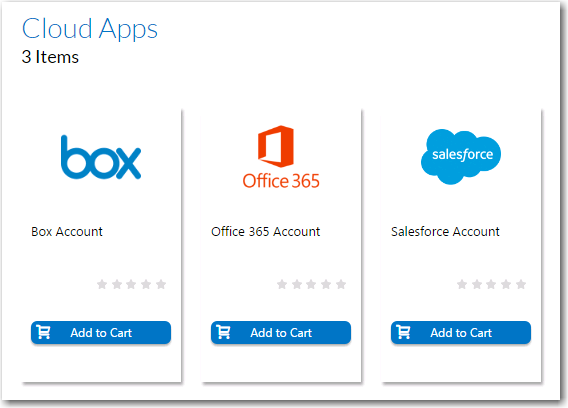
Out-of-the-Box Cloud Catalog Items
To enable this feature, you need to connect App Portal to these cloud applications by performing the following steps.
Important:Because some of the settings need to be stored locally, when you enter cloud application connection settings, you must be on the machine where App Portal is installed.
To connect App Portal to a cloud application:
| 1. | Log on to the vendor web site and create a custom cloud application for your organization. You will obtain the credentials and end points required to integrate App Portal with that cloud application. For information, see the following sites: |
|
Cloud Application Vendor |
Help Topic |
|
Box.com |
|
|
Salesforce |
|
|
Microsoft Office 365 |
| 2. | On the App Portal Admin tab, open the Site Management > Settings > Cloud Apps view. |
| 3. | Open the Box, Salesforce, or Office 365 tab. |
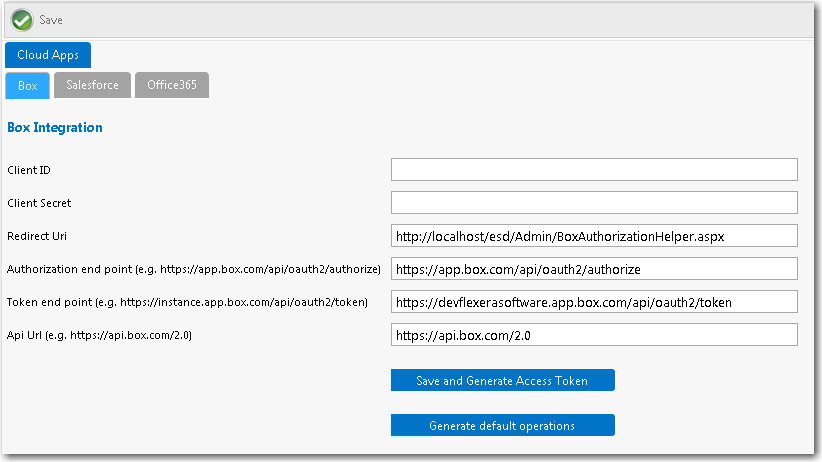
Note:All three of the tabs on the Cloud Apps view have the same fields and buttons.
| 4. | Enter the following credentials and end points, which were obtained when your corporate account with the cloud application vendor was created: |
|
Property |
Description |
|
Client ID |
Enter the client ID that was provided to you by the cloud application vendor. |
|
Client Secret |
Enter the client secret code that was provided to you by the cloud application vendor. |
|
Redirect URL |
Enter the redirect URL that was provided to you by the cloud application vendor. The redirect endpoint is the endpoint in the client application where the resource owner is redirected to, after having granted authorization at the authorization endpoint. Important:This URL must be on the local machine (the machine where App Portal is installed). |
|
Authorization end point |
Enter the endpoint on the authorization server where the resource owner logs in, and grants authorization to the client application. |
|
Token end point |
Enter the endpoint on the authorization server where the client application exchanges the authorization code, client ID and client secret, for an access token. |
|
API URL |
Enter the API URL for the cloud application vendor. |
| 5. | Click Save and Generate Access Token. A message box opens stating that the cloud application vendor credentials were saved successfully, and prompting you to perform additional tasks to generate a token. |
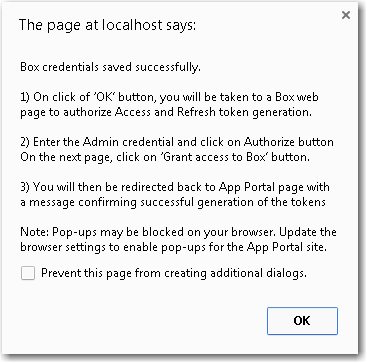
| 6. | Click OK on the dialog box. A web page opens where you will be prompted to grant access to the cloud application. |
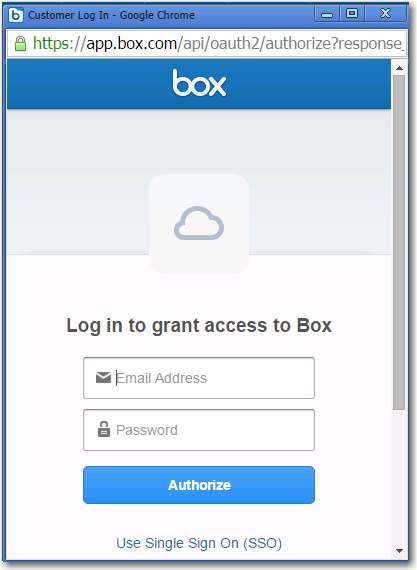
| 7. | Enter your user ID and password to the cloud application. You are then prompted to grant access to the cloud application. |
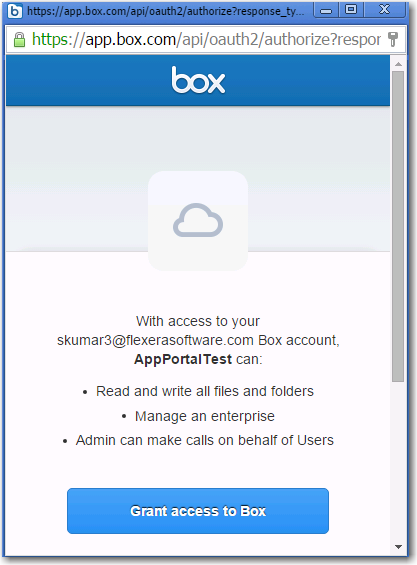
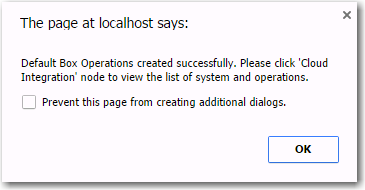
| 8. | Click the Grant access button. A message appears in App Portal confirming successful creation of the access token. |

The access token is saved in the App Portal database. Whenever an account is requested, App Portal will use this token to authenticate the user.
| 9. | Click the Generate default operations button. A message opens stating that the operations were created successfully. |
| 10. | Click OK. |
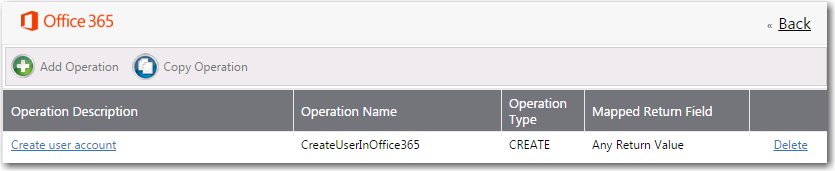
| 11. | Open the Site Management > Cloud Integration view, and then click on the name of the connected cloud application. A Create user account operation will be listed for each of the connected cloud applications. |
See Also
App Portal / App Broker 2020 R1 Administration GuideAugust 2020 |