Import New Computer Panel
App Portal 2020 R1
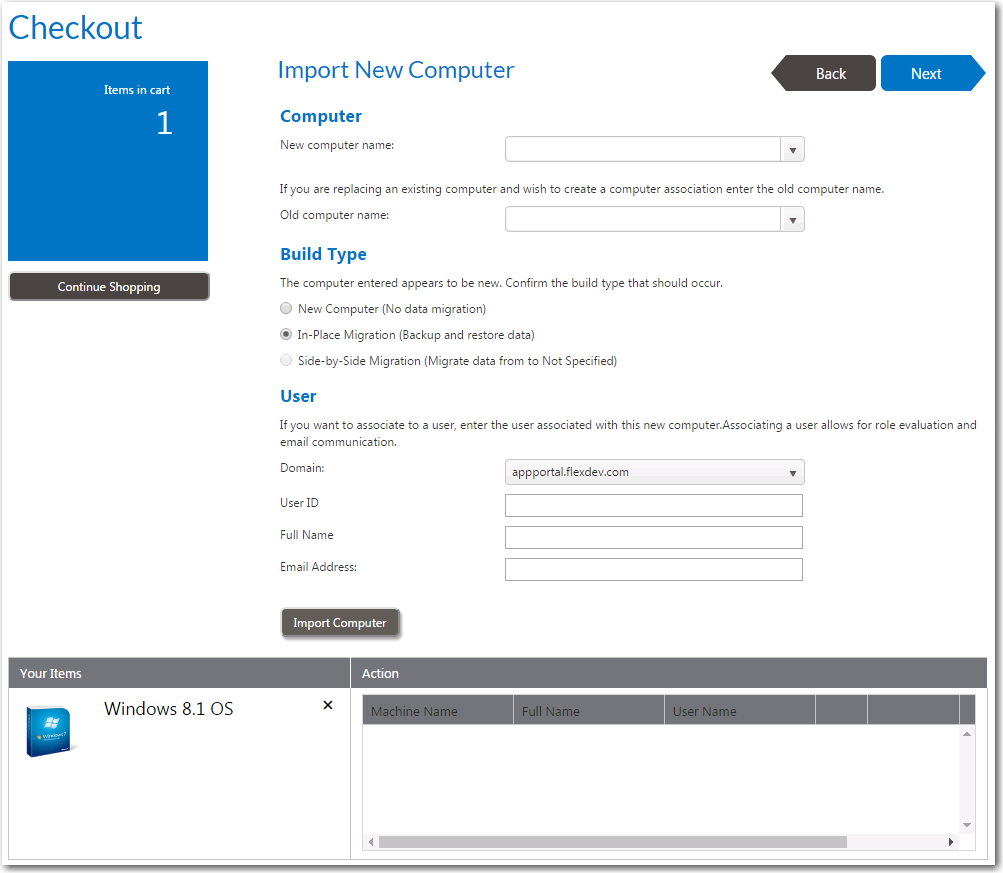
If you select Image a new computer or existing computer on the Choose Target panel when checking out a Task Sequence catalog item, the Import New Computer screen opens. On this panel, you are prompted to select the computer to import and the build type: new computer, in-place migration, or side-by-side migration.
Note:The Image a new computer or existing computer option is displayed on the Choose Target panel for Task Sequence catalog items if the Enable request on behalf? option is selected for that catalog item and if the requester has the Request on Behalf role.
Import New Computer Panel / Checkout Wizard
Use the following fields to specify the computer to image:
|
Property |
Description |
||||||||||||
|
New computer name |
Enter the name of the computer that you want to image, or select it from the list. |
||||||||||||
|
Old computer name |
If you are replacing an existing computer and wish to create a computer association between the existing computer and the new computer, enter the name of the existing computer or select it from the list. A computer association creates a relationship between a source and destination computer for the side-by-side migration of user state data. The source computer contains the user state data and settings that will be migrated to the specified destination computer. |
||||||||||||
|
Build Type |
Select one of the following options to confirm the build type that should occur:
Tip:If you want to perform an in-place migration, instead of selecting the Image a new computer or existing computer option on the Choose Target panel and then selecting the In-Place Migration option on this panel, you could have instead selected the Reimage my computer DEVICENAME with a new Operating System option on the Choose Target panel. |
||||||||||||
|
User |
If you want to associate the specified computer to a user, enter the user associated with this new computer. Associating a user allows for role evaluation and email communication. Enter the following information:
|
||||||||||||
|
Import Computer |
Click to import the specified computer. |
When you click Import Computer, the specified computer is listed in the Action column of the table, and displays the Machine Name along with the Full Name and User Name of the associated computer user (if it exists).
| • | Removing an item from the list—To remove a computer from the list, click the Remove button. |
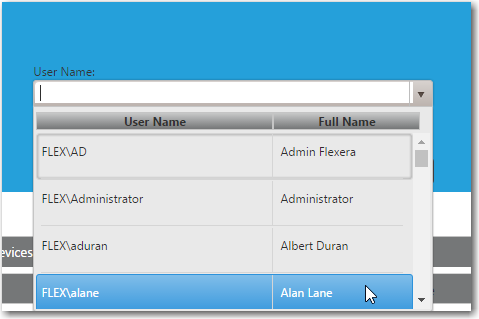
| • | Switching to a different user of the same device—If no user is assigned to the computer or if you want to select a different assigned user, click the user icon in the Action column. A user name selection dialog box opens. |
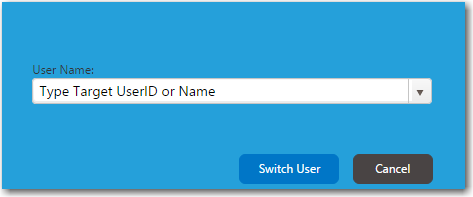
Select a different user from the list and then click Switch User.
See Also
Selecting a New Computer to Import for an OS Deployment
App Portal / App Broker 2020 R1 Administration GuideAugust 2020 |