Adding a New Cloud Application System
To add a new cloud application system, perform the following steps.
To edit an existing cloud application system:
| 1. | First, perform the steps in Adding Web Services for a New Cloud Application. |
| 2. | In App Portal, open the Site Management > Cloud Integration view. |
| 3. | Click Add System. The Configure Service view opens. |
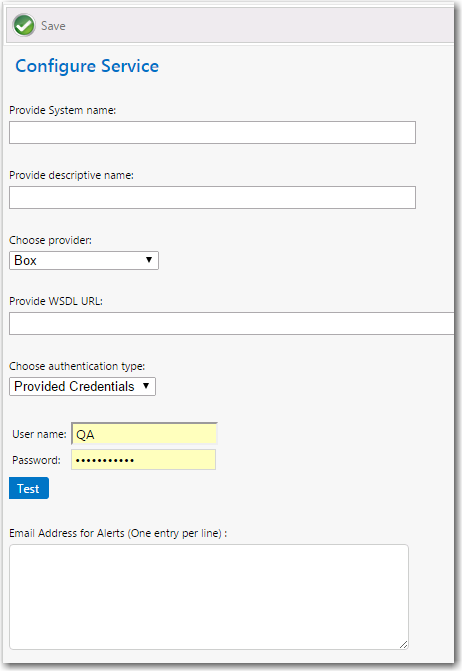
| 4. | Enter the following properties: |
|
Property |
Description |
|
Provide System name |
Enter a name that to identify this cloud application system. |
|
Provide descriptive name |
Enter a brief description of this cloud application system. This description is listed in the System Description column of the Cloud Integration view. |
|
Choose provider |
Select Others. |
|
Provide WSDL URL |
Enter the URL to .asmx file you created in Adding Web Services for a New Cloud Application, followed by ?wsdl: http://localhost/esd/WS/MyCloudAppIntegration.asmx?wsdl Important:Do not use any special characters in the URL field. The only special character that is permitted is _ (underscore). Dashes (-) and other special characters are not permitted. |
|
Choose authentication type |
Select either Provided Credentials or Integrated to indicate the authentication type. If you chose Provided Credentials, you also need to enter a User name and Password. |
|
Test |
Click to test the service settings |
|
Email Address for Alerts |
Enter email addresses, one entry per line, to be notified when alerts are generated in relation to this service. |
| 5. | Click Save to save your edits. |