Specifying the Target of the Request
App Portal 2016
If necessary, you may need to specify the target of the request, which means specifying who this item is being requested for.
Defining the Target
Defining the target means specifying who this item is being requested for.
To define the target:
|
1.
|
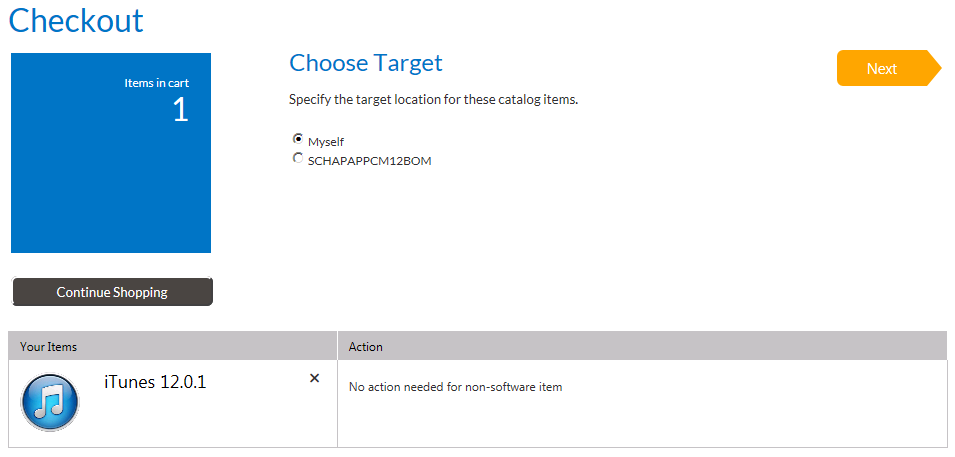
Perform the steps in Checking Out. The Choose Target panel of the checkout process opens. |
|
2.
|
It the top of the panel, select one of the following options. |
|
•
|
Me on machine MACHINENAME or MACHINENAME—These options are always available and are used when the requester is requesting the item for themselves on their current computer or another device assigned to them. |
|
•
|
People who report to me—This option is available when the requester has users who report to them according to the Manager attribute in the Active Directory user profile. The Enable request for Manager option must also be selected on the request itself. |
|
•
|
Search for people or computers—This option is available when the requester has the Request on Behalf role assigned to him in the Site Management > Catalog Security view. The Enable request on behalf? option must also be selected on the request itself on the General > Global tab of the Catalog Item Properties dialog box. |
|
•
|
Add machine names or user IDs manually—This option is available when the requester has the Request on Behalf role assigned to him in the Site Management > Catalog Security view. The Enable request on behalf? option must also be selected on the request itself on the General > Global tab of the Catalog Item Properties dialog box. |
Note • The options for the target that are listed in the Choose Target area depend on the options defined on the request itself and the permissions of the requesting user.
|
3.
|
Click Next and proceed with checkout. |
Searching for Targets
When any option other than Me on Machine MACHINENAME or MACHINENAME is selected in the Choose Target area of the first panel of the checkout process, the next step in the checkout process will be to search and specify the targets of the request.
The Search tab is divided into two grids.
|
•
|
The top grid is used to search and locate targets. |
|
•
|
The bottom grid contains the selected targets. |
To search for targets during the checkout process, perform the following steps.
To search for targets during the checkout process:
|
1.
|
Perform the steps in Defining the Target. The Choose Target panel of the checkout process opens. |
|
2.
|
Search for targets using the Filter By fields: User Name, Full Name or Machine Name. |
|
3.
|
Once the record is located, select the checkbox and select the Add Selected Records button at the bottom of the top grid. |
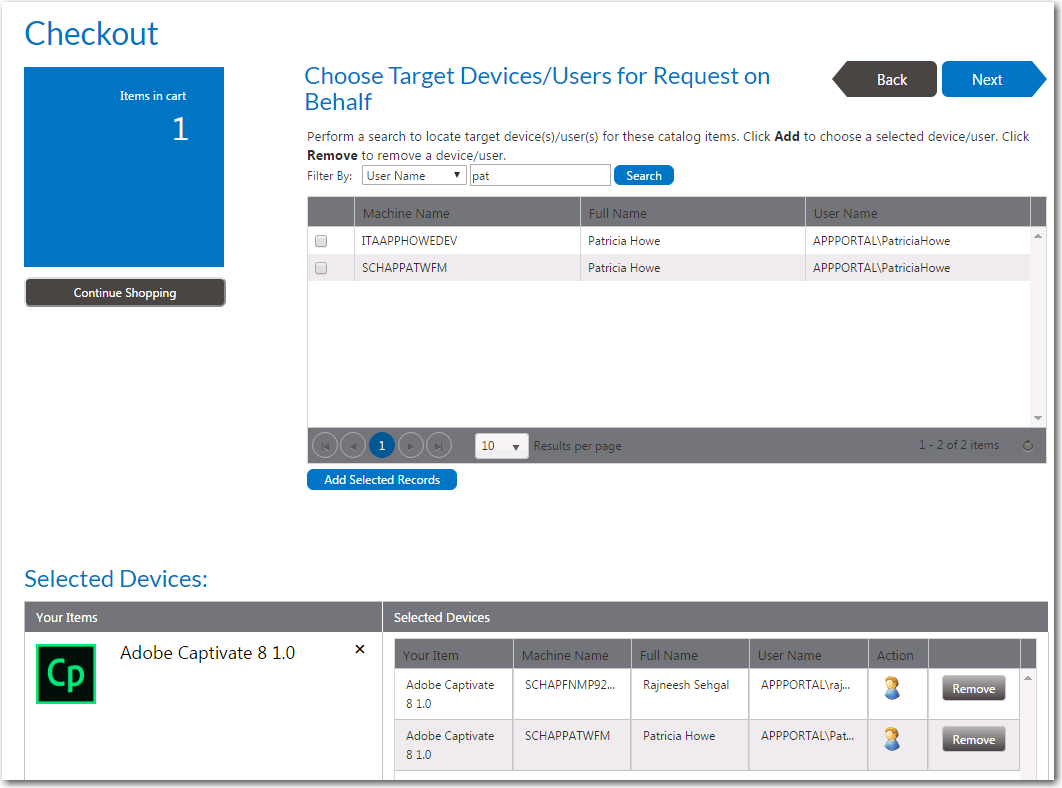
Note • When each item is selected, it goes through several checks to validate the selection against the items being requested. If there is a problem with adding one of the selections, a warning icon is displayed. Hover over the icon to display the message. Not all warnings prevent the computer from being added.
|
4.
|
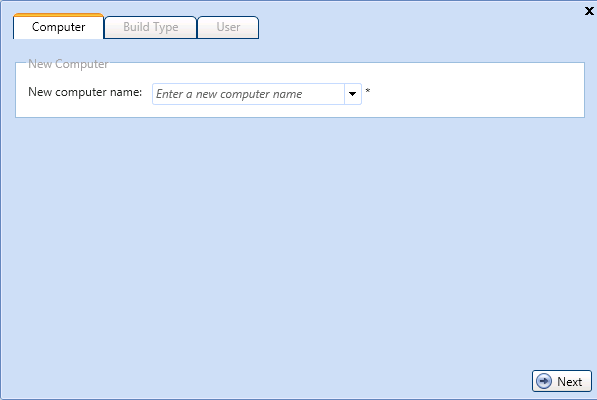
The Import New Computer button is available when the requester is assigned the New Computer Deployment role in the Site Management > Catalog Security view. This allows the requester to specify a new computer that does not yet exist in your deployment system. |
If available, click Import New Computer. The Computer tab of the computer import dialog box opens:
|
5.
|
Enter or select a computer from the New computer name list. Additional fields are displayed. |
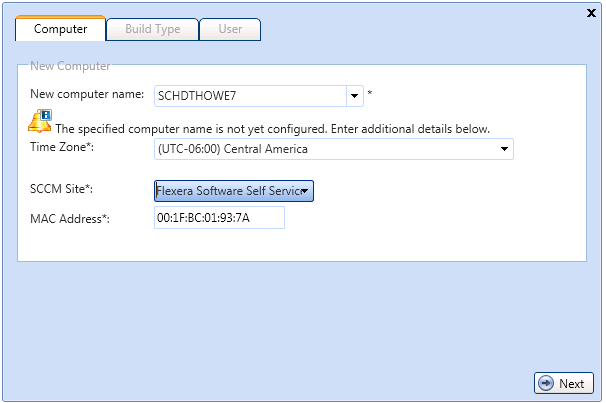
Entering in a computer name will cause a discovery process to happen. The computer will be checked if it is online using a ping command. If the computer is online, a remote connection is attempted to auto populate the requested information.
|
6.
|
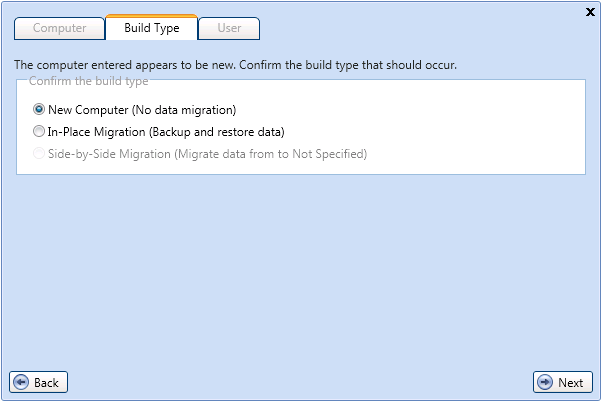
Click Next. The Build Type tab of the computer import dialog box opens. |
|
7.
|
Select one of the following options: |
|
•
|
New Computer—No data migration will be performed. |
|
•
|
In-Place Migration—Backup and restore data. |
|
8.
|
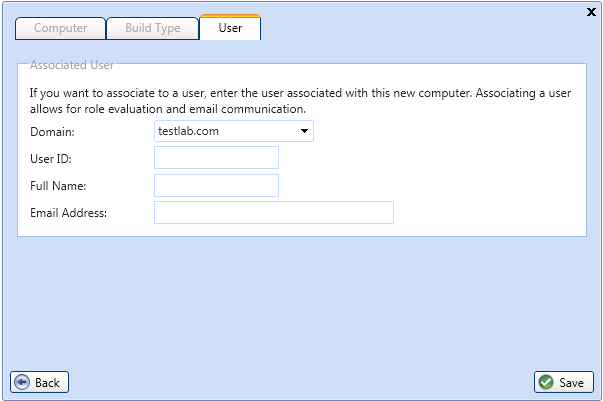
Click Next. The User tab opens. |
|
9.
|
If you want to associate a user, enter the user associated with this new computer. Associating a user allows for role evaluation and email communication. |
|
10.
|
Click Save. The item you added is now listed in the bottom grid. |
Note • Once the targets are selected, you have the option of changing the target user associated with the computer. To change the target user, select the user icon in the Action column and search for the correct user.
|
11.
|
Click Next and proceed with checkout. |
Open topic with navigation