App Portal 2018 R1
In a bare-metal installation scenario, your OS corporate image is deployed for the first time to a new computer. Since this machine is new to your organization, no user data or applications need to be captured or migrated.
To deploy an OS on a new computer, perform the following steps.
To deploy an OS on a new computer:
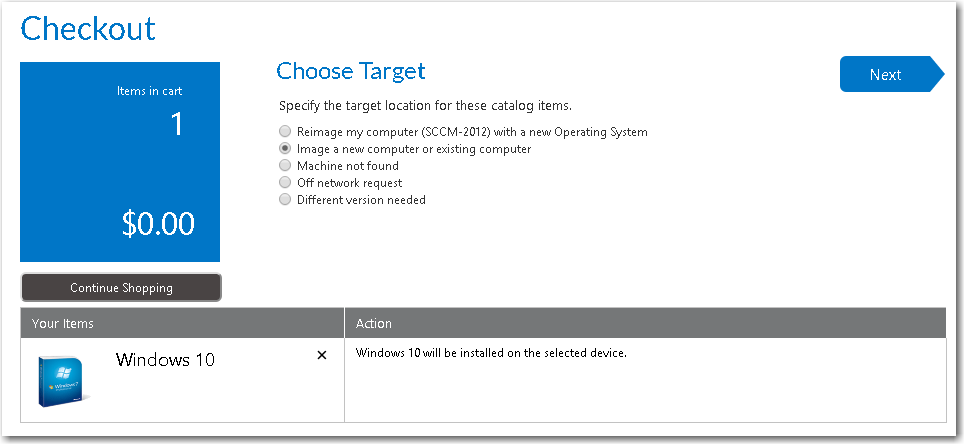
| 1. | On the Browse Catalog tab, locate an OS deployment task sequence catalog item for the operating system you desire, and click Add to add it to your cart. The Choose Target panel of the Checkout Wizard opens. |
| 2. | Select Image a new computer or existing computer and click Next. The Import New Computer panel opens. |
Note • If a questionnaire template was associated with this catalog item, the Respond to Questionnaire Panel would be displayed prior to the Import New Computer panel.
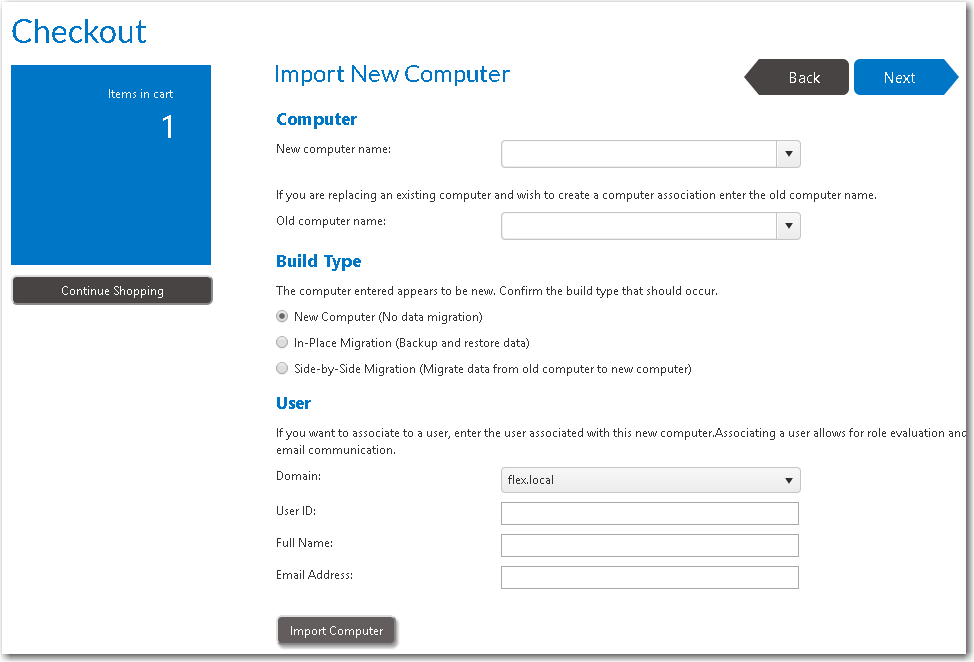
| 3. | From the New computer name list, specify a name for the new computer. Because it is a new computer, additional fields are displayed to enable you to identify it in System Center Configuration Manager: |
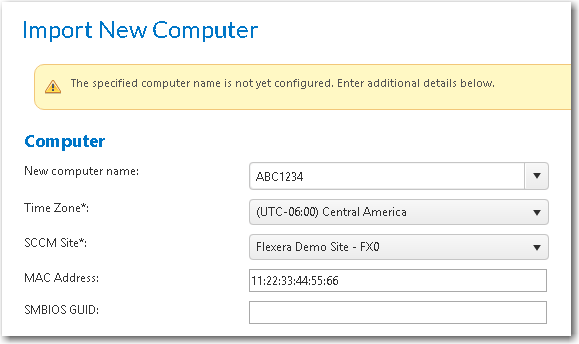
| 4. | Enter the following information to configure the new computer with System Center Configuration Manager: |
|
Field |
Description |
|
Time Zone |
Select the time zone for the System Center Configuration Manager site. |
|
SCCM Site |
Select the System Center Configuration Manager site where you want to create a new computer object. |
|
MAC Address SMBIOS GUID |
Enter either the MAC address or the SMBIOS GUID the computer you are importing. Note • You are only required to enter one of these values. |
| 5. | Under Build Type, select New Computer (No data migration). |
| 6. | Under User, enter the Domain, User ID, Full Name and Email Address of the user that will be assigned to this new computer. |
| 7. | Click Import Computer, and then verify that the old machine, new machine, and user information have been added to the table at the bottom of the page. |
| 8. | At the top of the page, click Next. If roles were associated with this catalog item, the Choose Roles panel opens. |

Whether or not the requester is permitted to select roles on this panel depends upon whether the Allow user role selection option is selected on the Deployment > Roles subtab of this catalog item’s Catalog Item Properties dialog box:
| • | Selected—The requester is able to select roles that will determine which applications will be installed on the target computer. |
| • | Not selected—The roles will be listed on this panel, but they will automatically be selected and the requester will be unable to clear the selection. |
| 9. | Click Next. If the Prompt requester to select additional applications to install option is selected on the Site Management > Settings > Deployment > OS Deployment tab, the Choose Additional Applications to Install During OS Deployment panel opens. |
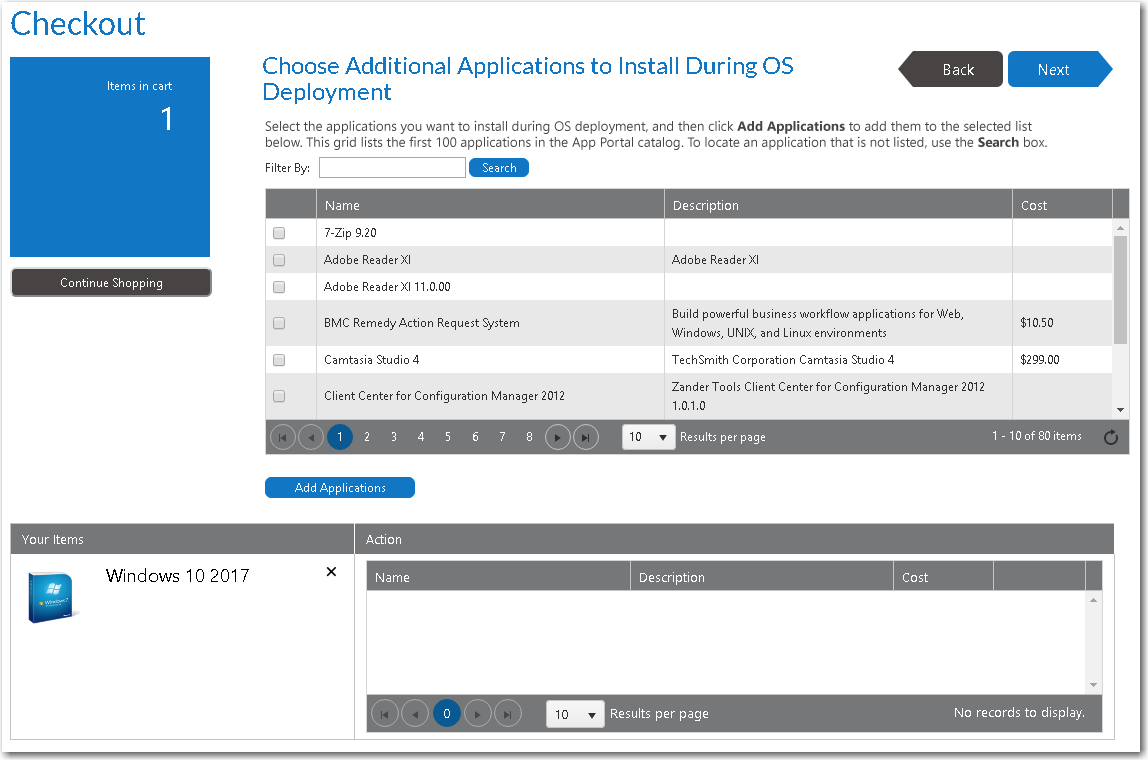
| 10. | Select any additional applications that you want to install during OS deployment, and then click Add Applications to add them to the selection list. |

| 11. | Click Next. If the Enable user defined scheduling? option is selected on the General > Global tab of the Catalog Item Properties dialog box for this catalog item, the Choose Scheduling Options panel is displayed during checkout, which prompts the requester to choose when the request should be fulfilled. |
| 12. | Specify scheduling options, as described in Choose Scheduling Options Panel and click Next. The Submit Request panel opens. |
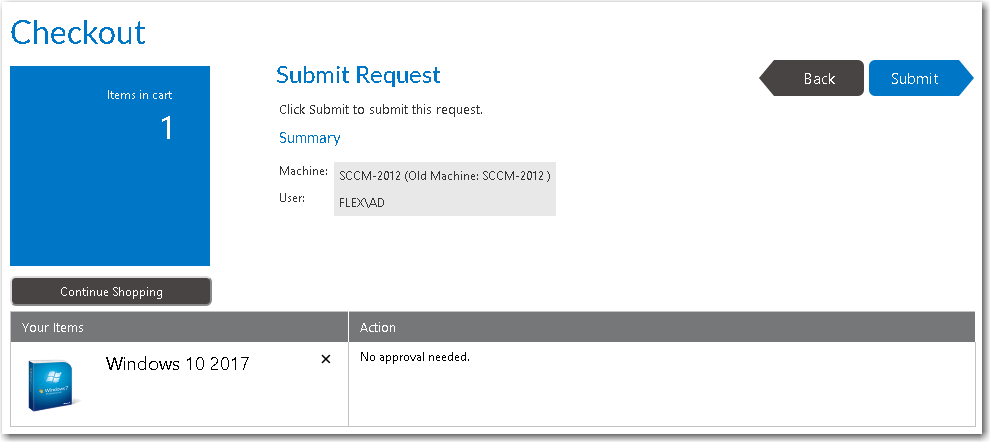
| 13. | Click Submit to submit the request. |
App Portal / App Broker 2018 R1 Administration GuideOctober 2018 |
Copyright Information | Flexera |