VMWare Workspace ONE
To create a new named connection to the VMWare Workspace ONE distribution system, perform the following steps:
To create a new named connection to the VMWare Workspace ONE distribution system:
| 1. | On Settings menu, click Distribution Systems in the left pane. |
The Distribution Systems pane appears.
| 2. | Click Add New. |
| 3. | Use the following fields to add the VMWare Workspace ONE connection: |
|
Field |
Description |
||||||
|
Distribution System Type |
Click the Distribution System Type drop down and select VMWare Workspace ONE from the list. |
||||||
|
Connection Name |
Enter connection name. |
||||||
|
Server |
Enter the server details. |
||||||
|
Authentication Type |
Select one of the authentication types:
For more information, see Basic or Certificate Authentication Type. |
||||||
|
Thumbprint |
Choose required certification for the authentication. Note:This field appears only when you select Authentication Type as Certificate. |
||||||
|
Tenant ID/API Key |
Enter the registered tenant id. For more information, see Create Tenant ID / API Key. |
||||||
|
Organization Group ID |
Choose the required organization group id. |
||||||
|
Assignment Groups |
Choose a group or multiple groups and make assignments for end point deployments. For more details, see VMWare Workspace ONE Assignment Groups. |
| 4. | Click the Test & Save Connection button to ensure the settings you entered can be used to successfully connect to this service. You will receive a successful message in the Output Window. |
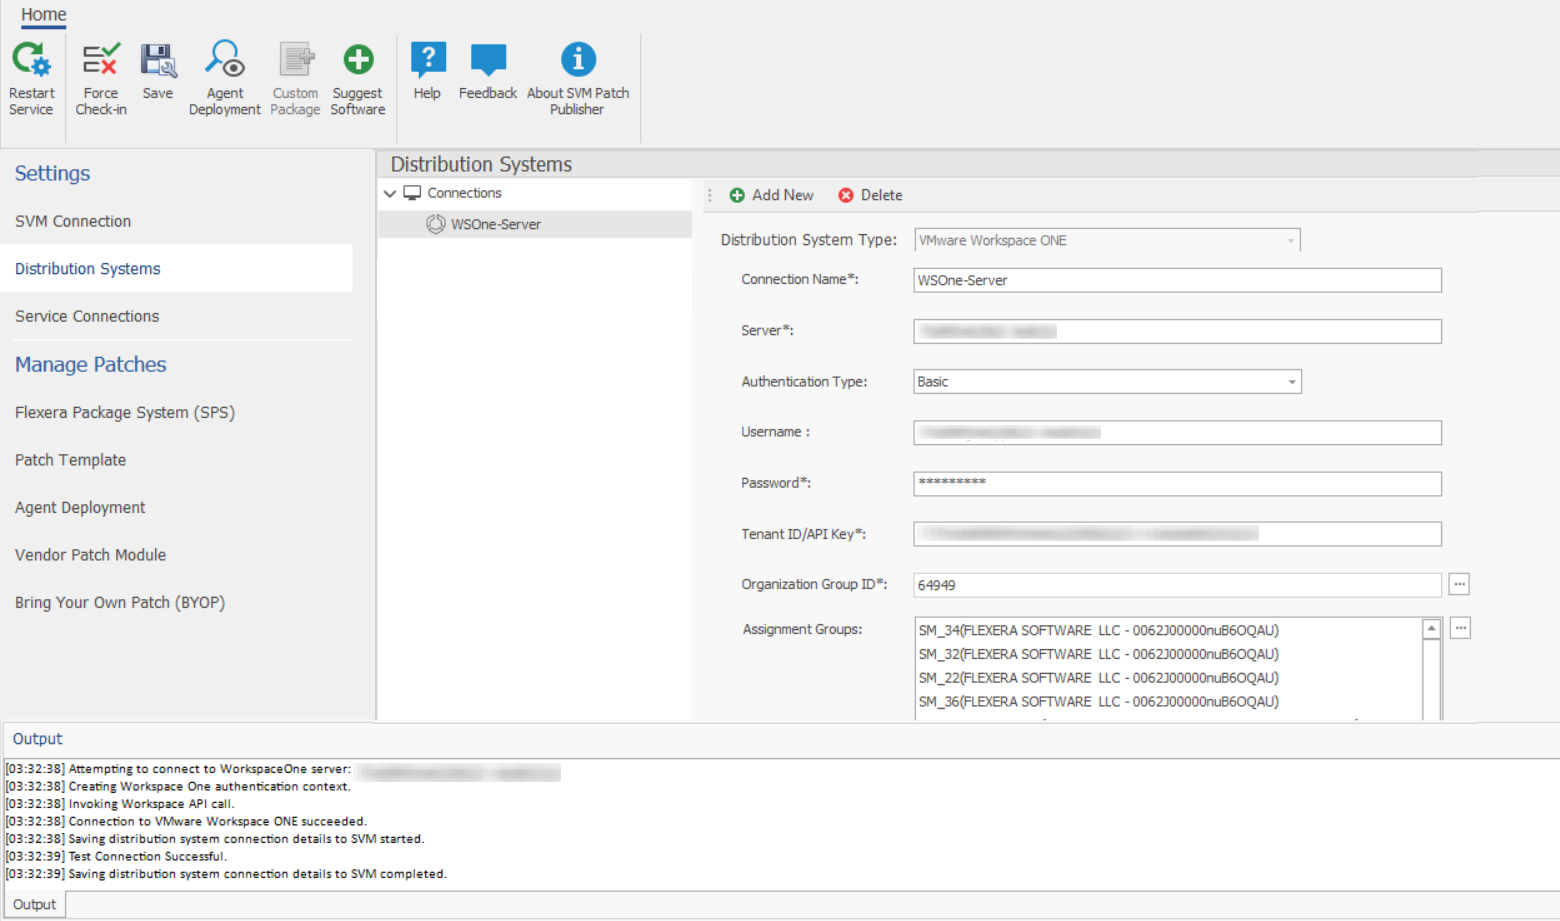
| 5. | On successful connection, the VMWare Workspace ONE Distribution System is added to the connection. |
| 6. | Click Restart Service ribbon for the change to take effect. |
To following topics related to Microsoft Intune:
| • | Workspace ONE Publishing |