Creating the WSUS-CSI GPO Manually
To create the WSUS-CSI GPO manually:
| 1. | Export the WSUS Self-Signed Certificate. |
| 2. | On the Domain Controller, click Start > Administrative Tools > Group Policy Management. Right-click your Domain name and select Create a GPO in this domain and Link it here. Alternatively, you can edit an existing GPO. |

| 3. | Right-click the GPO that you created/edited in the previous steps and select Edit. |
| 4. | Navigate to Computer Configuration > Policies > Windows Settings > Security Settings > Public Key Policies. |
.png)
| 5. | Right-click Trusted Root Certification Authority and select Import. Import the certificate that you exported in Step 1. |

| 6. | Repeat Step 4 and import the certificate for Trusted Publishers. |

| 7. | Navigate to Computer Configuration > Administrative templates > Windows Component > Windows Update. |
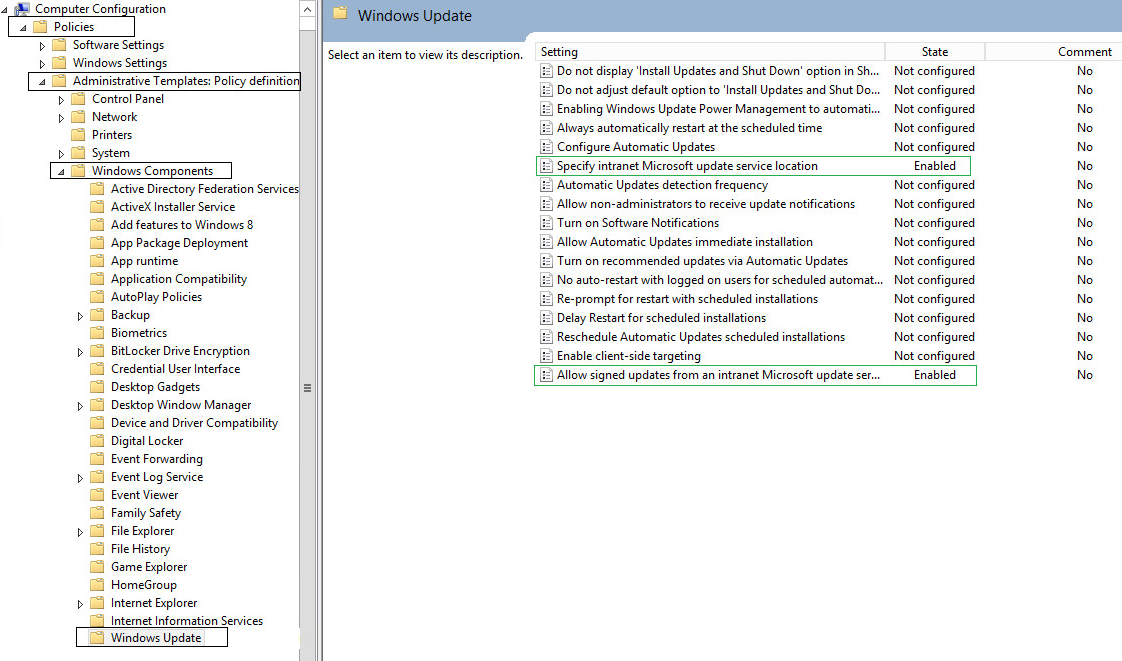
| 8. | On the right-side menu, double-click Allow signed updates from an intranet Microsoft update service location. Select Enabled and click OK. |

| 9. | On the right-side menu, double-click Specify intranet Microsoft update service location. Enable this setting and modify the existing empty fields with the intranet address of your WSUS Server. This step is only valid for WSUS integration and is not required for System Center Configuration Manager integration. |
 - not done for SCCM.png)
| 10. | Link the created GPO to an Active Directory container appropriate for your environment. |

The clients affected by the created GPO will install the certificate being distributed (either the WSUS Self-Signed Certificate or your own CA certificate) and acknowledge the Windows Update settings that you have specified in the GPO.
By default, Group Policy refreshes in the background every 90 minutes, with a random offset of 0 to 30 minutes. If you want to refresh Group Policy sooner, you can go to a command prompt on the client computer and type:
gpupdate /force
Refer to http://technet.microsoft.com/en-us/library/cc720539 for further information on how to configure Automatic Updates by Using Group Policy.