Adding Windows Server Update Services (WSUS) Connection
To add Windows Server Update Services (WSUS) connection, perform the following steps.
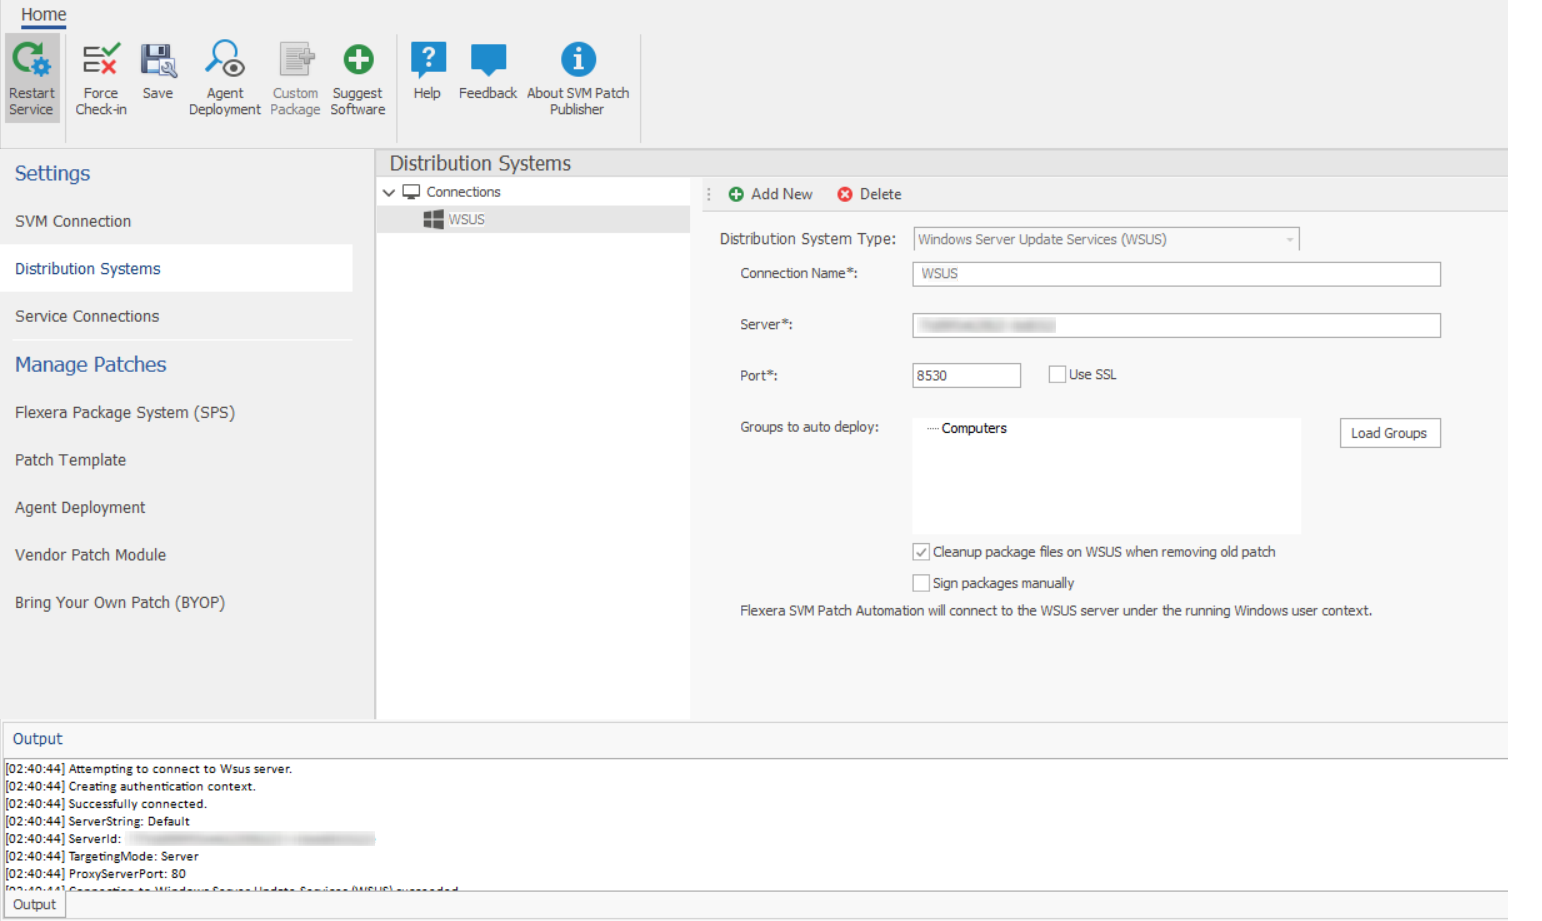
To add WSUS connection:
| 1. | On Settings menu, click Distribution Systems in the left pane. |
The Distribution Systems pane appears.
| 2. | Click Add New. |
| 3. | Use the following fields to add the Windows Server Update Services (WSUS) connection: |
|
Field/Button |
Description |
|
Distribution System Type |
Select distribution system type as Windows Server Update Services (WSUS). |
|
Connection Name |
Enter the connection name. |
|
Server |
Enter the server details. |
|
Port |
Enter the port number. |
|
Use SSL |
Only select the Use SSL Connection check box if your WSUS is configured to accept SSL connections. |
|
Load Groups |
Click load group. |
|
Groups to auto deploy |
Displays a list of computer groups configured in WSUS Server. Select the computer groups which you wanted to deploy the packages. Note:Only displayed when Load Groups button is clicked. |
|
Cleanup packages files on WSUS when removing old patch |
If you enable, old package will be removed during the publish. By default this option will be unchecked. |
|
Sign packages manually |
Select Sign package manually check box to external package signing. |
| 4. | Click the Test & Save Connection button to ensure the settings you entered can be used to successfully connect to this service. You will receive a successful message in the Output window. |
| 5. | On successful connection, the WSUS Distribution System is added to the connections. |
| 6. | Restart the SVM Patch Publisher so that the selected groups will be assigned for the end point deployments. |