Adding a Data Mashup Using a Database Connection
Data Platform
Adding a data mashup:
|
1.
|
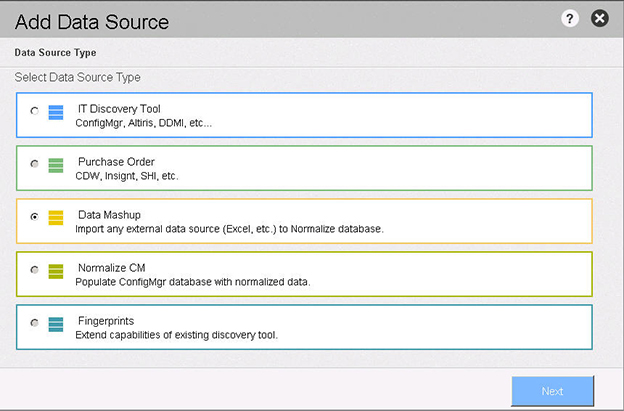
Click Add Data Source, located on the Normalize panel of the Administration Console. The Select Data Source Type screen opens. |
Add Data Source Type
|
2.
|
Click the Data Mashup radio button. |
|
3.
|
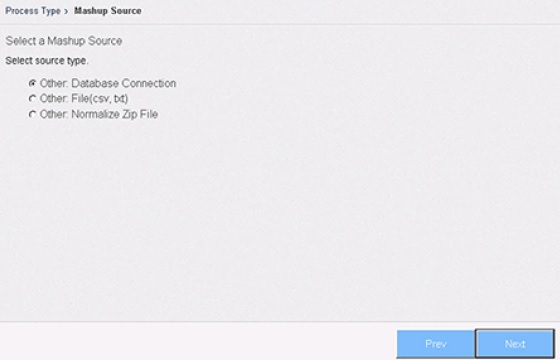
Click Next. The Mashup Source screen opens. |
|
4.
|
Click the Other: Database Connection radio button. |
Mashup Source
|
5.
|
Click Next. The Select Data Source dialog opens. |
|
6.
|
Click the database connection radio button that is applicable to your situation. Options are determined by the IT Discovery Tool process and type of database used by Normalize. |
|
7.
|
Select a configuration file (or use a customized configuration file), for the discovery tool you are adding. |
|
8.
|
Enter configuration values for the discovery tool’s data source and location. |
Note:The specific fields that display on the screen will vary, depending on the database connection previously selected.
|
9.
|
Click Finish to add the data source to the process. |
IT Discovery Tool Data Source—MSSQL

When MSSQL is selected as the data source, the Create Process dialog box includes the following properties:
|
•
|
Server Name—Enter the name of the database server. |
|
•
|
Database—Enter the name of the database. |
|
•
|
Use Windows Authentication—Click the checkbox to enable Windows authentication. |
|
•
|
User Name—Enter the authentication domain/username that enables access to the database. |
|
•
|
Password—Enter the password that enables access to the database. |
IT Discovery Tool Data Source—Oracle

When Oracle is selected as the data source, the Create Process dialog box includes the following properties:
|
•
|
Server Name—Enter the name of the database server. |
|
•
|
Port—Enter the port used to connect to the database. |
|
•
|
SID—Click this radio button to enable use of the System Identifier (SID) that identifies the database instance, and then enter system identifier (database name + instance number; e.g. database3). |
|
•
|
Service Name—Click this radio button to enable use of a ‘connector’ to one or more instances of the database, and then enter the Service Name (e.g., sales.us.example.com). |
|
•
|
User Name—Enter the username that enables access to the database. |
|
•
|
Password—Enter the password that enables access to the database. |
IT Discovery Tool Data Source—DB2
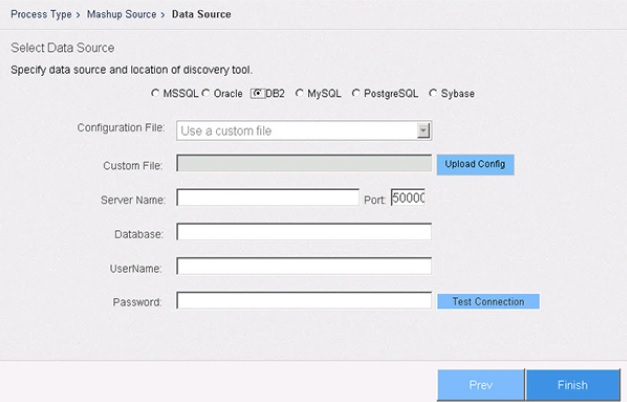
When DB2 is selected as the data source, the Create Process dialog box includes the following properties:
|
•
|
Server Name—Enter the name of the database server. |
|
•
|
Port—Enter the port used to connect to the database. |
|
•
|
Database—Enter the name of the database. |
|
•
|
User Name—Enter the username that enables access to the database. |
|
•
|
Password—Enter the password that enables access to the database. |
IT Discovery Tool Data Source—MySQL
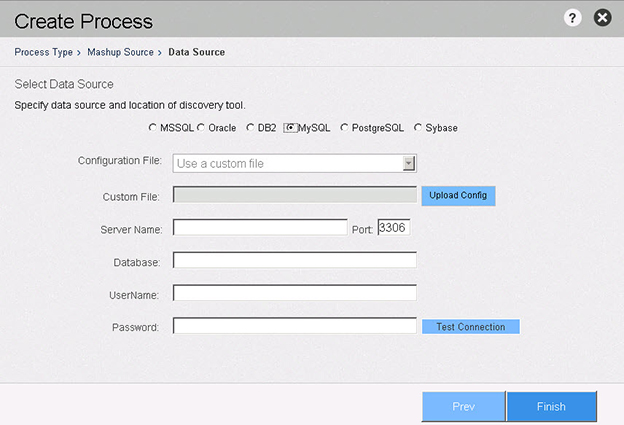
When MSSQL is selected as the data source, the Create Process dialog box includes the following properties:
|
•
|
Server Name—Enter the name of the database server. |
|
•
|
Database—Enter the name of the database. |
|
•
|
User Name—Enter the username that enables access to the database. |
|
•
|
Password—Enter the password that enables access to the database. |
IT Discovery Tool Data Source—PostgreSQL
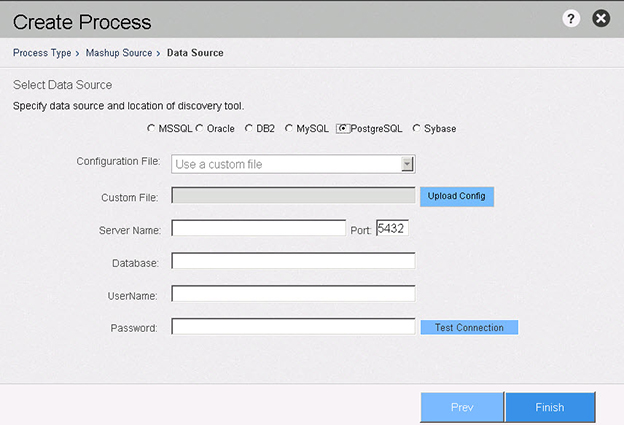
When PostgreSQL is selected as the data source, the Create Process dialog box includes the following properties:
|
•
|
Custom File—Click Upload Config and select the custom file to be used for this process. (This option may be greyed-out and not available, depending on the database settings.) |
|
•
|
Server Name—Enter the name of the database server. |
|
•
|
Port—Enter the port used to connect to the database. |
|
•
|
Database—Enter the name of the database. |
|
•
|
User Name—Enter the username that enables access to the database. |
|
•
|
Password—Enter the password that enables access to the database. |
IT Discovery Tool Data Source—Sybase

When Sybase is selected as the data source, the Create Process dialog box includes the following properties:
|
•
|
Server Name—Enter the name of the database server. |
|
•
|
Port—Enter the port used to connect to the database. |
|
•
|
Database—Enter the name of the database. |
|
•
|
User Name—Enter the username that enables access to the database. |
|
•
|
Password—Enter the password that enables access to the database. |