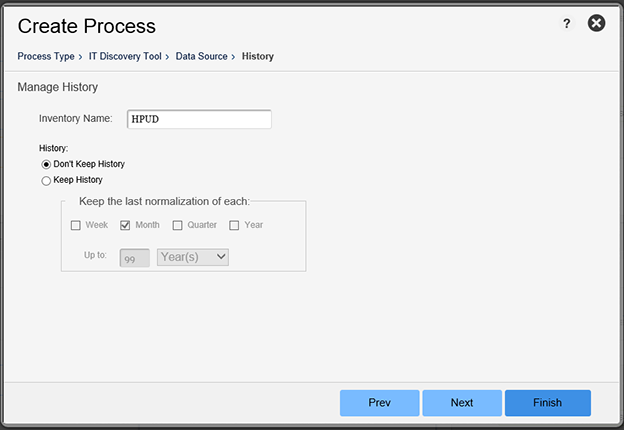
Setting History Mode for IT Discovery Tool Process
Data Platform
When you are creating a process, use this screen to accept or modify the default inventory name, and set a history mode and schedule.
|
•
|
Inventory Name—Accept the pre-populated name or enter a new inventory name. |
|
•
|
History Mode—Click the radio button next to the setting you want to activate. |
|
•
|
Don’t Keep History—Always overwrite the most recent Normalization |
|
•
|
Keep History—Activate history for Analyze and/or Normalize |
|
•
|
In Analyze—Activate Analyze history |
|
•
|
In Normalize—Activate Normalization history |
|
•
|
Keep the last normalization of each—Place a check next to the schedule you want to activate. |
|
•
|
Store the last Normalization of each Week |
|
•
|
Store the last Normalization of each Month |
|
•
|
Store the last Normalization of each Quarter |
|
•
|
Store the last Normalization of each Year |
|
•
|
Up to: 1-99 Weeks, Months, Quarters, or Years |
Caution:Selecting “Keep History” saves all inventory data to Analyze and/or Normalize. Depending on the number of assets, saved inventories can grow very large and severely impact Data Platform application performance, especially reporting and analysis. Data Platform advises caution when setting “Keep History” values, and recommends monitoring saved inventory sizes frequently.
Note:Click Next to proceed to the Metering settings screen
Setting History Model

