Using ServiceNow as a Data Source
Data Platform
Configure ServiceNow as a data source:
|
1.
|
Click Create Process, located in the upper-right section of the Administration Console. |
|
2.
|
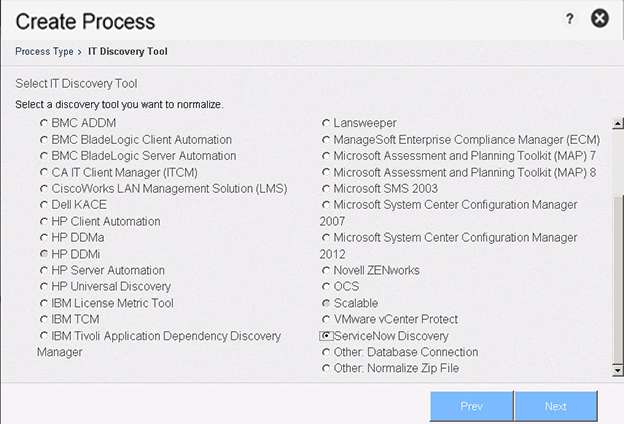
Click the IT Discovery Tool radio button. |
|
4.
|
Select ServiceNow. The discovery tools are listed in alphabetical order and may require scrolling the window to see the entire list. |
IT Discovery Tool—ServiceNow
|
5.
|
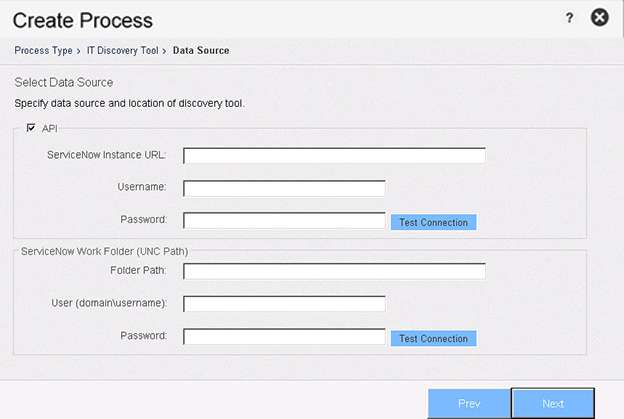
Click Next. The Select Data Source screen opens. |
IT Discovery Tool Data Source—ServiceNow
|
6.
|
Place a check in the API checkbox. |
Note:If you want to manually trigger a normalization from ServiceNow, you can disable the API calls from the Normalize server by un-checking the API checkbox.
|
7.
|
Provide the ServiceNow Instance URL. |
|
8.
|
Provide the Username and Password for your ServiceNow Instance. |
|
9.
|
Provide the ServiceNow work folder location in UNC format (for example, \\server-name\shared-resource-pathname) |
Note:This folder is configured in the ServiceNow update set settings. ServiceNow will extract the data from the CMDB and copy the data locally on that folder (mid-server).
|
10.
|
Provide the Username and Password for access to the ServiceNow work folder. |
|
11.
|
Click Test Connection to verify the connection. |
|
12.
|
Complete one of the following options: |
|
•
|
To configure the Process Settings later: Click Finish to add the process to the Data Platform Normalize Console. |