Using the Configuration Wizard
After the initial installation is finished, the Configuration Wizard launches automatically. You can also launch the wizard at a later time by locating and running the Configuration Wizard.exe file.
To configure Data Platform User Console using the Configuration Wizard:
| 1. | Always launch the Configuration Wizard as an administrator. To launch the Configuration Wizard as an administrator, right-click the Configuration Wizard EXE file and select Run as administrator from the context menu. |
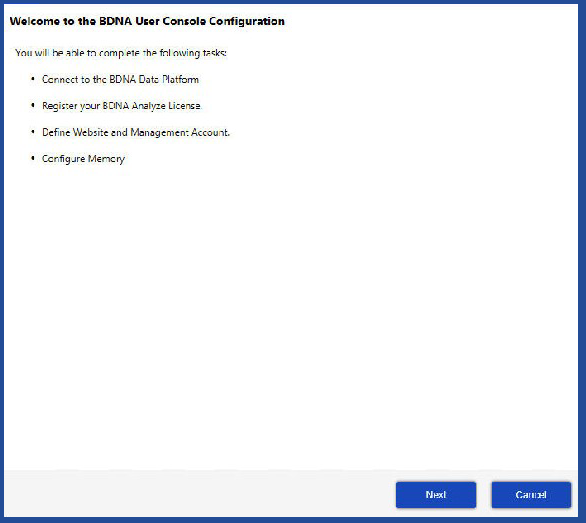
The Welcome screen opens, showing the tasks that you will complete during the configuration process.
| 2. | Click Next. The Connect to Data Platform screen opens. |
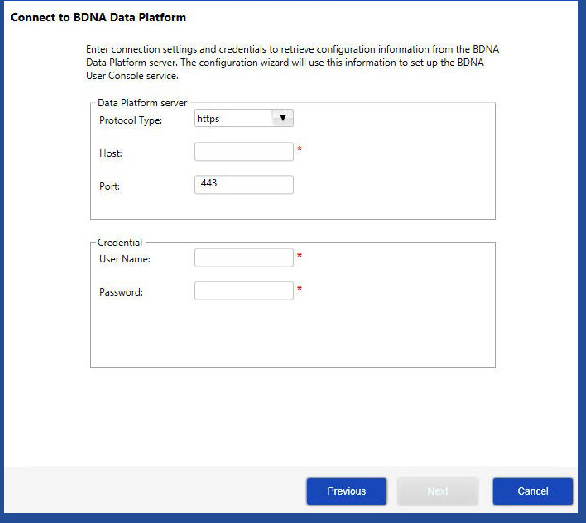
The information you provide in this screen enables the connection between the Data Platform server and the User Console server.
| 3. | Enter connection settings and credentials to retrieve Data Platform configuration information and click Next. The User Console Configuration Wizard uses the information to set up the Data Platform User Console service. |
The Register License screen opens.
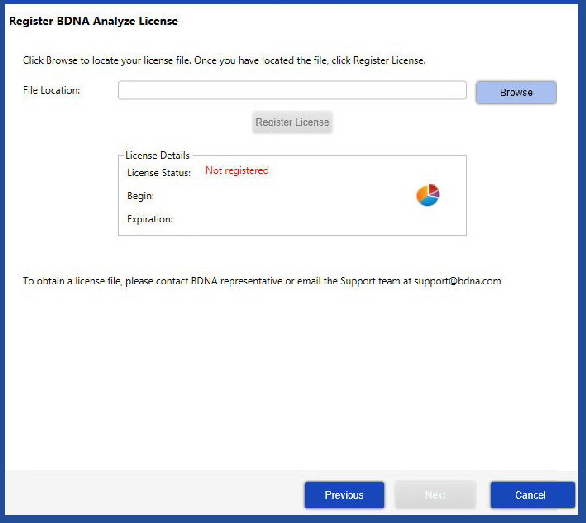
| 4. | Click Browse to locate the *.nbilic file, and click Register License to activate the license. |
| • | License keys have the following format: |
Customername_date_.nbilic
| • | Trial keys have the following format: |
Trial_date_.nbilic
| 5. | Click Next. The Specify Local User Account screen opens. |

| 6. | Select the IIS Website that will host the Data Platform User Console. |
| 7. | Enter the authentication settings (User name and Password) for the Data Platform User Console Management Account. |
Note:The Management Account role performs User Console administrative and system operations.
| 8. | If you are using LDAP/AD, select a group to be assigned to the Data Platform User Console Management User Role. |
Note:If you are using SAML to connect to a single sign-on identity provider, the Configuration Wizard will show a SAML Authentication screen prior to the Memory Configuration screen when you click Next. For details about the SAML authentication settings see Optional SAML Authentication Settings and Prerequisites.
| 9. | Click Next. The Memory Configuration screen opens. |
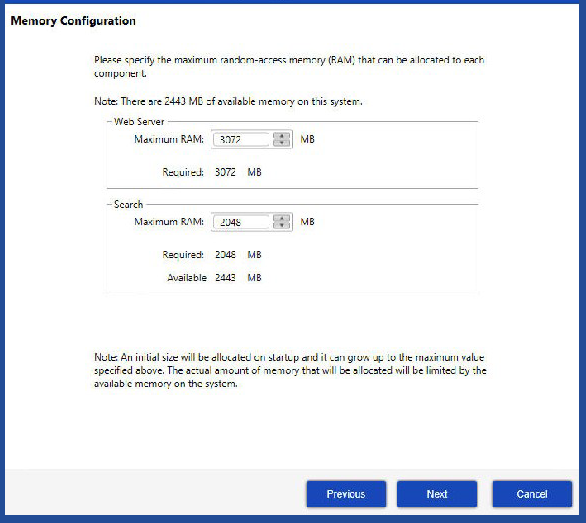
| 10. | Specify the maximum memory (Maximum RAM) that can be allocated to the Data Platform User Console components. |
Note:A default value for memory allocation is set during startup. It can increase as necessary to the maximum value you specify in the Memory Configuration dialog box.
| 11. | Click Next. The Configuration Progress screen opens. |

| 12. | Click Execute to begin the configuration process. Messages appear in the message column that provide status details about each step in the process. |
When the configuration process is finished, a Configuration Process Successful screen opens.
| 13. | Click Finish to end the configuration process and launch the Data Platform User Console. |
| 14. | See the Data Platform User Console Guide for detailed instructions about Data Platform User Console operations. |
Optional SAML Authentication Settings and Prerequisites
The SAML Authentication screen appears in the Administrator Console Configuration Wizard and in the User Console Configuration Wizard when the Administrator Console and the User Console are installed on the same machine and the Administrator Console is configured for SAML. Observe the requirements and recommendations and perform the required IdP configurations before completing the SAML Authentications settings, shown below, if you are using SAML to integrate with a single sign-on identity provider (IdP).
| • | SAML Requirements and Recommendations |
| • | IdP Configurations Required for SAML Authentication |
| • | SAML Authentication Settings |
Note:When installing Data Platform with SAML authentication support, configure the Administrator Console before you configure the User Console.
SAML Requirements and Recommendations
The following requirements apply to SAML support in Data Platform:
| • | The Administrator Console and the User Console must be installed on the same machine. (Follow the system requirements for the User Console machine to ensure the server has sufficient compute and memory to accommodate both applications.) |
| • | Windows Server 2016 or later required. |
| • | Data Platform version 5.5.60 or later required. |
| • | Web Server Certificate: Requiring access to Data Platform over HTTPS using a proper web server certificate (not self-signed) is highly recommended. |
| • | Signing/Encryption Keys: Data Platform enforces signed and encrypted authorization requests. This requires the administrator to create a valid x509 certificate (which may be self-signed). Only one certificate is required to both sign and encrypt the SAML requests. The certificate should be exported in both PKCS12 format and binary format according to the following guidelines: |
| • | PKCS12 format with private key (but do not include the certificate chain in the export). |
| • | Binary format without the private key. |
| • | The private key should be protected with a password of at least 8 characters (minimum). |
| • | IdP Configurations: Administrators must perform additional configurations and create SAML 2.0 applications in their IdP vendor’s utilities and obtain IdP Metadata URL values for those applications. |
IdP Configurations Required for SAML Authentication
Data Platform’s SAML configuration is tested and supported for Okta. In your IdP vendor’s configuration tools, you must create a new SAML 2.0 application and obtain IdP Metatdata URL for a SHA-2 certification to integrate Data Platform with your IdP environment.
Flexera recommends you choose an application URL your users will connect to when accessing Data Platform’s Administrator Console or User Console. This application URL should begin with HTTPS and be resolvable via DNS. For example, the application URL, https://prod.dp.flxra.mydomain.us, could translate to the URL for your production Data Platform instance.
Two separate SAML 2.0 applications must be created: one for the Data Platform Administrator Console and one for the Data Platform User Console. For the SAML 2.0 applications use the following settings in your IdP vendor’s environment.
|
Setting |
Description |
|||||||||||||||||||||
|
Single Sign-on URL |
Administrator Console Use the URL for your application hostname + /bdna-admin/Admin.aspx. For example: https://prod.dp.flxra.mydomain.us/bdna-admin/SAML/ACS User Console Use the URL for your application hostname + /bdna/saml/SSO. For example: https://prod.dp.flxra.mydomain.us/bdna/saml/SSO |
|||||||||||||||||||||
|
Audience URI |
If your organization does not provide or enforce the values set for Audience URI, you can use the same value you provided for Single Sign-on URL. |
|||||||||||||||||||||
|
Advanced Settings |
|
When the SAML 2.0 application has been created, obtain the IdP Metadata URL for its SHA-2 certificate. You will need this value for the SAML Authentication Settings in the Configuration Wizard.
The settings for SAML Authentication to supply in the Configuration Wizard appear in the table below. In each case, use values from your IdP that match the SAML 2.0 application that aligns with the component you are configuring: Administrator Console or User Console.
|
Setting |
Description |
|
IdP Metadata |
The IdP Metadata URL for the SHA-2 Signing Certificate for the SAML 2.0 application you created in your IdP. |
|
Issuer URI |
The Audience URI chosen in your IdP. |
|
IDP SSO URL |
The Single Sign-on URL value from your IdP. |
|
Logout Redirect URL |
The Single Logout URL value from your IdP. |
|
Certificate Path |
Path to the PKCS12 certificate used to sign and encrypt SAML authentication requests. |
|
Certificate Password |
Password used to secure the certificate private key. |