Adding a Slicer
Note:
If you have already been upgraded to Technology Intelligence Platform, information in this section is applicable to you. With Technology Intelligence Platform, out-of-the-box IT Visibility dashboards are being replaced with new, enhanced IT Visibility Technology Intelligence Platform reports.
Important:The Manage custom reports role is required to export custom report details. For complete descriptions of each role available in Flexera One, see Flexera One Roles.
You can add a slicer to the pane to create custom dropdown filters. This helps to generate reports to meet specific business requirements.
Tip:An easy way to get started working with custom reports to add more filters to out-of-the box reports is to start with a duplicate of one of the Technology Intelligence Platform reports. See Duplicating a Technology Intelligence Platform Report for more information.
To add a slicer:
|
1.
|
Go to the Dashboards page from one of the following menus: |
|
•
|
Dashboards > Technology Intelligence Reports > Custom Reports |
|
•
|
IT Visibility > Technology Intelligence Reports > Custom Reports |
By default, reports are grouped by type, such as Hardware, Software, and Vulnerabilities.
|
2.
|
Click the expand icon next to the group type to view the list of reports. |
|
3.
|
To open a report, do one of the following: |
|
•
|
Use the filter controls to search for the report. Click the report name to open the report. Click Manage in the upper-right corner of the page, and then select Edit Mode. |
|
•
|
Locate the report and click the Edit button in the report row. Hover over the button icon to view the button name. |
|
•
|
Locate the report and click the report name. Click Manage in the upper-right corner of the page, and then select Edit Mode. |
The selected report opens in an editable mode.
|
4.
|
Click Manage and then click Setting. |
|
5.
|
From Panels, select the Bookmarks and Selection Pane checkboxes and click Save.
The Bookmarks and Selection pane appears. |
Note:
|
•
|
By default, the Selection Pane and Bookmarks pane are disabled in the custom reports. You must enable it from Settings to use. |
|
•
|
After enabling the panels from Settings, don’t use View-> Selection or Bookmarks as that operates only on runtime basis and may lead to inconsistencies in generated reports.
|
|
6.
|
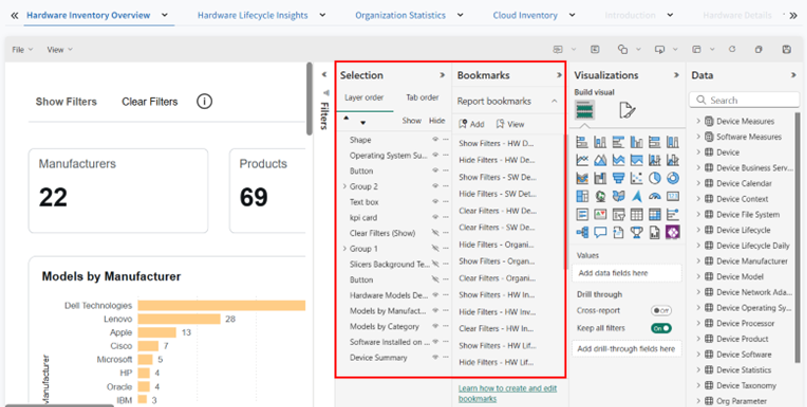
Press Ctrl and click Show Filters.
A group of slicer pops down with the Hide Filters and Show Filters button on top. |
|
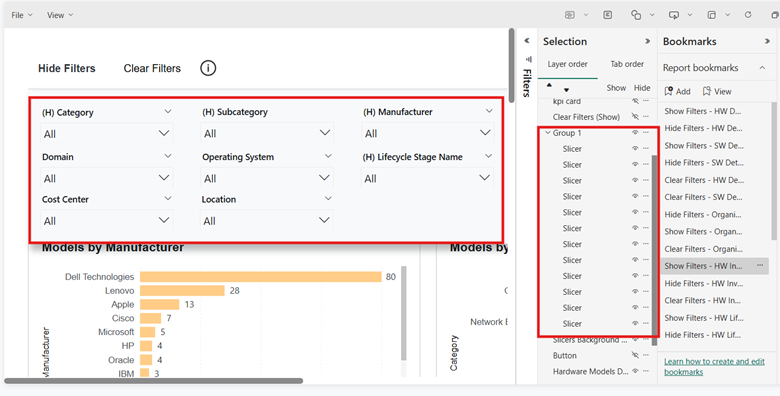
7.
|
To check if all the slicers are grouped under a single group, from the Selection pane, select all the slicers.
|
|
8.
|
To add a new slicer, select the Slicer from the Visualization pane.
The new slicer appears in the Selection pane but not in the group of slicers. |
|
9.
|
To add the new slicer in the group, drag and drop the new slicer into the group.
The new slicer is part of the group now. |
Note:To identify the bookmark linked to the Show Filters or any filters-related button, click on Show Filters > Action > Bookmark.
Updating the bookmark
|
1.
|
Select the slicer group, Slicers Background, and the Show Filters button. |
|
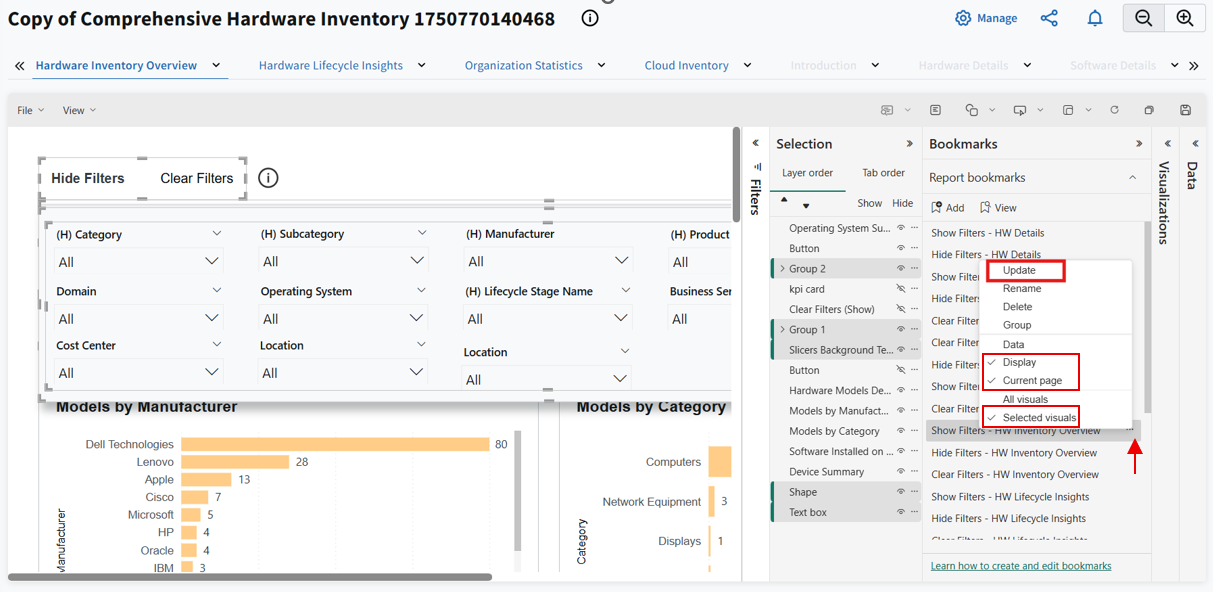
2.
|
On the Bookmarks tab, hover over respective bookmark and click the More options (...). Don’t click on bookmark directly. |
Note:Ensure the Show and Hide filter bookmarks have only Display, Current Page, and Selected Visuals checked.
|
4.
|
Hide the respective slicers, text box, and Hide filters button and enable the Show Filters button. Then select the slicer group and update the respective Hide Filter Bookmark similar to Show filter bookmark. |
|
5.
|
For Clear Filters button, select the Slicer Group having all the slicers and update the respective Clear Filters Bookmarks. |
Note:While updating the Clear Filters bookmarks, ensure Data, Current Page, and Selected Visuals are checked.
Creating and updating a new bookmark
|
1.
|
In the Selection pane, select the desired elements you want to include in the bookmark. |
|
2.
|
At the top of the Bookmarks pane, select Add.
A new bookmark is created and added to the list. |
Apply the same steps for creating new bookmarks for Hide/Clear Filter and follow the Updating the bookmark to update.
Note:
|
•
|
If the Selection Pane is turned on in Edit mode, it remains visible in View mode. To hide it, turn it off in Edit mode (Go to Manage > Settings > Panel, and deselect Selection Pane) before switching to View mode. |
|
•
|
In very rare cases, if the Bookmark or Selection Pane doesn’t update after changes, refresh or reload the report to apply the settings properly. |