Using Schema.ini
Column names, data types, character sets, and data conversions may be specified for
the Business Importer using a schema.ini file. This file
contains the definition of the columns for any text files in the current directory,
and overwrites all other settings, including Microsoft registry settings. Using
the schema.ini file approach is useful, for example, when you
need to define fixed length fields, or specify a custom delimiter.
HKLM\SOFTWARE\Wow6432Node\Microsoft\Jet\4.0\Engines\Text\Format
(or the equivalent key for 32-bit systems), but for any reason you cannot update
that registry setting, you may over-ride the registry with a setting in
schema.ini. For example, suppose that the registry setting
is CSVDelimited, but your imported file uses a
Tab character as the delimiter. Until you create an appropriate
schema.ini, the import will fail, typically by crushing all
your imported columns into one column in the Business Adapter Studio. To over-ride
the registry setting for a particular import, create a
schema.ini containing a line such as the
following:Format=TabDelimitedMicrosoft Windows offers an easy way to generate a default
schema.ini file based on the existing text files in a
directory.
To generate and adjust the schema.ini file:
-
To initiate the process, do one of the following:
- On a 32-bit machine, access the Windows Control Panel and select ODBC from the icons in the control panel.
- On a 64-bit machine, run the following command:
C:\Windows\SysWOW64\Odbcad32.exe.
The ODBC Data Source Administrator properties display.Figure: The ODBC Data Source Administrator screen  Note: This tool is primarily used to create and manage ODBC data sources. However, it is used here simply to create a default schema.ini file.
 -
Click Add....
The Create New Data Source dialog displays.
Figure: Pick the driver matching your data source 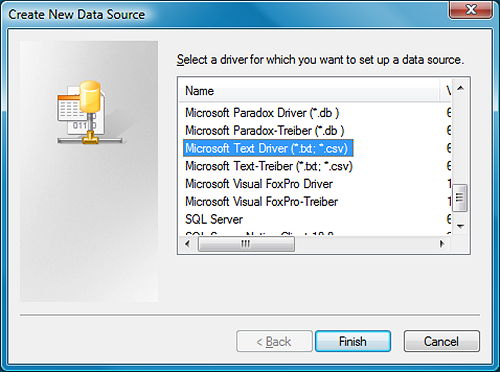
-
Click Finish.
The ODBC Text Setup dialog displays.
Figure: Locate the CSV (or text) file 
-
Click Define Format....
The Define Text Format dialog displays.
Figure: Define the format of the text file 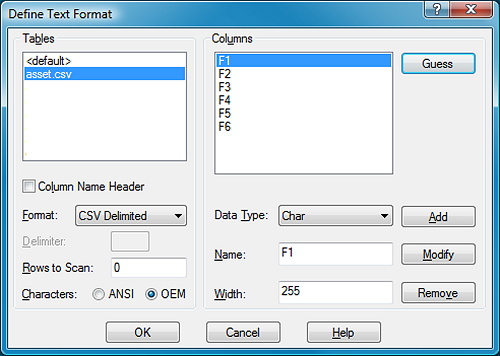
IT Asset Management (Cloud)
Current