Edit Watch Lists
To edit a watch list, perform the following steps.
To edit a Watch List:
|
1.
|
Click an item in the grid and select Edit. |
|
2.
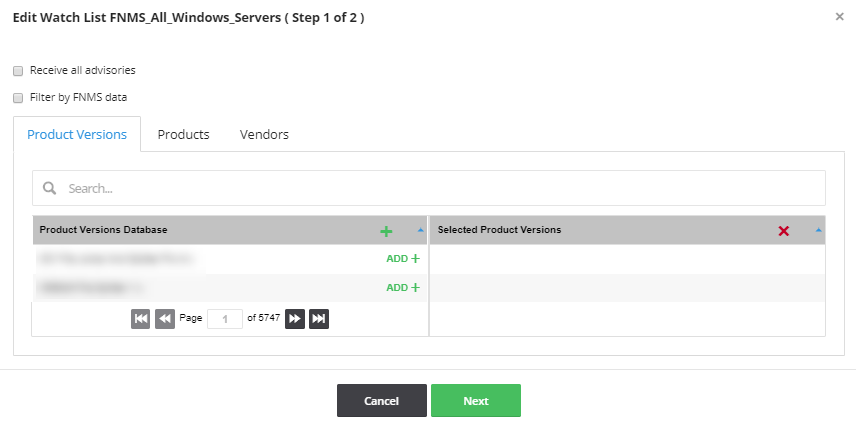
|
Select Receive all advisories and Filter by FNMS data as appropriate. When you have finished making your selections, click Next. The Edit Watch List (Step 2 of 2) page opens. |
|
3.
|
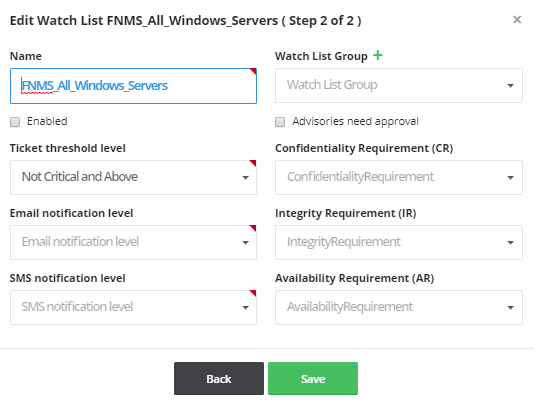
Enter the Name of the edited Watch List. |
|
4.
|
Select the Watch List Groups, if available, from the drop-down list to associate with this Watch List. You can also click  to create a new Watch List group. to create a new Watch List group. |
|
5.
|
Notifications and/or tickets are not sent for disabled Watch Lists. If you wish to preserve a Watch List for historical reasons, you can disable it by clearing the selection of the Enabled check box. |
|
6.
|
If you select the Advisories need approval option, you will receive a notification and an email for advisories that match your Watch List. You can approve that advisory, in which case a ticket is created or you can dismiss the advisories. |
Note:If the users have the rejected advisories option enabled, the threshold filters may not apply since the advisory may not have the criticality set.
|
7.
|
Select the Ticket threshold, Email and SMS notification levels from the drop-down lists. |
The Ticket threshold level is used to determine whether or not tickets will be created for advisories matching your Watch List.
|
8.
|
You can optionally select the impact that a vulnerability in any item in the Watch List will have to your environment (Low, Medium or High) by Confidentiality Requirement (CR), Integrity Requirement (IR) and Availability Requirement (AR) from the drop-down lists (optional). |
|
9.
|
Click Save to save the edited Watch List. Once saved, you will begin to receive alerts and advisories based on your configuration. |