Configuring Single Sign-On (SSO)
Note:The following information is unique to the single sign-on vendor Okta (SAML 2.0). Single sign-on procedures from other vendors may vary.
Prerequisites
To get started, you need the following:
| • | An Okta account |
| • | Administrator privileges |
To set up Okta (SAML 2.0) to use as a single sign-on (SSO) with Software Vulnerability Research, perform the following steps.
To set up Okta (SAML 2.0) to use as a single sign-on (SSO) with Software Vulnerability Research:
| 1. | Sign in to Okta. |
| 2. | Navigate to the Admin section, choose Applications, and select Applications to configure the SVR app. |
| 3. | Click Create App Integration to create a new Okta SSO app. 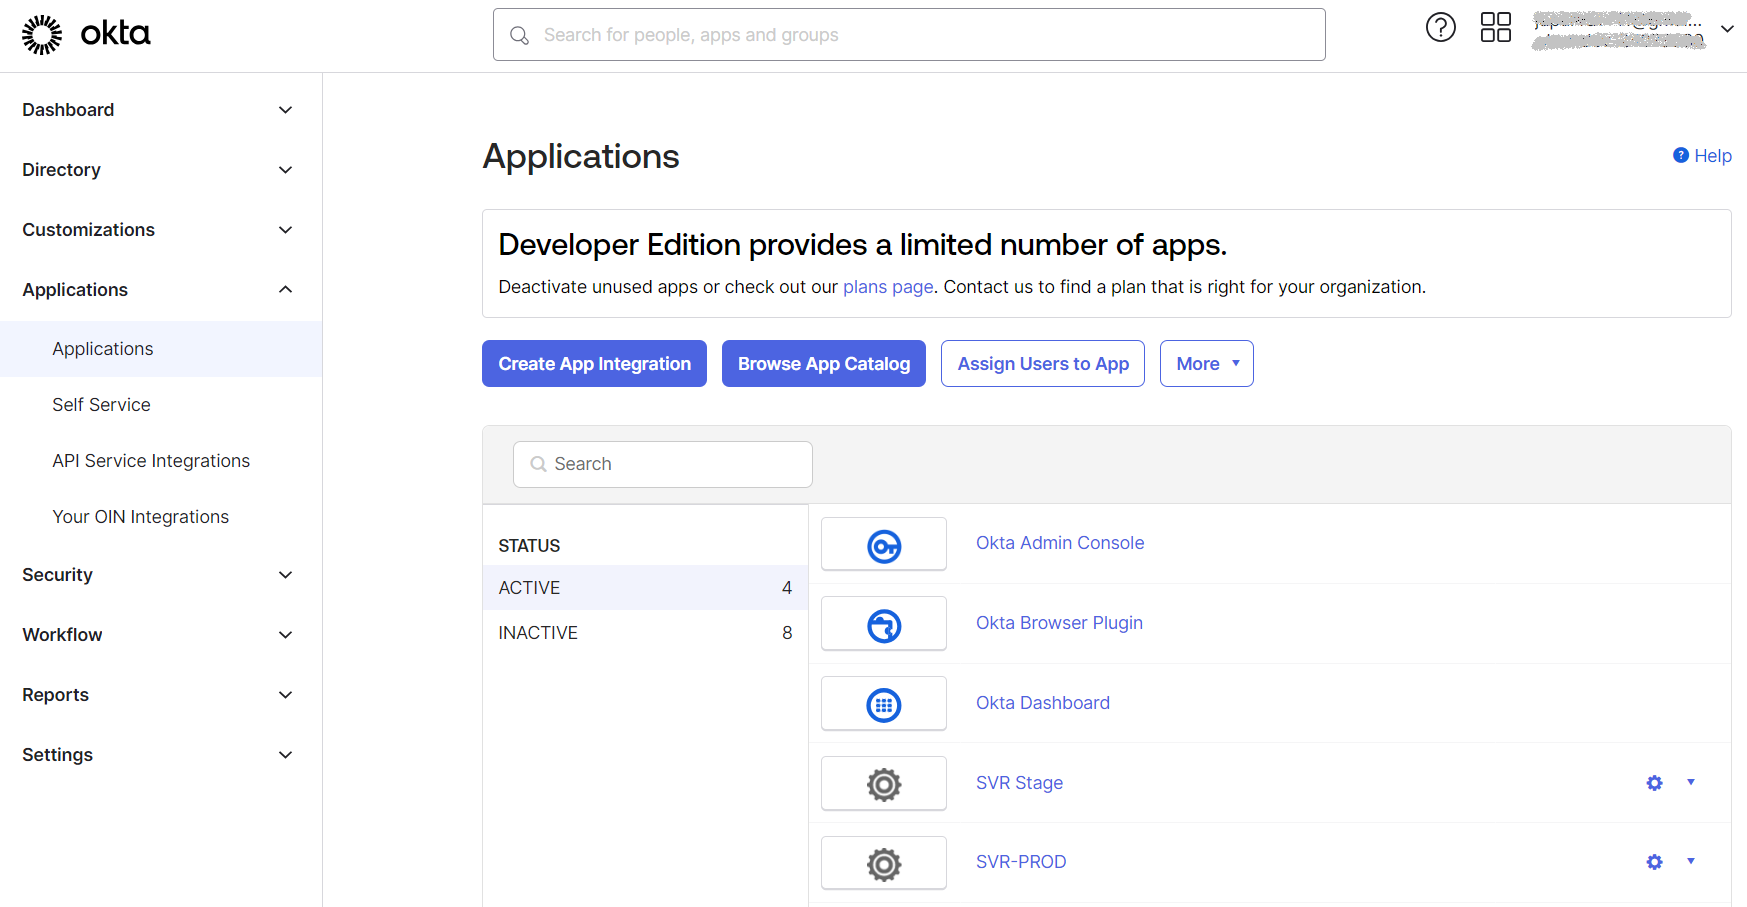 |
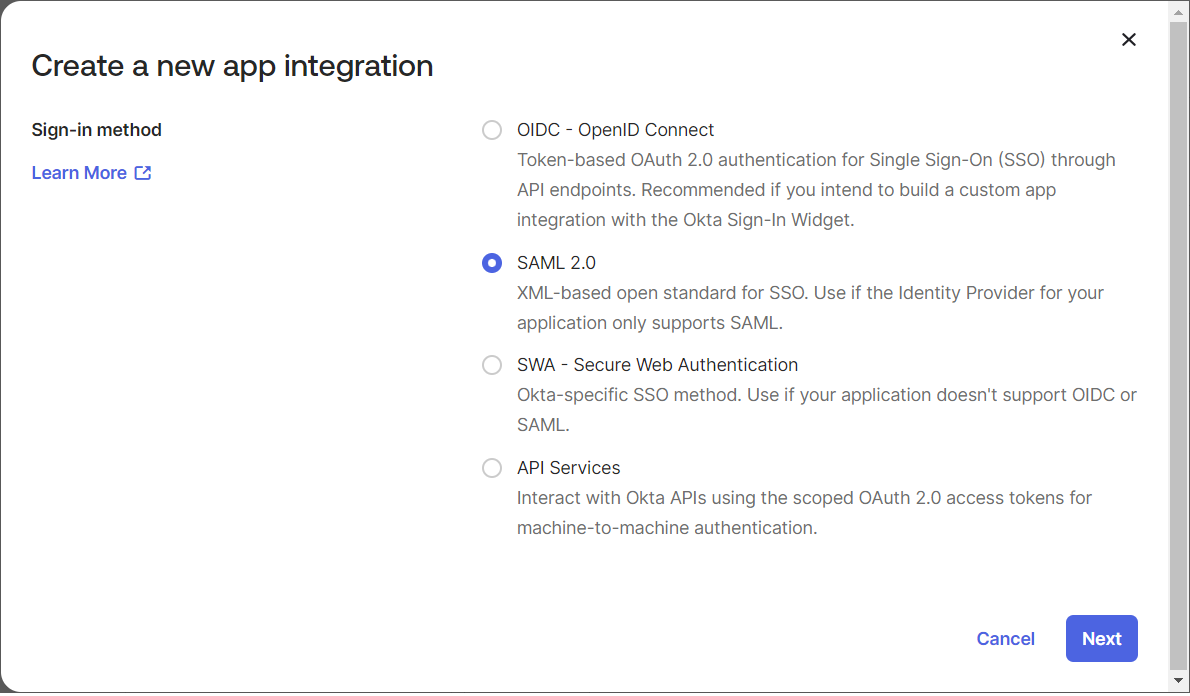
The Create a new app integration wizard opens.
| 4. | Choose SAML 2.0 for the Sign on method. Then click Next. |
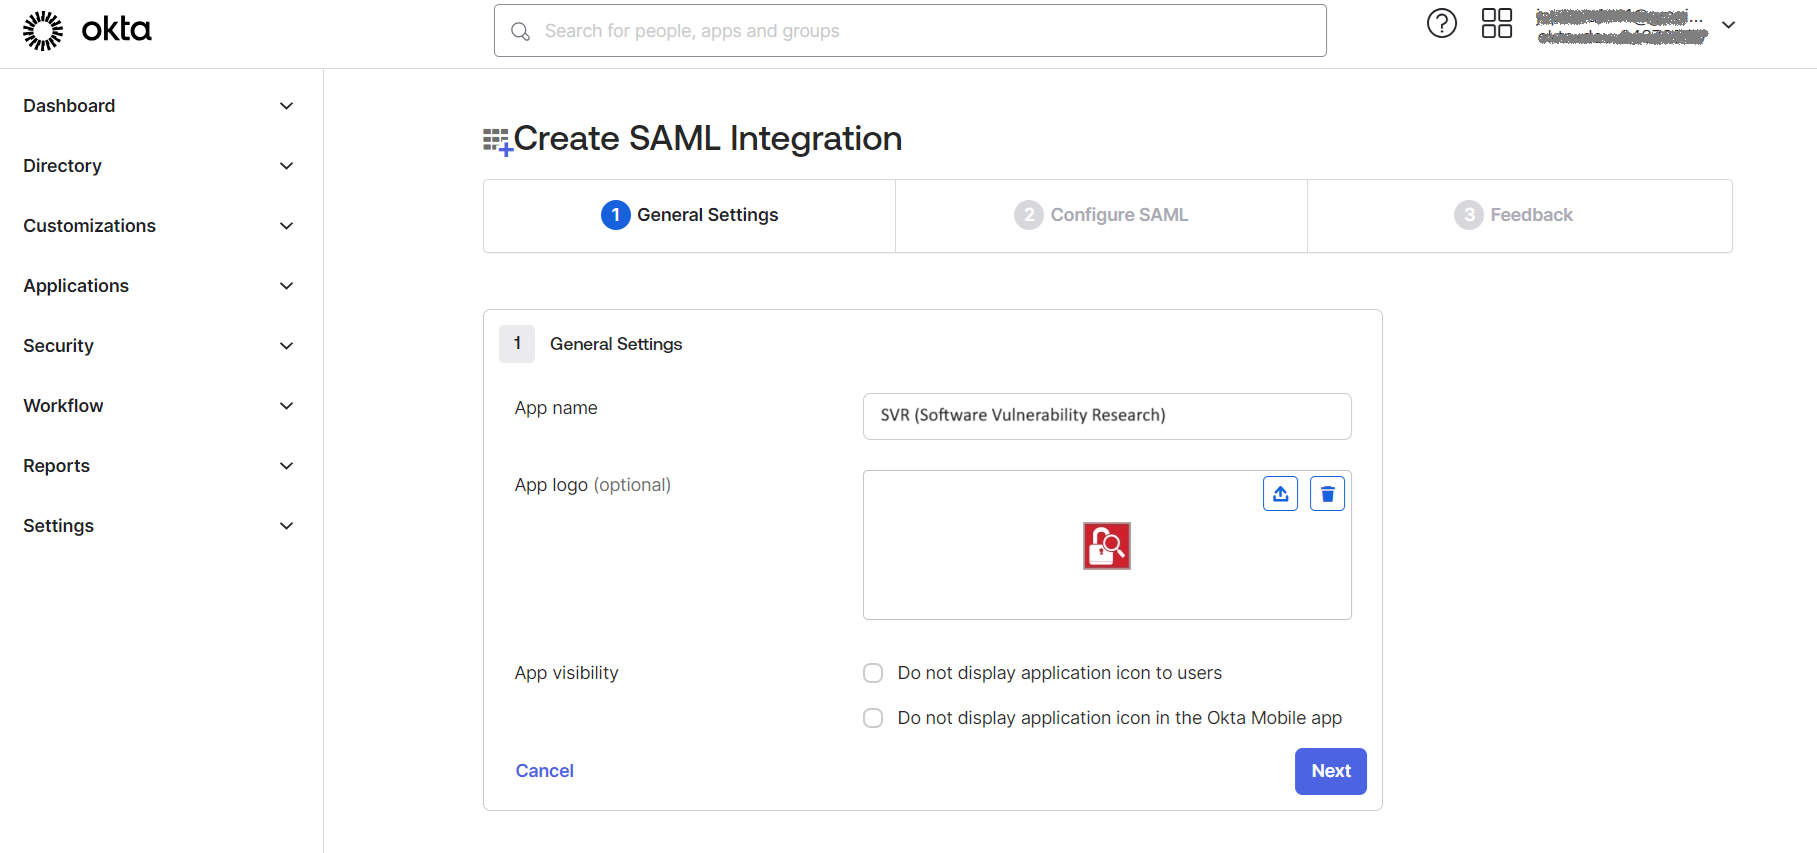
| 5. | Enter an App name (Example: SVR). In the App Logo field, click the upload icon, navigate to the location of the logo file, and select the logo (Example: Software Vulnerability Research logo). |
Click Next button.
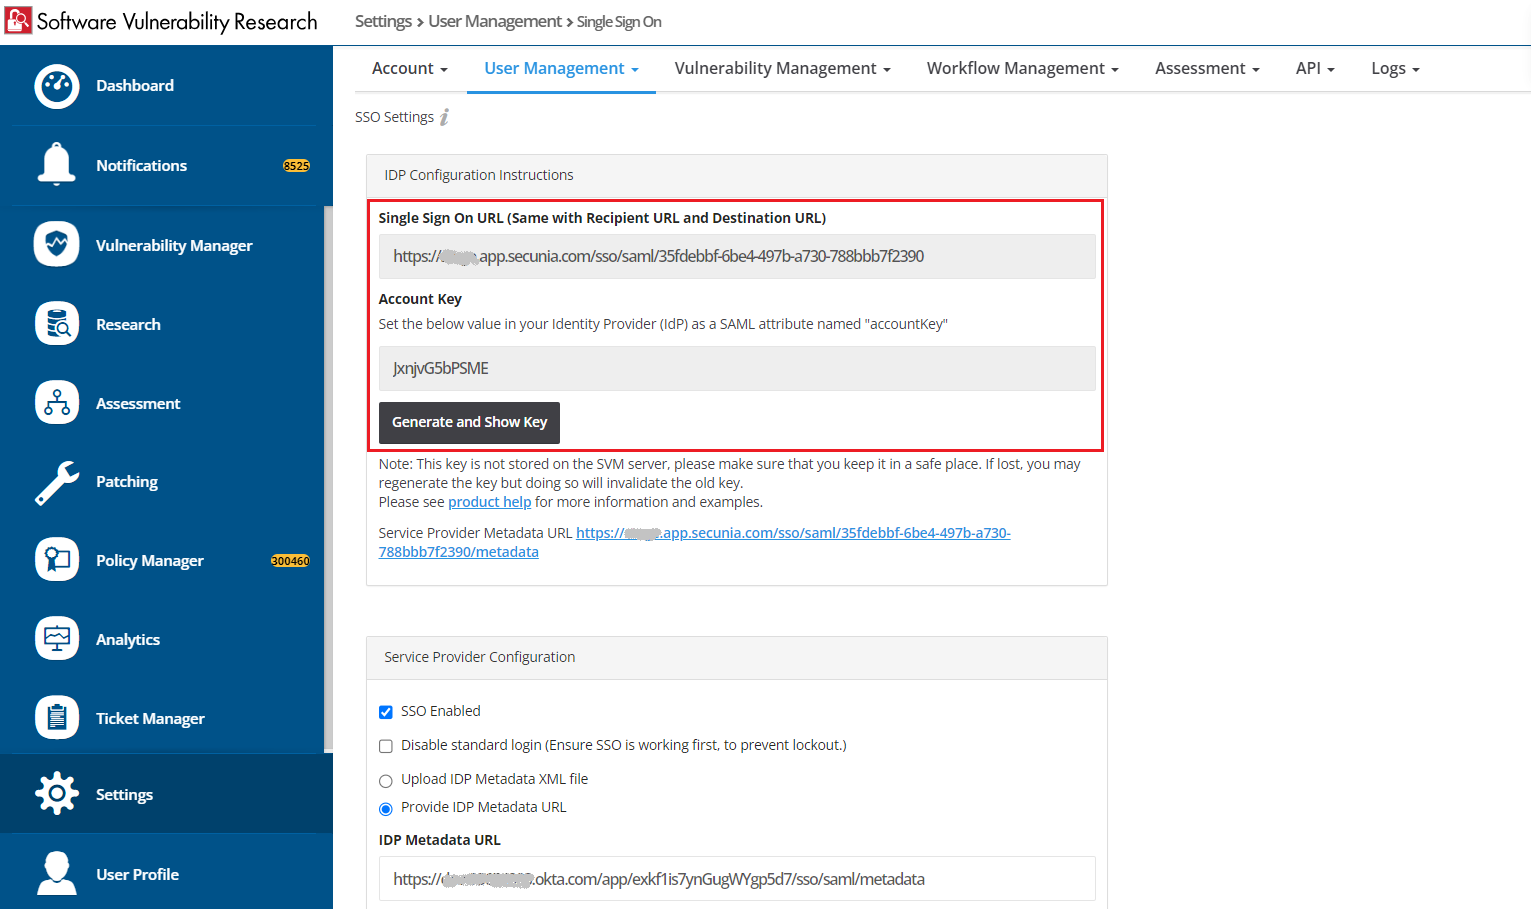
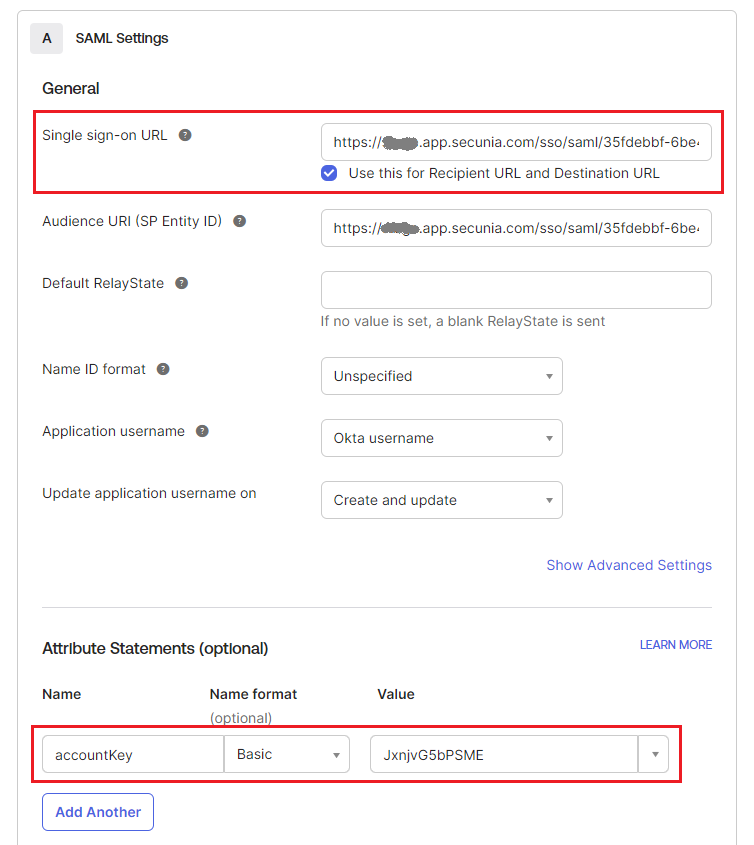
| 6. | Copy the following from the Software Vulnerability Research Settings > User Management > Single Sign On fields and paste in the SAML Settings > fields: |
| • | Single Sign On URL (Same with Recipient URL and Destination URL) to Single sign on URL and Audience URL (SP Entity ID) |
| • | Account Key to accountKey Value (in Attribute Statements (Optional)) |
Note:The accountkey value is typically provided by your Software Vulnerability Research (SVR) system. You will need to log into your SVR to retrieve it.
Complete the remaining Okta SAML Settings > Attribute Statements (Optional) name and value fields using the field’s drop-down list:
|
Name |
Name format |
Values |
|
accountkey |
Basic |
accountkey Note:The value obtained from SVR. |
|
firstName |
Unspecified |
user.firstName |
|
lastName |
Unspecified |
user.lastName |
|
|
Unspecified |
user.email |
|
username |
Unspecified |
user.login |
When configuring attribute statements, you might also need to specify the Name Format. Here are the common formats:
| • | Basic—This is a simple name format used for custom attributes. It doesn’t follow any specific URI format. |
| • | Unspecified—This format doesn’t enforce any particular structure. |
| • | URI Reference—This uses a URI to define the attribute name, typically in the form of a URL. |
For most custom attributes like accountkey, you can use Basic or Unspecified unless the application specifically requires a URI format.
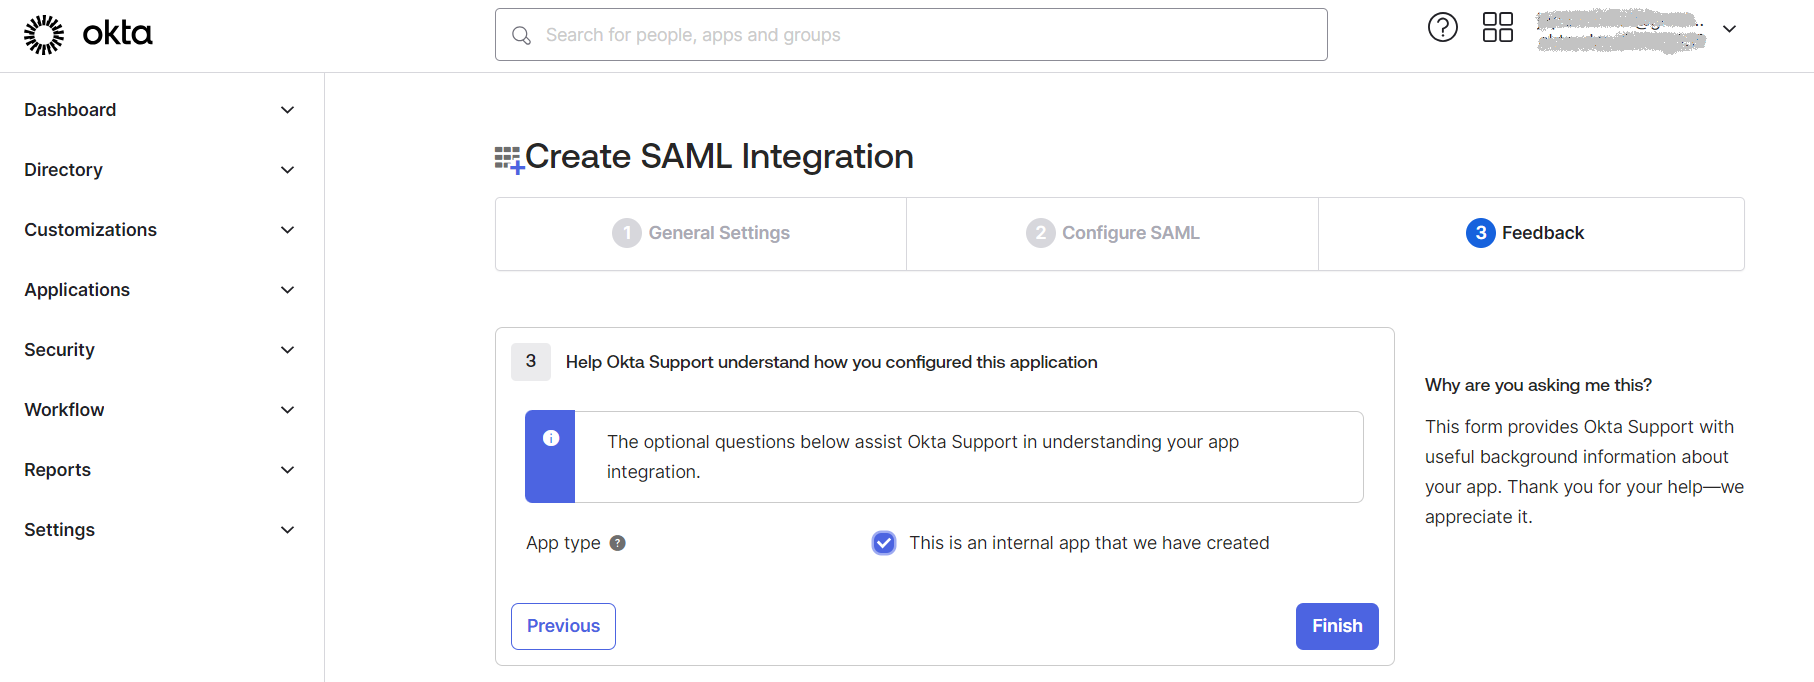
| 7. | In the Create SAML Integration - Step 3 Feedback screen, click Finish. |
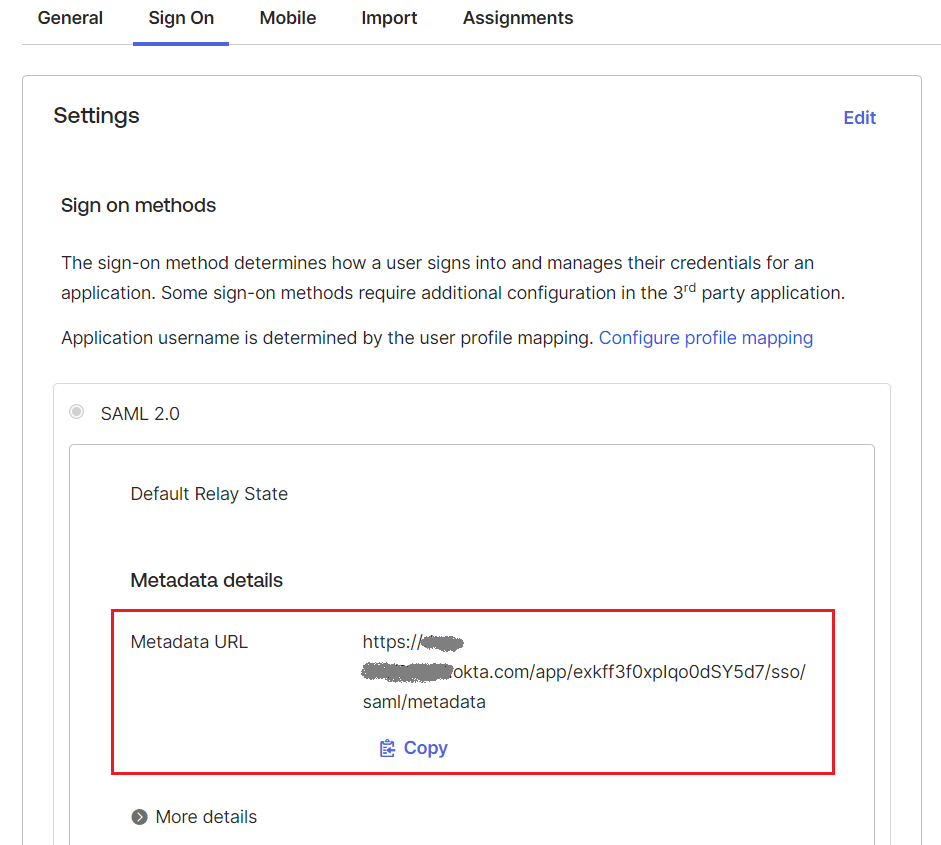
| 8. | At the Okta Sign On Settings screen, click on Copy link to copy the metadata URL. |

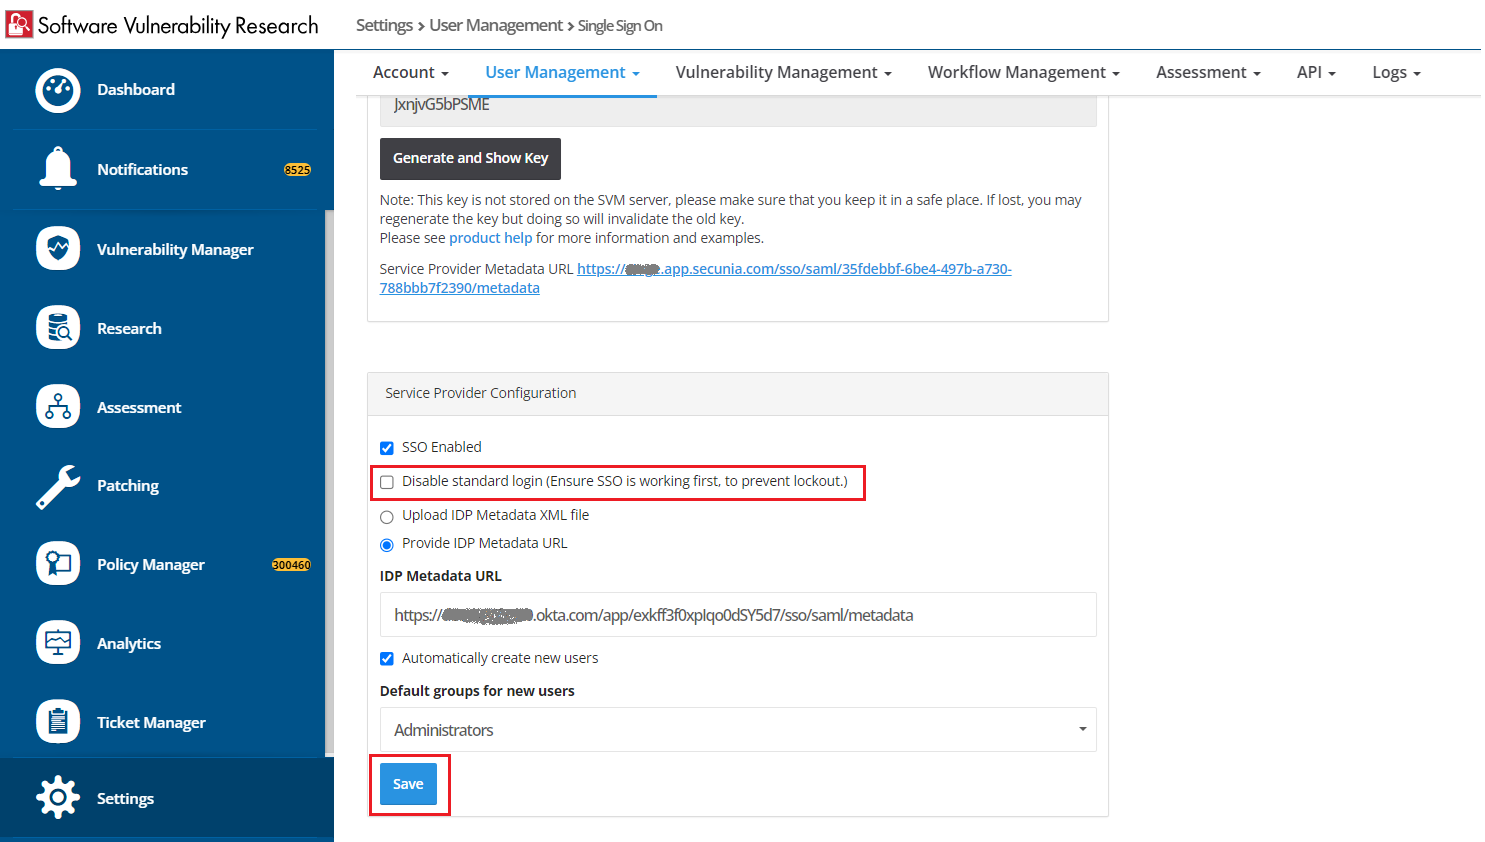
| 9. | Copy the Identity Provider metadata URL from Okta into the Software Vulnerability Research Settings > User Management > Single Sign On > IDP Configuration Instructions section. In the Service Provider Configuration section, check SSO Enabled, check Automatically create new users, and assign a Default group for new users by selecting from the drop down. |
Note:For a secure connection, the Assertions Signed (or similarly named) setting should be enabled on your IDP.
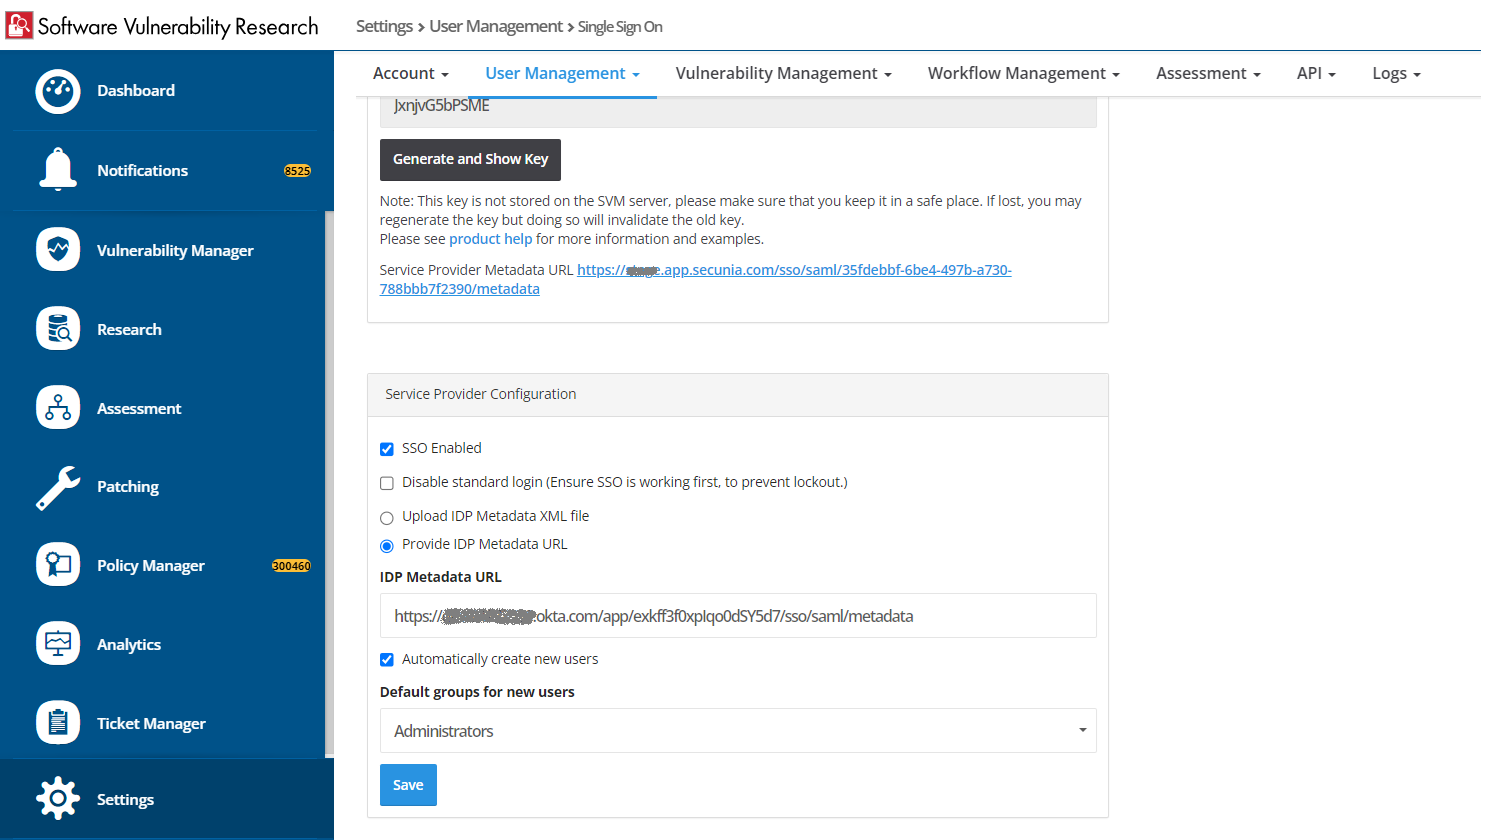
| 10. | If you want to disable standard login options for all of your users (except root), select the Disable standard login (Ensure SSO is working first, to prevent lockout.) option under Settings > User Management > SSO Settings > Service Provider Configuration. |
Click Save to on the Settings > User Management page.
Important:Before selecting this option, make sure that SSO is working correctly, to prevent user lockout.
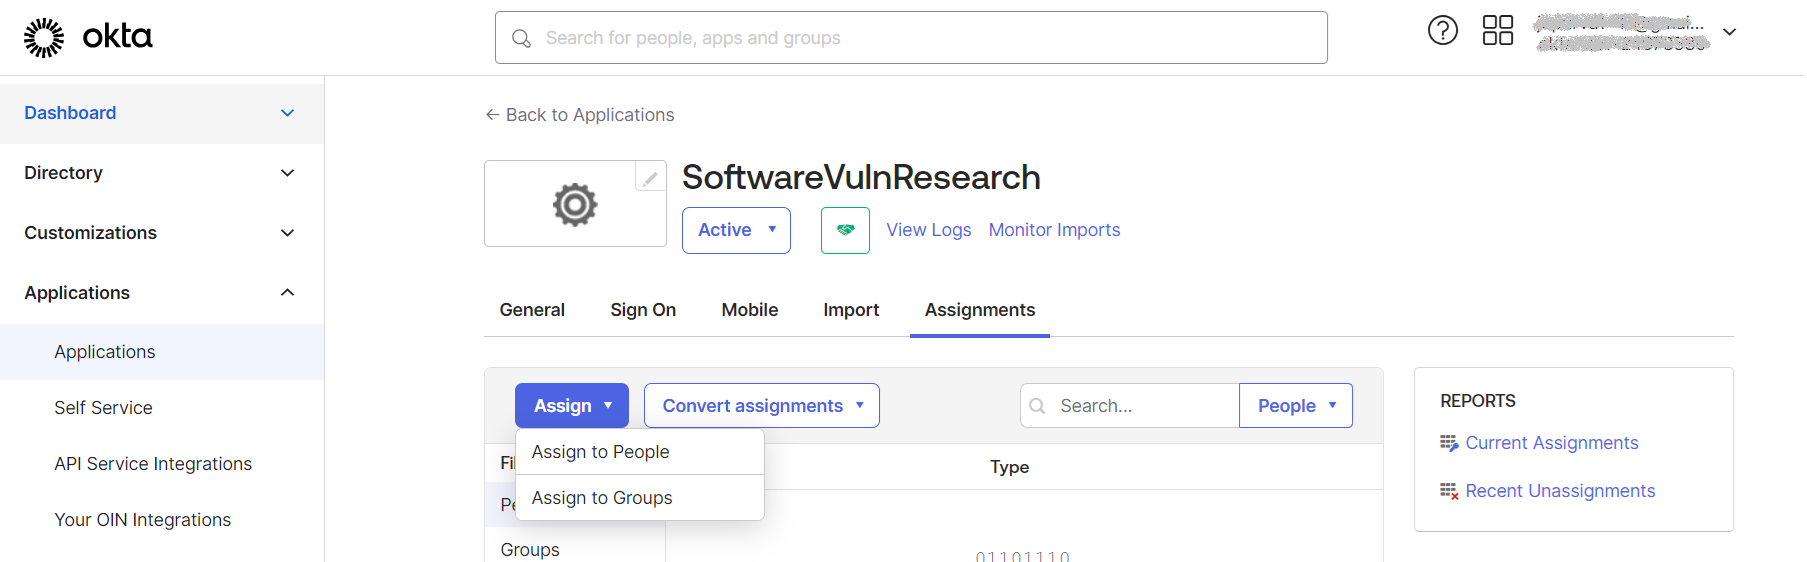
| 11. | Add Software Vulnerability Research users to the Okta SSO account. |
| 12. | Assign Software Vulnerability Research users to the Okta SSO app. A reset password link is sent to each user. |
| 13. | Users open the reset password link, reset their password, and click open the Okta SSO application. |
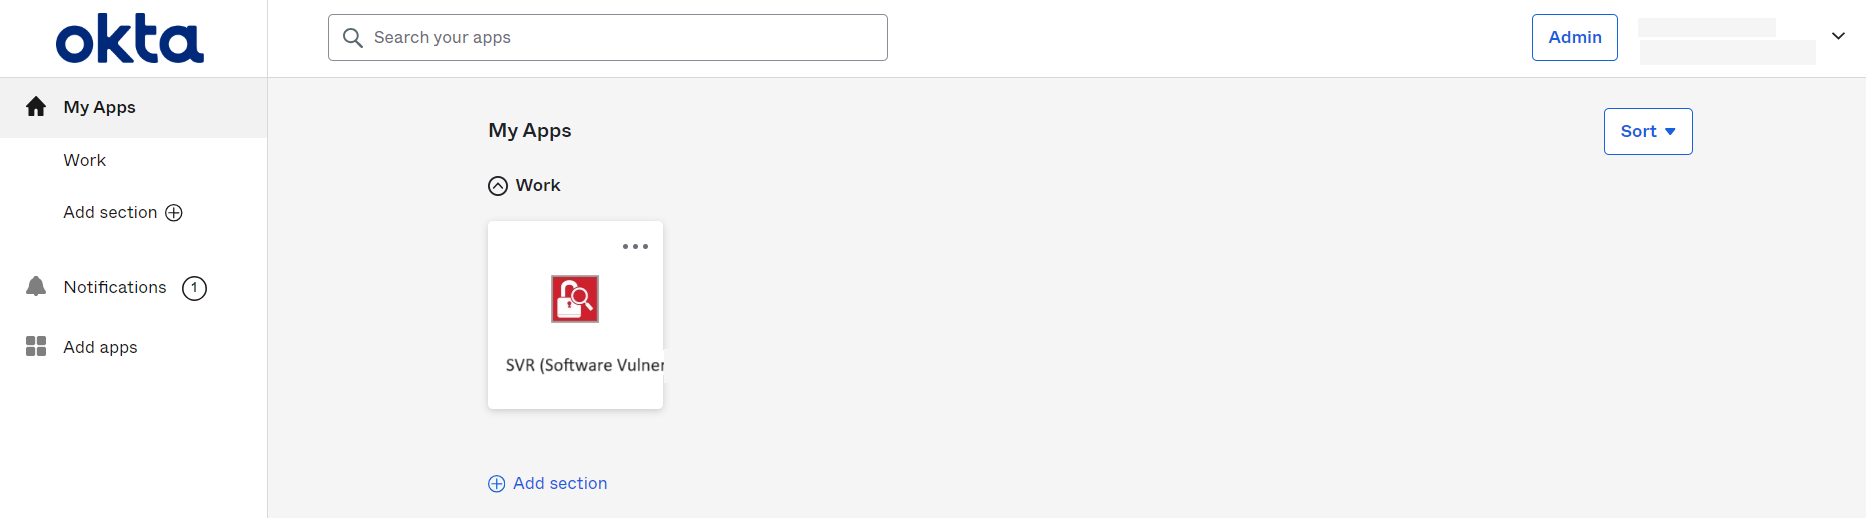
| 14. | Users are then logged into the Software Vulnerability Research Login page. |
Important:For security purposes, Software Vulnerability Research has a session timeout that will log you off after 2 hours of inactivity.