Overriding Default Email Notification Settings for an Individual Workflow Request
Workflow Manager
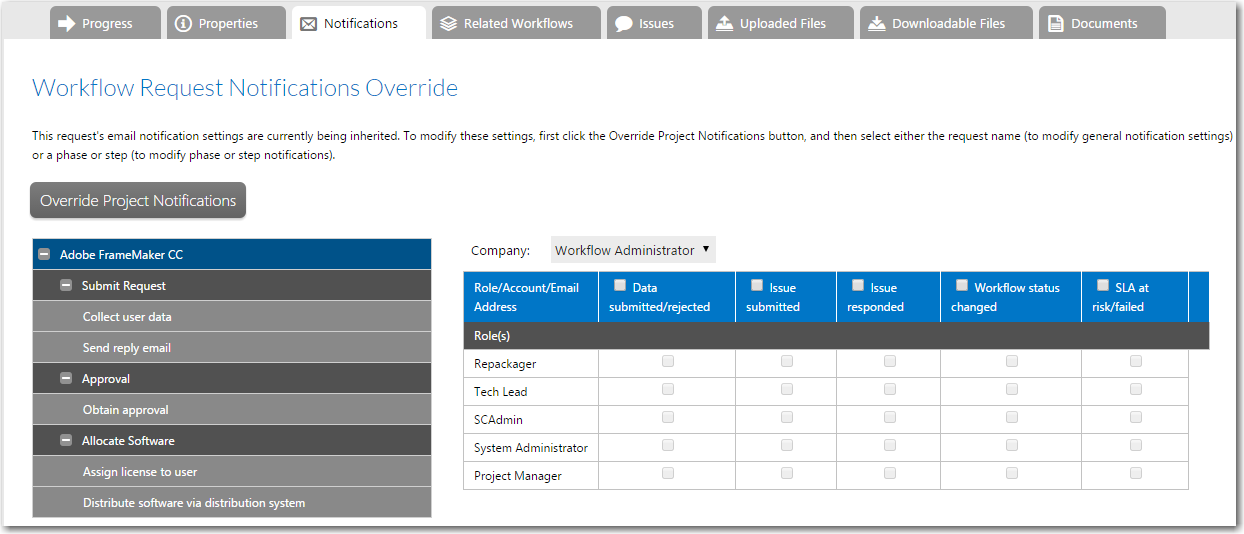
When a new workflow request is created, it inherits the email notification settings defined on the Notification tab of the Workflow Details page for its associated workflow template. You can, however, modify these notification settings as required on the Workflow Request Notifications Override page for an individual workflow request.
To override email notification defaults for a workflow request:
|
1.
|
If you are an administrator, open a workflow request’s Workflow Request page. |
|
2.
|
Open the Notifications tab. |
|
3.
|
Initially, the email notification options are display-only. To unlock these settings so that you can override them, click the Override Project Notifications button. The notification options are unlocked and the name of the button changes to Inherit Project Notifications. |
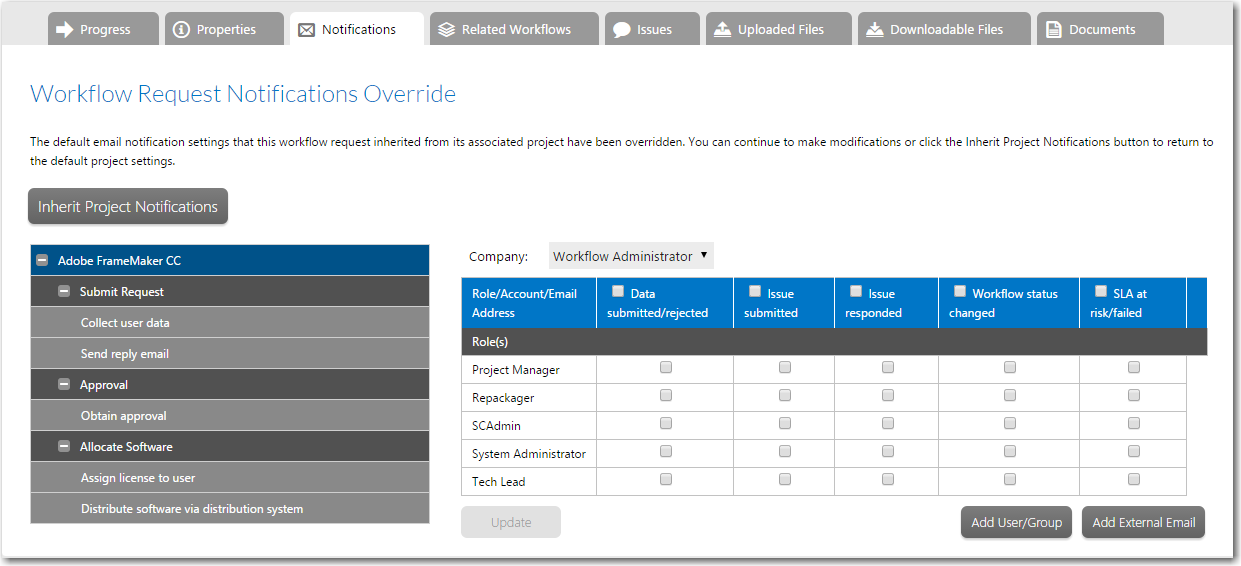
Note:If at any time after modifying these notification settings, you want to return to the project defaults, click the Inherit Project Notifications button.
|
4.
|
Select the consumer or administrator company associated with the project from the Company list, to display a list of roles and accounts associated with that company who are configured to receive email notifications for this project. |
|
5.
|
Select the root node of the Workflow Phase/Step tree control. The workflow request-level email notification options are displayed in the panel on the right. |
|
6.
|
Indicate whether the accounts or roles shown should receive an email notifications when each of the five listed workflow request events occur (Data submitted or rejected, Issue submitted, Issue responded, Workflow status changed, and SLA at risk/failed). Do this by selecting or deselecting the check box in the appropriate column, next to the relevant account name. Click the check box in the column header to select all check boxes in that column. |
|
7.
|
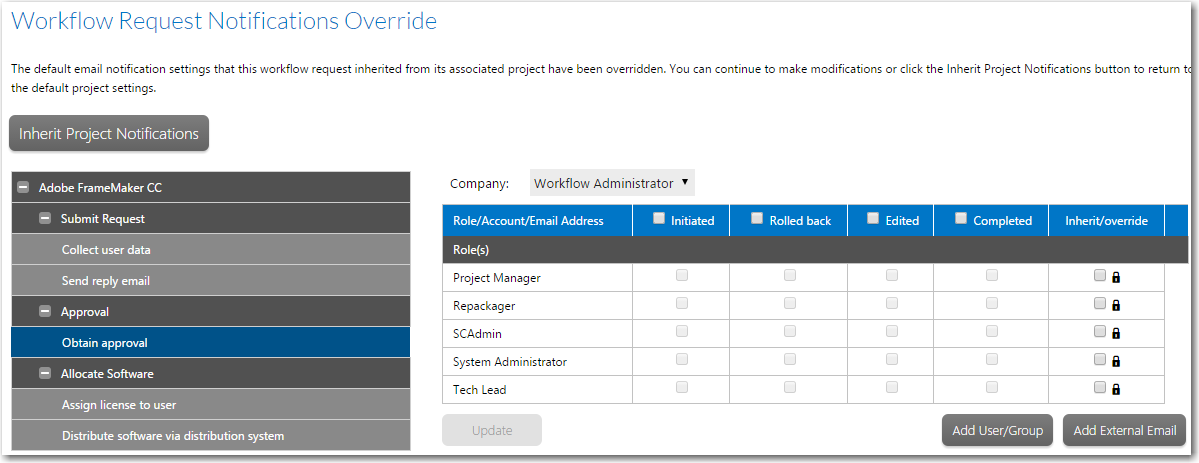
Select a workflow phase name in the tree. The phase/step level notification options are displayed: Initiated, Rolled Back, Edited, and Completed. |
|
8.
|
Make any desired updates to these notification settings at the phase level, and click Update to save your changes. |
|
9.
|
Workflow steps inherit email notification settings from their parent phase. To override these settings, select a workflow step in the tree. |
|
10.
|
If a workflow step is inheriting its settings from its parent phase, the settings are initially locked. Click the lock icon next to an account or role name to unlock the settings, and agree to the confirmation dialog that appears. |
|
11.
|
Make any desired updates, then click Update to save your changes. |
Important:Each time you add an account, group, or external email address and assign email notifications to it, remember to click Update. If you jump to another phase or step before you click Update, your changes will be lost.
See Also
Adding Accounts or Groups to an Email Notification List
Managing Email Notifications