Initiating the Template
Workflow Manager 2014
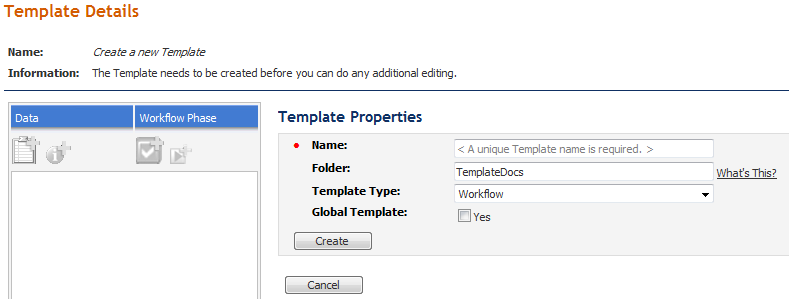
The first step in creating a new template is to click Add on the Template Administration page, and then assign the template a name, folder, and template type.
Note: Instead of creating a new template from scratch, you can copy an existing template. See Copying an Existing Template for more information.
To initiate a new template:
|
1.
|
In the navigation bar, open the Administration group and click Templates in the Workflow Settings subgroup. The Template Administration page opens. |
|
2.
|
Click the Add button. The Template Details page opens, displaying the Template Properties view. |
|
3.
|
Enter a unique name for the template in the Name field. |
|
4.
|
In the Folder field, enter the name of a directory on the Workflow Manager web server that will contain the Workflow Manager data help files and instruction files for this template. Specify the directory location relative to the wwwroot subfolder of the folder in which Workflow Manager is installed. For a typical install, this directory is C:\WorkflowManager\TemplateDocs. |
|
5.
|
From the Template Type list, select one of the following options: |
|
•
|
Workflow—Select if this template will define an ordered series of steps that an administrator follows to perform a specified task. This is the most commonly used template type. |
|
•
|
Deployment—Select if this template will be used to track the deployment of a prepared application to multiple deployment sites. |
|
6.
|
If you are creating a template to serve as example for your organization to copy and use, select the Global Template option. Note that: |
|
•
|
Global templates cannot be modified directly; they must be copied first. |
|
•
|
Global templates have the word Global listed in the Library column on the Template Administration page. |
|
•
|
You cannot assign a Global template to a Project. |
|
7.
|
Click the Create button. The Data and Workflow Phase tree on the left is now activated. |
See Also
Initiating the Template
Creating Data Groups
Creating the First Workflow Phase
Creating Subsequent Workflow Phases
Creating Templates That Use Conditions
Open topic with navigation