Workflow Manager 2015
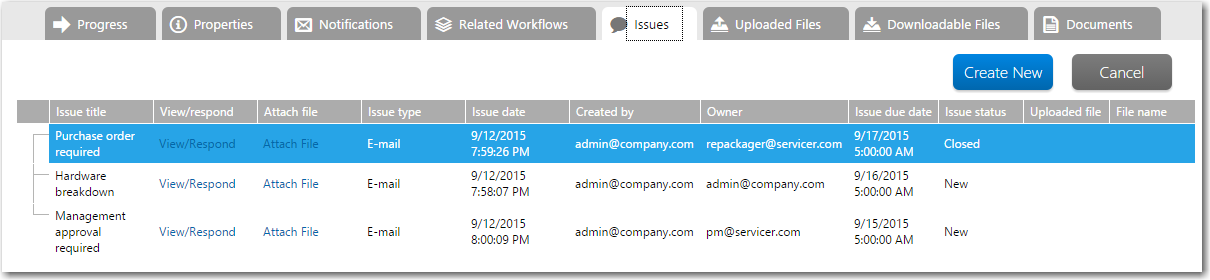
You can upload and attach a file to an issue on any of the pages available on the Issues menu or on the Issues tab for a workflow request.
To upload a file to an issue dialog:
| 1. | On one of the pages on the Issues menu or on the Issues tab of a workflow request, click Attach File in the Attach File column next to an issue. |
The File Upload dialog box opens.
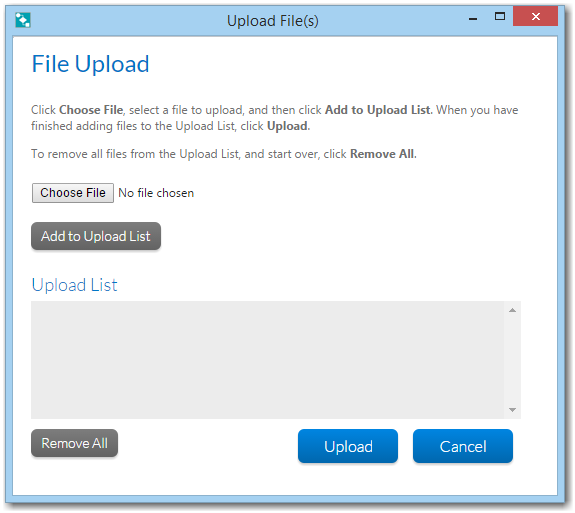
| 2. | Click the Choose File button. The standard system file upload dialog opens, allowing you to choose the file you wish to upload. |
| 3. | Click Add to Upload List to add the file to the Upload List. At this stage, the file has not yet been uploaded. |
| 4. | Repeat if you wish to upload multiple files. |
Tip • If you change your mind, click the Remove All button to remove the files you have added to the Upload List.
| 5. | Click Upload to upload your file(s). The files are uploaded, and a confirmation dialog appears once the upload is finished. |
Note • You can upload files of any size without causing a timeout error. When uploading a file, Workflow Manager streams the data into a disk file instead of receiving the entire upload request in memory, so the only limitation to file size would be the amount of free disk space at the location of the uploaded files.
Workflow Manager 2015 / AdminStudio Enterprise Server 2015 Help Library10 September 2015 |
Copyright Information | Flexera Software |