Workflow Manager 2015
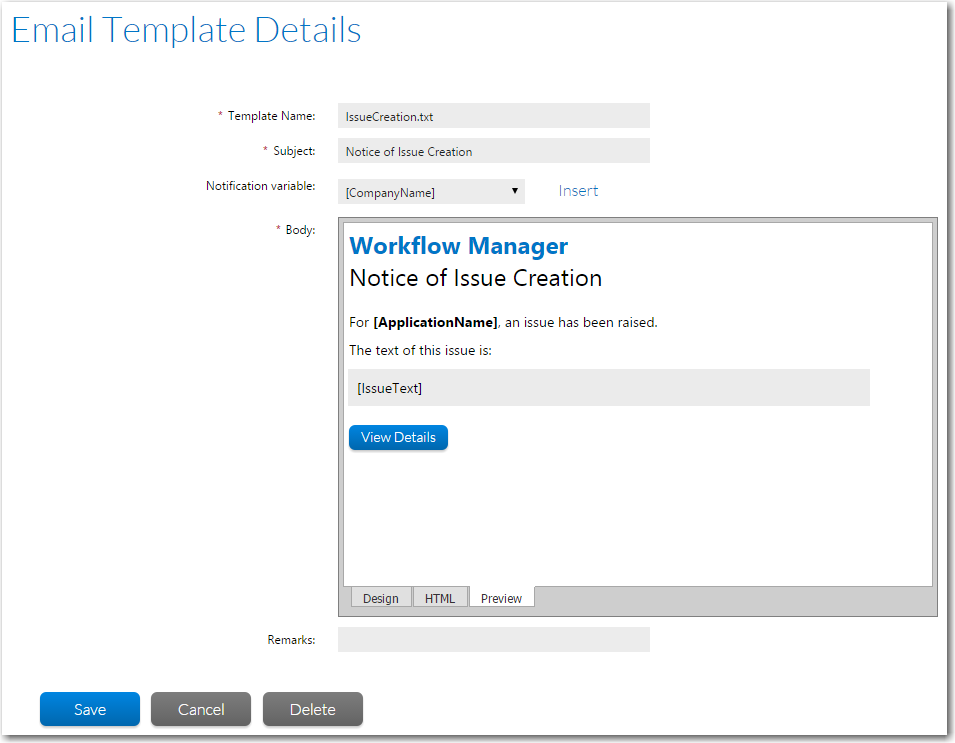
On the Email Template Details page, you can edit both email templates that were shipped with Workflow Manager and also new email templates that you have created. The Email Template Details page includes a text editor that features both a design view and an HTML code view.
Note • In previous releases, email templates were stored on the Workflow Manager server in the Workflow Manager\wwwroot\EmailTemplate directory. Starting with Workflow Manager 2013 R2, the email template text files are stored in the Workflow Manager database. Any edits that you would like to make to the email templates must be made in the Workflow Manager interface on the Email Template Details page. The Workflow Manager server location, however, does include a backup copy of the default email template text files for your reference.
To edit an existing email template, perform the following steps:
To edit an email template:
| 1. | In the navigation bar, click Email Templates in the Settings menu. The Email Template Administration page opens, and lists all existing email templates. |
| 2. | Click the name of the email template that you want to edit. The Email Template Details page opens, displaying the selected email template in a text editor. |
The text editor on the Email Template Details page provides the following views of the selected email template:
| • | Design—Displays an editable view of the text, tables, and images of the email template. Design view gives you an idea of how the email will look when it is opened by the recipient, but it is not rendered accurately: table cell borders are visible, and not all embedded CSS styles are applied. |
| • | HTML—Displays an editable view of the HTML code of the email template. |
| • | Preview—Displays a non-editable preview of how an email created using this template will look when it is opened by the recipient. Table cell borders are not visible, and embedded .CSS styles are applied. |
You switch between these three views by clicking on the tabs at the bottom of the window:
| 3. | The Template Name field lists the name of the text file that identifies this email template. |
Important • When editing one of the default email templates (which were installed with Workflow Manager), it is recommended that you do not edit this field. If you do edit it, you will also need to update its associated entry in the web.config file, as described in Email Template Settings.
| 4. | The Subject field lists the contents of the email’s Subject line. When editing this field, make sure that the final text describes the purpose of this email and prompts email recipients to take action. |
| 5. | Use the controls on the Design tab to modify the format of the text. Alternatively, you could enter in-line CSS styles directly to the text in HTML mode. |
Note • Because some email clients strip head and style tags from emails, CSS styles entered in a <style> element at the top of the email template in HTML mode will not be saved. Therefore, you need to design your email templates using inline styles. To quickly convert from standard CSS to inline styles, you may want to use a CSS “inliner” tool, such as the one available on the MailChimp web site:
http://templates.mailchimp.com/resources/inline-css/
| 6. | Use the Notification Variable list to insert replaceable parameters, if desired, as described in Using Notification Variables in Email Templates. |
| 7. | In the Remarks field, enter notes or comments to identify the purpose of this email template, if desired. |
| 8. | Click Update to save your edits. |
See Also
Workflow Manager 2015 / AdminStudio Enterprise Server 2015 Help Library10 September 2015 |
Copyright Information | Flexera Software |