Workflow Manager 2017
On the Workflow Phase Details view, which opens when you create a new workflow phase or edit an existing workflow phase on the Template Details page, you build the workflow phases of a template.
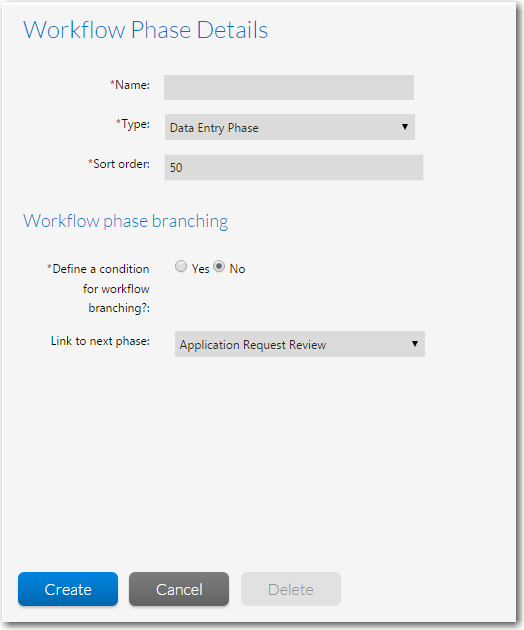
Workflow Phase Details View
The Workflow Phase Details view consists of the following options:
|
Option |
Description |
|||||||||||||||
|
Workflow Phase Name |
Enter a name to identify this workflow phase. |
|||||||||||||||
|
Phase Type |
Select one of the following options to identify the workflow phase type:
Note • By default, an AdminStudio Workflow phase is automatically assigned to the AdminStudio user named admin@servicer.com. To change this default user to a different user, go to the <appSettings> section of the web.config file on the web server and edit the following line: <add key="ASProjectOwner" value="admin@servicer.com" /> Note • If you are editing a Workflow Phase that is in use, the Phase Type field is disabled. |
|||||||||||||||
|
Sort Order |
Enter a number to determine where this workflow phase will appear in the workflow phase list, with lower numbers appearing higher in the list. |
|||||||||||||||
|
Define a condition for workflow branching? |
Select one of the following options:
Branch and Merge Phases In a branch phase, the workflow proceeds in two different paths depending upon an item of data that was collected. A merge phase is where a workflow with branch phases merges back together. |
|||||||||||||||
|
Link to next phase |
Select the existing phase that you want to follow this phase in the Workflow. Note • This option is displayed only if the Define a condition for workflow branching? option is set to No. Caution • Even though phases are listed in a specific order in the phase/step tree, they are not automatically linked together. If you create a phase but fail to link it to a preceding phase, it will not be visible in the workflow. Tip • The easiest way to link phases is to create all of the phases first, and then edit each of them to link the phases together. |
|||||||||||||||
|
Select the branching condition |
Select a Data Element to use as the branching condition. If one the following is true, the Select the branching condition list will be empty:
Note • This option is displayed only if the Define a condition for workflow Branching? option is set to Yes. |
|||||||||||||||
|
Condition Value / Next Phase List |
If the Define a condition for workflow branching? option is set to Yes and you have selected a data element from the Select the branching condition list, a table displaying the possible values for that data element is displayed:
|
|||||||||||||||
|
Create / Update |
Click to save your entries. |
|||||||||||||||
|
Delete |
Delete this workflow phase. |
Workflow Manager 2017 Help Library (Updates 1 and 2)3 September 2018 |
Copyright Information | Flexera Software |