
Workflow Manager 2017
To customize Workflow Manager for your organization, you can add new menu items to the Workflow Manager navigation bar that will open a URL that you specify. You can add new items to any of the navigation bar tabs, such as Workflows, Administration, Settings, etc.
To add a menu item to the Workflow Manager navigation bar, you need to edit a file named NavExtension.xml file and specify the following information:
| • | Name of the top-level tab, such as Administration. |
| • | Name of the heading of the menu group, such as View Tables. |
| • | Name of the menu item, such as Custom SQL Tables. |
| • | A URL link for the menu item. |
To add a custom menu item to the main Workflow Manager navigation bar, perform the following steps.
To add a custom menu item to the Workflow Manager navigation bar:
| 1. | On the server where Workflow Manager is installed, locate and open the following file in a text editor (running it as an Administrator): |
C:\AdminStudioWebComponents_2017\wwwroot\NavExtension\NavBar_Extensions.xml
By default, the code in this file is “commented out” so that it is not applied to Workflow Manager.
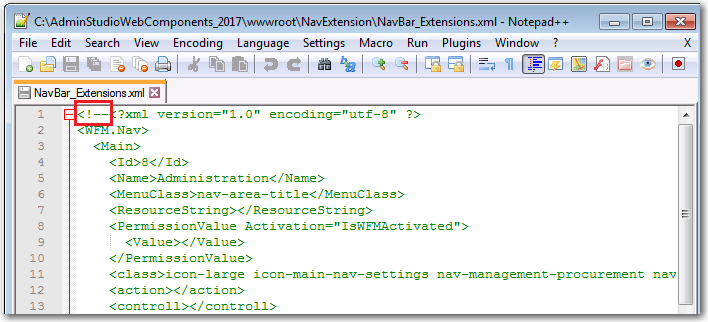
| 2. | Remove the <!-- characters at the very beginning of the XML file, and the --> characters at the very end of the file and save the file. |
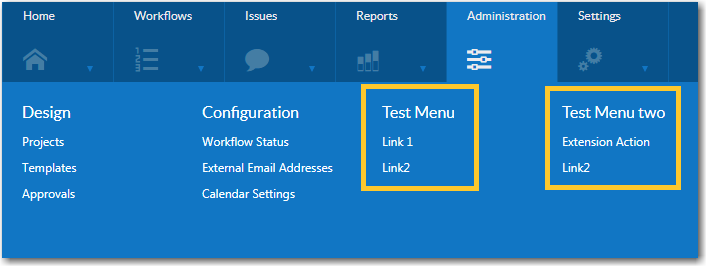
After you save this file and open Workflow Manager in a new browser window, you will notice that several new workflow items are added to the Administration tab: Test Menu and Test Menu two.
| 3. | Locate the <Name> element under <Main>. By default, <Name> is set to Administration. |
<WFM.Nav>
<Main>
<Id>8</Id>
<Name>Administration</Name>
| 4. | Set the <Name> element to the name of the main tab that you want to add a menu item to: Home, Workflows, Issues, Reports, Administration, or Settings. |
| 5. | Under the <Name> element, locate the <SubItem> element. By default. this element is set to Test Menu. |
<SubItem>
<Name>Test Menu</Name>
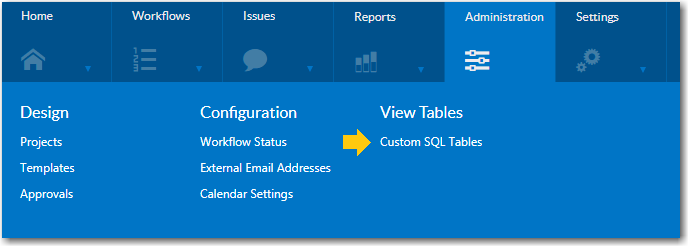
| 6. | Change the value of the <SubItem> element to the name of the new menu heading that you want to add, such as View Tables. |
| 7. | Under that <SubItem> element, locate the first <ItemList> element. |
<ItemList>
<Name>Link 1</Name>
<ResourceString></ResourceString>
<PermissionValue Activation="IsWFMActivated">
<Value></Value>
</PermissionValue>
<class>nav-item</class>
<action>ActionLink1</action>
<controll>Test</controll>
<Actiondata>
<data>
<key>id</key>
<value>1</value>
</data>
</Actiondata>
</ItemList>
| 8. | Change the value of the <Name> element to the name of the menu item you want to add, such as Custom SQL Tables. |
| 9. | Specify the relative URL of the page that you want to open when this menu item is clicked by setting values for the following elements: |
<action>ActionLink1</action>
<controll>Test</controll>
<Actiondata>
<data>
<key>id</key>
<value>1</value>
</data>
<Actiondata>
For example, if the menu item is configured with the above values, the URL that would be opened when the menu item was selected would be the following:
http://localhost:81/Test/ActionLink1/1
| 10. | To add another item to the menu list, duplicate and edit the entire <ItemList> element. |
| 11. | Save the NavBar_Extensions.xml file, and then open Workflow Manager in a new browser window. The new menu item will now be listed in the menu. |
| 12. | To add custom menu items to second main tab of the navigation menu, make a copy of the entire <Main> element in the NavBar_Extensions.xml file, change the <Name> element to another one of the main menu tabs (such as Reports) and then specify the <SubItem> and <ItemList> elements as described above. |
Workflow Manager 2017 Help Library (Updates 1 and 2)3 September 2018 |
Copyright Information | Flexera Software |