Creating a New Project
Workflow Manager 2020
Create projects for sets of workflow requests with the same SLA (service level agreement) conditions. Each project must be associated with a workflow template, a workflow administrator company and a consumer company. You may also want to revisit email notification settings, since the default values defined for your project will be applied to each new workflow request.
To create a new project:
| 1. | In the navigation bar, click Projects in the Administration menu. The Project Administration page opens. |
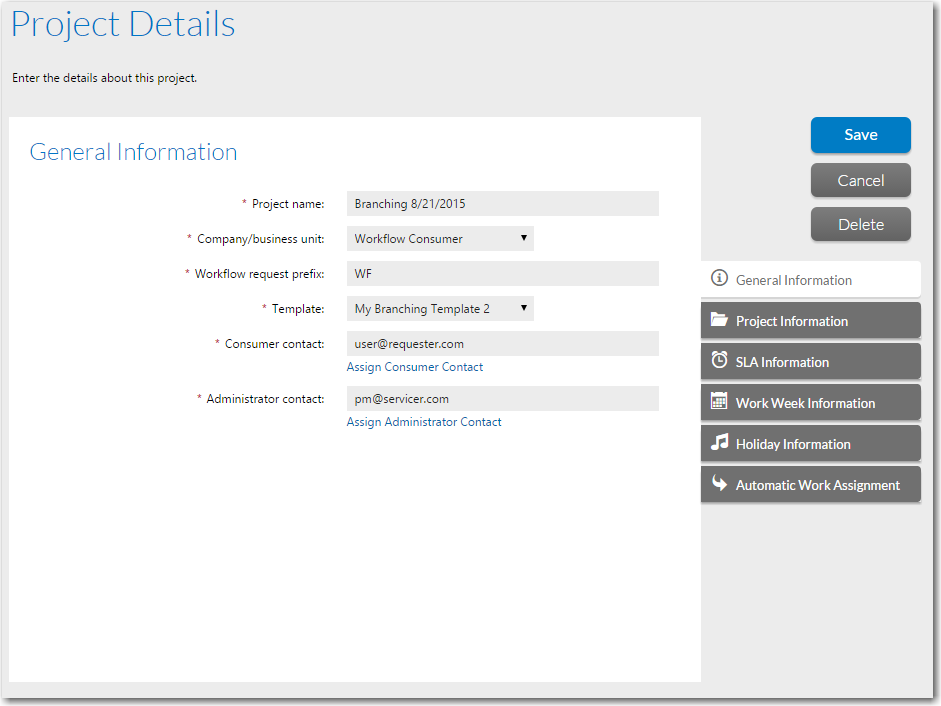
| 2. | Click Add. The Project Details page opens. |
Tip:The Add button will be disabled if there are only global workflow templates available for your company. Such templates are identified by the word Global in the Library field of the Template Administration page. Before proceeding, ensure you have created at least one private template for your company, perhaps by copying an existing global template if there is one appropriate to your project. See Creating a New Template or Copying a Template for details.
| 3. | Enter the details of your new project, as described in Project Details Page. You will need to assign a template, a consumer company, and a contact from both your workflow administrator company and the consumer company you have selected. See the following for more information: |
| 4. | Click the Save button. The Project Details page closes, and the new project appears in the list on the Project Administration page. |
Note:A project is assigned the permissions and notification settings that were defined in its associated workflow template. However, you can override a workflow request’s notifications settings on the Workflow Request Notifications Override page, as described in Overriding Default Email Notification Settings for an Individual Workflow Request.
See Also