Creating a New Custom Job
AdminStudio Enterprise Server 11.0 | Job Manager
Edition: Job Manager is included with AdminStudio Enterprise Edition.
When you create a Custom Job, you can include only the Job Steps that you want to perform, in the order you want to perform them, and using the source and target packages that you select. Custom Jobs can include the Import Job Step, while Template Jobs cannot.
To create a Custom Job, perform the following steps.
To create a new Custom Job:
|
1.
|
Login to AdminStudio Enterprise Server. |
|
2.
|
Click the Job Manager tab. The Jobs Queue page opens. |
|
3.
|
Click the Add button. The Add Job page opens with the Template option selected. |
|
4.
|
Enter a Name for this new job. |
|
5.
|
Clear the Template option. An empty Define Job Steps area opens. |

|
6.
|
Select one of the listed tasks from the Step Type list: |
|
•
|
Scan for Dependencies—Analyze a Windows Installer package for dependent files. |
|
•
|
Directory Monitoring—Use to establish a consistent, repeatable process in which a directory and, optionally, its subdirectories are monitored for any new or modified Windows Installer package files, and if any changes are detected, those new or modified files are then either imported or re-imported into the Application Catalog. |
|
•
|
Validation—Verifies the internal data integrity of a Windows Installer package. |
|
•
|
Conflict Detection—Performs conflict detection on selected packages using Conflict ACE Rules |
|
•
|
Import—Import a selected package into the Application Catalog. |
|
•
|
Best Practice Detection—Performs conflict detection on a single package using Best Practice ACE Rules to enforce Windows Installer standards. |
|
•
|
Resolution—Performs automatic conflict resolution on selected packages. |
Each time you select a Step Type, you are prompted to specify additional information:
|
|
|
|
Scan for Dependencies
|
|
1.
|
Click Next. The Step 2 of 2 View opens. |
|
2.
|
Select the packages or groups of packages that you want to scan, and then click Finish to save this Job Step. |
|
|
Directory Monitoring
|
|
1.
|
Click Next. The Step 2 of 2 View opens. |
|
2.
|
In the Directory Name box, enter the UNC path of the directory that you want to monitor. |
|
3.
|
Choose whether to Include subdirectories in the ‘Directory Monitoring’ process. |
|
4.
|
Click Finish to save this Job Step. |
|
|
Validation
|
|
1.
|
Click Next. The Step 2 of 2 View opens. |
|
2.
|
Select the packages or groups of packages that you want to validate. |
|
3.
|
Click Finish to save this Job Step. |
|
|
Conflict Detection
|
|
1.
|
Click Next. The Step 2 of 4 vew opens. |
|
2.
|
Select the source packages or groups of packages that you want to include in the conflict detection process, and then click Next. The Step 3 of 4 View opens. |
|
3.
|
Select the target packages or groups of packages that you want to use in the conflict detection process and click Next. The Step 4 of 4 View opens. |
|
4.
|
Select the set of Conflict ACE Rules that you want to include in the conflict detection process and click Finish to save this Job Step. |
|
|
Import
|
|
1.
|
Click Next. The Step 2 of 4 View opens. |
|
2.
|
Select a package to import. |
|
3.
|
Specify whether to include the package in the Software Repository |
|
4.
|
Click Next. The Step 3 of 4 View opens. |
|
5.
|
Select any transform (.mst) or patch (.msp) files to import. |
|
6.
|
Click Next. The Step 4 of 4 View opens. |
|
7.
|
Select one or more destination groups into which the package will be imported. |
|
8.
|
Click Finish to save this Job Step. |
|
|
Best Practice Detection
|
|
1.
|
Click Next. The Step 2 of 2 View opens. |
|
2.
|
Select the packages or groups of packages that you want to perform Best Practice conflict detection on. |
|
3.
|
Click Finish to save this Job Step. |
|
|
Resolution
|
|
1.
|
Click Next. The Step 2 of 3 View opens. |
|
2.
|
Select the packages or groups of packages that you want to perform conflict resolution on, and then click Next. The Step 3 of 3 View opens. |
|
3.
|
Select the Conflict ACE Rules that you want to resolve automatically. |
|
5.
|
Click Finish to save this Job Step. |
|
|
7.
|
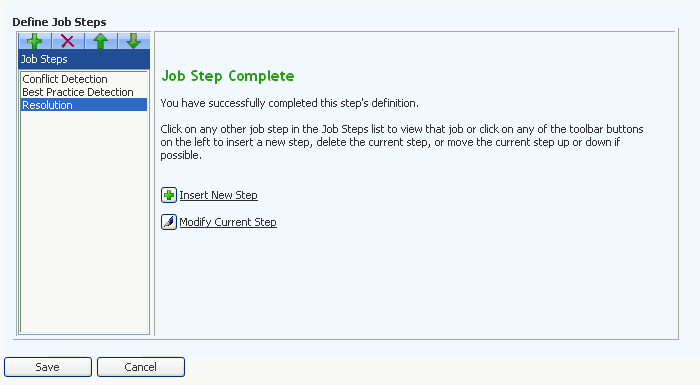
Each time you click Finish, the new Job Step is saved and you are prompted to add another Job Step. |
|
8.
|
Continue adding desired Job Steps by clicking Insert New Step. |
|
9.
|
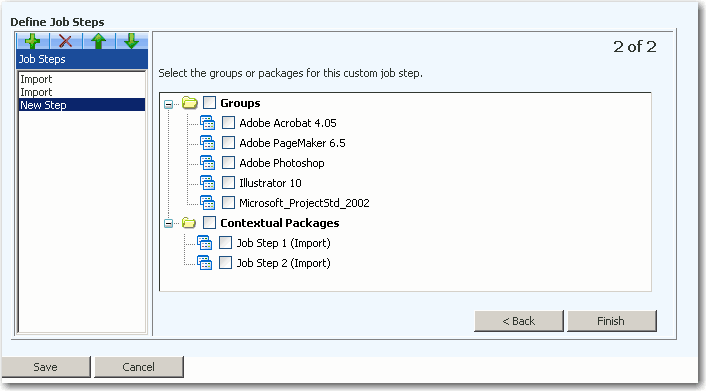
If your Job includes Import or Directory Monitoring Job Steps, you can perform actions on those imported or reimported packages in subsequent Job Steps. For example, if you add a Validation Job Step after an Import or Directory Monitoring Job Step, you can choose to validate the newly imported/reimported package or packages from the previous Steps. |
To make these packages available for selection when defining subsequent Job Steps, they are listed in the Contextual Packages group in the package tree and are referred to in context of their associated step, such as Job Step n, where n is the number of the Job Step that performed the import.
Note: During a Directory Monitoring Job Step, one or more packages in the monitored directory may be imported or reimported into the Application Catalog. Therefore, if you select a Directory Monitoring Job Step as a Source for a subsequent Job Step, that Step’s action will be performed on all of the newly imported or reimported packages.
|
10.
|
Schedule this Job by selecting one of the following options from the Execution list: |
|
•
|
Immediate—Execute this Job immediately. |
|
•
|
Scheduled—Execute this Job at the Date and Time selected. |
Note: You can also choose to set this job to reoccur at a specified interval. See Rescheduling a Job
|
11.
|
Click Save. The new Job is now listed on the Jobs Queue page and will be run at its scheduled time. |
Open topic with navigation