Importing Applications, Mobile Apps, and Packages from ConfigMgr (Formerly called as System Center Configuration Manager)
AdminStudio 2021 | 21.0
Edition:Application Manager is included with AdminStudio Professional and Enterprise Editions.
You can import applications and mobile apps from System Center 2012 Configuration Manager or packages from System Center 2007 Configuration Manager into the Application Catalog.
You can import the following deployment types from System Center 2012 Configuration Manager:
|
•
|
Microsoft App-V 4.x and 5.0 |
|
•
|
Apple iOS (local and public store link) |
|
•
|
Google Android (local and public store link) |
|
•
|
Windows Store (local only) |
When you import packages from ConfigMgr (Formerly called as System Center Configuration Manager) from versions prior to 2012, Application Manager also imports information that will assist you in migrating that package to System Center 2012 Configuration Manager’s application model.
Note:Before you can perform an import from ConfigMgr (Formerly called as System Center Configuration Manager), you need to define a named connection to a ConfigMgr (Formerly called as System Center Configuration Manager) Server, as described in Creating a New Distribution System Connection Setting.
To import applications and mobile apps from Microsoft System Center 2012 Configuration Manager:
|
2.
|
On the Home tab of the ribbon, click the Import button. The Source panel of the Import Wizard opens. |
|
3.
|
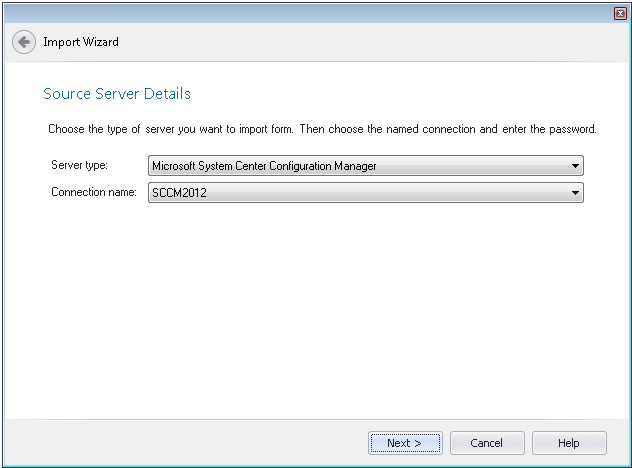
Select Packages from a deployment system and click Next. The Source Server Details panel opens. |
|
4.
|
From the Server type list, select ConfigMgr (Formerly called as System Center Configuration Manager). |
|
5.
|
From the Connection name list, select the named connection you created to your ConfigMgr (Formerly called as System Center Configuration Manager) server. |
|
6.
|
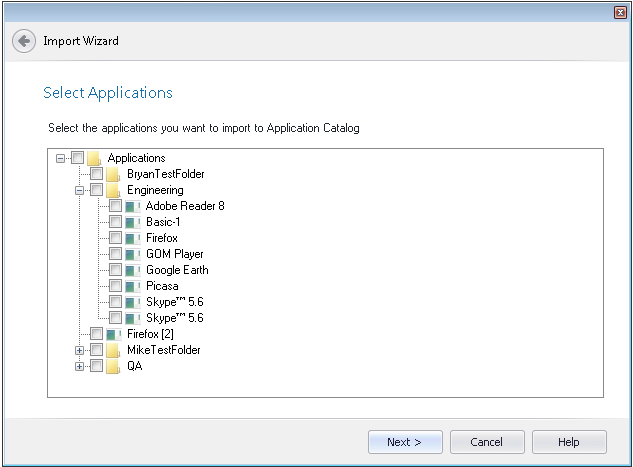
Click Next. The Select Applications (for System Center 2012 Configuration Manager) or Select Packages for System Center 2007 Configuration Manager) panel opens, listing all of the applications or packages in the specified server. |
|
7.
|
Select the applications or packages that you want to import. |
|
8.
|
Click Next. The Destination Group panel opens. |
|
9.
|
On the Destination Group panel, select the group into which you want the selected applications to be imported. |
Note:If you launched the Import Wizard by selecting a group in the tree and then clicking Import, that group will be selected by default on the Destination Group panel.
Note:If you want to import the packages into a new group, click the New Group button to create a new group.
|
10.
|
Set the Create subgroups based on source folder structure option to determine the location of the imported packages in the Application Manager tree: |
|
•
|
Selected—Subgroups of the selected group will be created in the Application Manager tree that mimic the directory structure of the selected ConfigMgr (Formerly called as System Center Configuration Manager) directory, and the packages will be imported into those subgroups. |
|
•
|
Not selected—All of the packages in the selected ConfigMgr (Formerly called as System Center Configuration Manager) directory (and its subdirectories) will be imported into the root of the selected group. |
|
11.
|
Click Next. The Summary panel opens. |
|
12.
|
Review the information in the Summary panel. If you are satisfied with the import options, click Next to start the import. |
Progress messages are listed on the Running the Import panel.
|
13.
|
When import is complete, click Finish to close the wizard. The applications imported from ConfigMgr (Formerly called as System Center Configuration Manager) will then be listed in the Application Manager tree. |
Note:Depending on whether options have been set on the Import Options / General tab of the Application Manager Options dialog box (available from the Application Catalog tab menu), testing may be performed after import.
See Also
Package Information Imported from ConfigMgr (Formerly called as System Center Configuration Manager)
Importing From ConfigMgr (Formerly called as System Center Configuration Manager)
Managing ConfigMgr (Formerly called as System Center Configuration Manager) Application Model Data
Publishing Packages to ConfigMgr (Formerly called as System Center Configuration Manager)