Modifying Configuration to Extract and Process DB2 Data
Data Platform
This section provides step-by-step instructions for enabling the Data Platform DB2 extractor to extract data from a DB2 database using the IBM Native Provider rather then the default MS OLEDB Provider.
The process described here requires modification to the Normalize DatabaseProvider.config file, located in <Installpath>\BDNA\Normalize\Conf, using a text editor such as Notepad.
To extract data from a DB2 database:
|
1.
|
Open the DatabaseProvider.config file in a text editor. |
|
2.
|
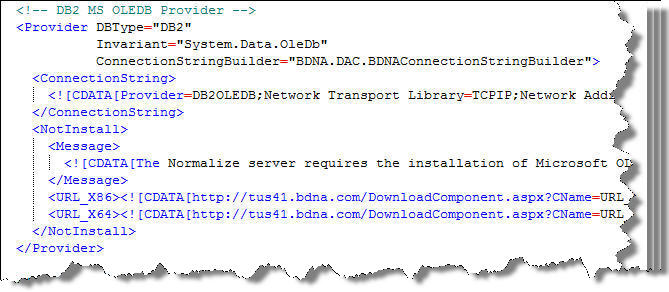
By default, the standard Normalize 4,3 extractor uses the MS OLEDB Provider for DB2, as shown in You must edit the DatabaseProvider.config file so that it uses the IBM Native Provider for DB2 instead. |
Note:Both the MS OLEDB and the IBM Native Provider are included in the DatabaseProvider.config file. Only the MS OLEDB provider is activated by default.
DatabaseProvider.config with DB2 MS OLEDB Provider activated
|
3.
|
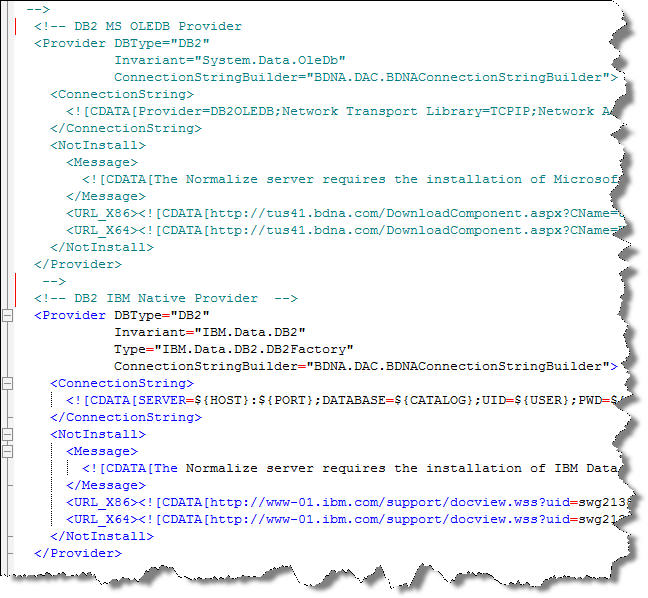
You can make the modification to DatabaseProvider.config simply by commenting out the DB2 MS OLEDB Provider section and un-commenting the DB2 IBM Native Provider section as shown in . |
DatabaseProvider.config with DB2 IBM Native Provider activated
|
4.
|
Save the modified DatabasaeProvider.config file. |
|
5.
|
Restart the Normalize service. |
|
6.
|
Test the connection to DB2. |
|
8.
|
On the IBM Data Server Client Packages page, click the IBM Data Server Runtime Client link. |
Link to IBM Data Server Runtime Client
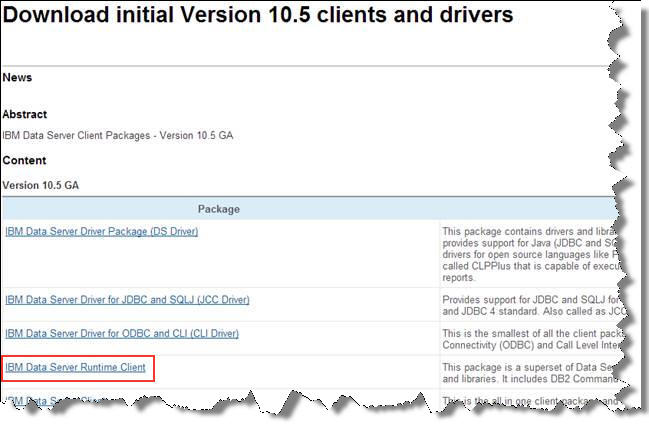
Note:You are required to have an IBM ID to download the Data Server Runtime Client.
|
a.
|
Select the appropriate download for your Normalize installation: |
|
•
|
Select the IBM 32-bit Data Server Runtime Client if you are running Normalize in 32-bit mode |
|
•
|
Select the IBM 64-bit Data Server Runtime Client if you are running Normalize in 64-bit mode |
|
b.
|
Download and install the IBM Data Server Runtime Client you selected. |
|
9.
|
You have completed the modifications necessary to extract and process data from your DB2 database. Reboot your system if necessary, and re-launch Normalize. |
IT Discovery Tool Data Source—MySQL
|
•
|
Server Name—Enter the name of the database server. |
|
•
|
Database—Enter the name of the database. |
|
•
|
User Name—Enter the username that enables access to the database. |
|
•
|
Password—Enter the password that enables access to the database. |
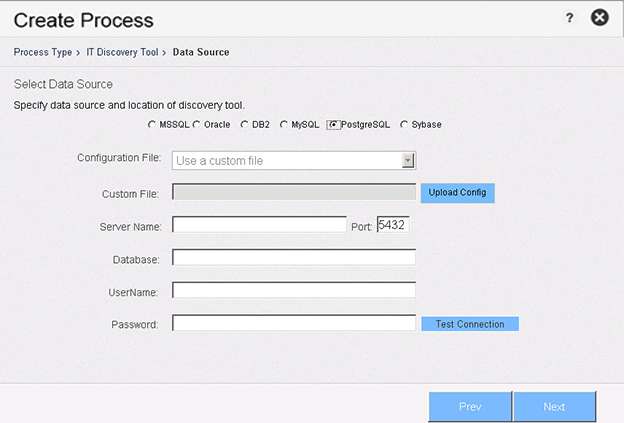
IT Discovery Tool Data Source—PostgreSQL
|
•
|
Custom File—Click Upload Config and select the custom file to be used for this process. (This option may be grayed-out and not available, depending on the database settings.) |
|
•
|
Server Name—Enter the name of the database server. |
|
•
|
Port—Enter the port used to connect to the database. |
|
•
|
Database—Enter the name of the database. |
|
•
|
User Name—Enter the username that enables access to the database. |
|
•
|
Password—Enter the password that enables access to the database. |
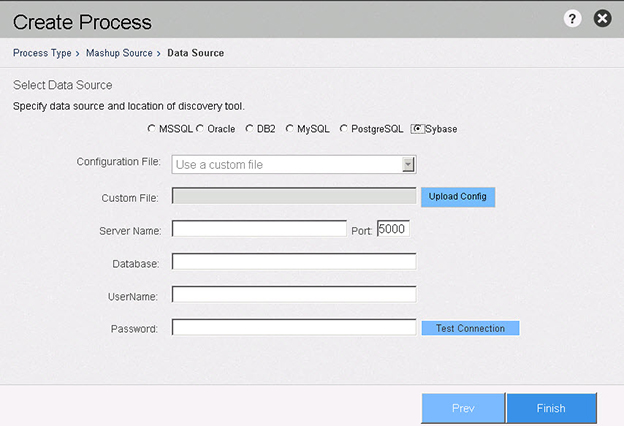
IT Discovery Tool Data Source—Sybase
|
•
|
Server Name—Enter the name of the database server. |
|
•
|
Port—Enter the port used to connect to the database. |
|
•
|
Database—Enter the name of the database. |
|
•
|
User Name—Enter the username that enables access to the database. |
|
•
|
Password—Enter the password that enables access to the database. |