Proceeding Step-by-Step through the Configuration Wizard
After the initial installation is complete, the Configuration Wizard launches automatically. You can also launch the wizard at a later time from the Windows Start menu. Alternatively, you can locate the ConfigurationWizard.exe file in the BDNA\BDNA Data Platform\Bin installation folder, and double-click the ConfigurationWizard.exe file to launch the Configuration Wizard.
To configure Data Platform using the Configuration Wizard:
| 1. | The first screen you see is the Welcome screen, which lists the tasks you will complete during the Configuration Wizard. |

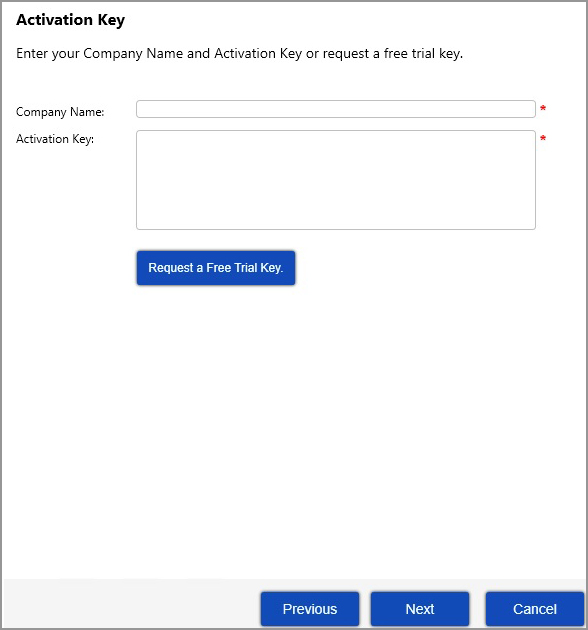
| 2. | The next screen you see is the Activation Key screen. Enter your Company Name and Activation Key, and then click Next to activate your key and proceed with the installation. |
| 3. | Enter your Data Platform settings or simply use the defaults already preselected, and click Next. |
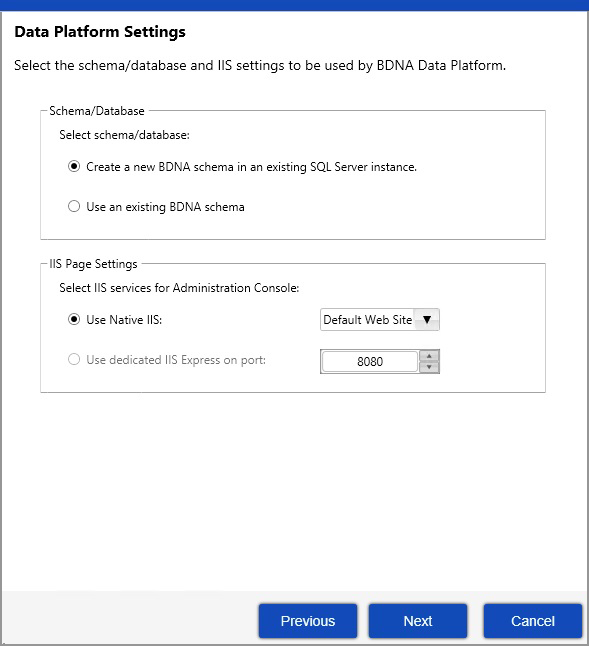
| 4. | The Configuration Wizard opens a dialog in which you select database and IIS options. |
Database options—Select one of these database options:
| • | Create a new BDNA schema in an existing SQL Server instance |
| • | Use an existing BDNA schema |
IIS options—Select one of these IIS options: (available IIS options will vary depending on options selected during setup.)
| • | Use Native IIS: (Select Web Site) |
| • | Use dedicated Normalize IIS Express on port: (Select Port number) |
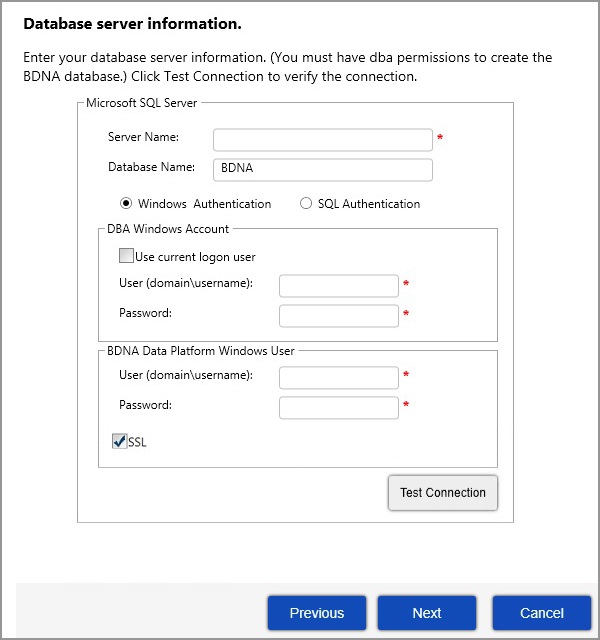
Note:The “Create a new BDNA Schema...” option requires two users: a DBA user that creates the databases, and a service user that runs the Data Platform service. We recommend using a “no expiration password” if you are using Windows Authentication.
| 5. | On the Database server information screen, enter your server name and user (domain/password) information. Optionally, click the SSL checkbox to enable SSL encryption for the database connection. You may select the “Test Connection” option if you wish to test that your settings work before committing them. When ready, click Next. |
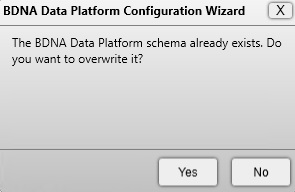
| 6. | You may be prompted to overwrite an existing schema if one already exists. Click ‘Yes’ to proceed. |
Note:If a DBA user cannot use the standard setup wizard, select “Use an Existing Schema” in order to install Normalize. Then continue to install Normalize as per usual.
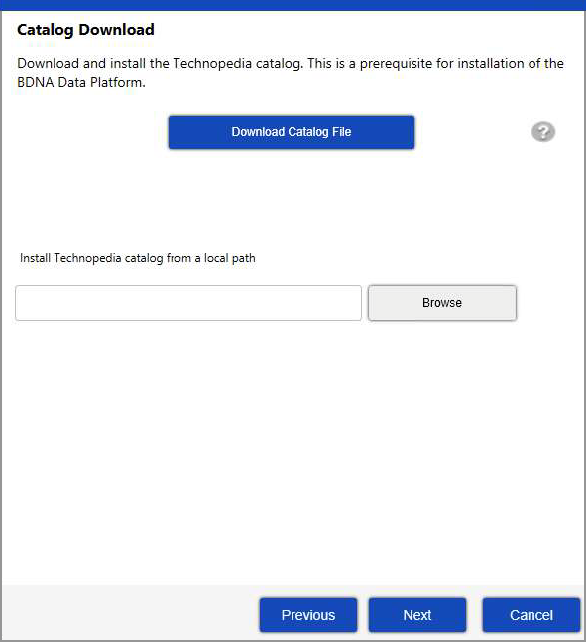
| 7. | If the Catalog has not been downloaded and installed, the next screen prompts you to download and install the catalog. Click Download Catalog File to download a new catalog file, or click Browse to locate a catalog file that has already been downloaded. |
If you are using a system that does not have Internet access, you can download the catalog on a system that has Internet access, then copy the downloaded catalog to the Data Platform installation server. Click the question mark on the Catalog Download dialog to obtain the URL for locating and downloading the catalog.
If you choose to download the catalog file using Internet Explorer, you may see the error message, “Your current security settings do not allow this file to be downloaded.” To enable the download, use the following procedure to change your security settings:
| a. | Launch Internet Explorer. |
| b. | Select Tools -> Internet Options from the menu bar. |
| c. | Go to the Security tab. |
| d. | Select Trusted sites under “Select a zone to view or change security settings.” |
| e. | Click the Sites button. |
| f. | Under “Add this website to the zone,” enter “http://tus50.bdna.com.” Click Close. |
| g. | Click OK to accept the changes. |
| h. | Download the partial catalog from Internet Explorer. |
| 8. | Click Next in the Catalog Download dialog. |
You can now either create database fields and definitions or use existing database fields and definitions.
| • | Create database fields and definitions—Use the following information to create database fields and definitions: |
|
Field |
Definition |
|||||||||||||||||||||
|
Database Name |
Name assigned to the database (default BDNA). |
|||||||||||||||||||||
|
Windows Authentication (Windows Authentication is only available with SQL Server) |
Method of authenticating to the database server. If you select this option, specify the following.
|
|||||||||||||||||||||
|
SQL Authentication |
Method of authenticating to the database server. If you select this option, specify the following:
|
|||||||||||||||||||||
|
Oracle Authentication |
Method of authenticating to the database server. If you select this option, specify the following.
|
| • | Use existing database fields and definitions—Use the following information to use existing database fields and definitions. |
|
Field |
Definition |
||||||||||||||||||
|
Windows Authentication (Windows Authentication is only available with SQL Server) |
Method of authenticating to the database server. If you select this option, specify the following.
|
||||||||||||||||||
|
SQL Server Authentication |
Method of authenticating to the database server. If you select this option, specify the following:
|
||||||||||||||||||
|
Oracle Authentication |
Method of authenticating to the database server. If you select this option, specify the following.
|
||||||||||||||||||
|
Generate Scripts |
Generates scripts that can be used by a DBA to create the database schema, users, and in the case of Oracle, tablespaces. To enable the Generate Script button, you must enter connection information for the server on which the database is located, and the password you use for BDNA Data Platform authentication. Clicking Generate Scripts opens a Notepad file that contains a script which can be used by a DBA to create the database schema, users, and tablespaces. Generate Scripts creates only the db schema, users, and, for Oracle, the tablespace. The remainder of the objects (table, proc stock, etc.) are created by the BDNA Data Platform installer Note:The password you enter in the Use existing database dialog is used for creating the database. |
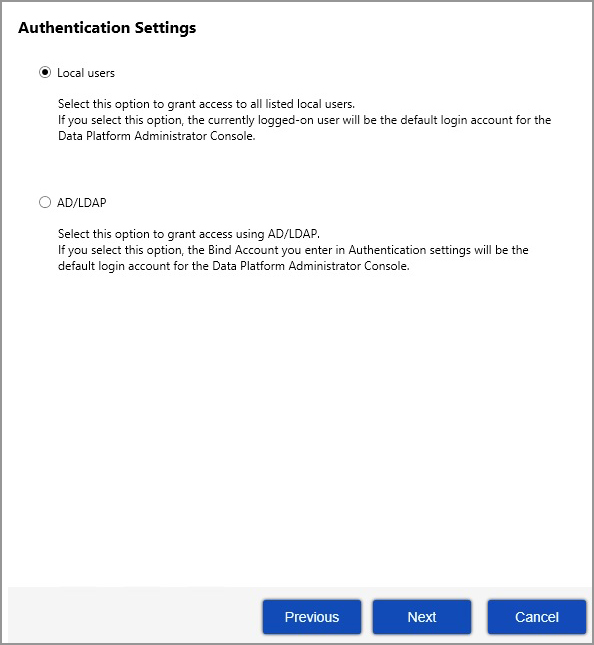
| 9. | The next screen that opens is the Authentication Settings dialog. You can select Local users, AD/LDAP, or SAML Authentication. |
| • | If you select Local user, the currently logged-on user will be the default login account for the Data Platform Administration Guide. Proceed to step 11. |
| • | If you select AD/LDAP, the Authentication Settings dialog opens when you click Next. The Bind Account you enter in Authentication Settings will be the default login account for the Data Platform Administration Console. |
| • | If you select SAML Authentication, review the settings and prerequisites information in Optional SAML Authentication Settings and Prerequisites before clicking Yes to acknowledge you have read and understood the documentation pertaining to this feature. Then enter the required SAML Authentication Settings. |
Caution:If you plan to install the BDNA User Console with the BDNA Data Platform, there is a known limitation regarding the User Console Local users authentication mechanism. Although Local users authentication mode supports mapping of users to BDNA roles, it does not support mapping of groups to BDNA roles. To map groups to BDNA roles, you must select AD/LDAP authentication mode instead.
If you selected AD/LDAP or SAML Authentication, the next screen that opens is the Authentication Settings dialog. A detailed explanation of the AD/LDAP settings required in the Authentication Settings dialog follows. (For SAML Authentication settings, see Optional SAML Authentication Settings and Prerequisites for further explanation.)
|
Field |
Description |
|||||||||||||||
|
Active Directory drop-down |
Select Active Directory or LDAP |
|||||||||||||||
|
Bind Account panel |
|
|||||||||||||||
|
Directory Connection panel |
|
|||||||||||||||
|
User Search panel |
|
|||||||||||||||
|
Authorities Search |
|
|||||||||||||||
|
Populator |
|
| 10. | If your licensing key includes Normalize CM, the next screen prompts you to configure Normalize CM now or later. If you decide to postpone installation of Normalize CM, or your licensing key does not provide the optional Normalize CM feature, continue with Step 11. If you decide to install it now, proceed to Step 12. |
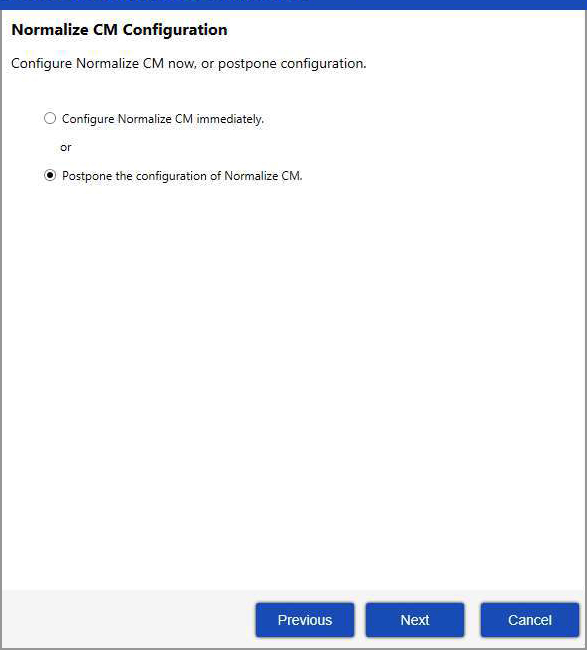
Note:Normalize CM is compatible with SQL Server only.
| 11. | Click Next to proceed with the installation. In the screen that opens, click Execute. The installation begins and the screen shows the progress. |

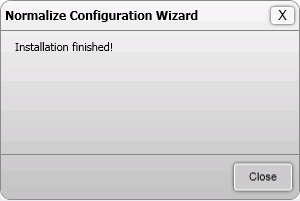
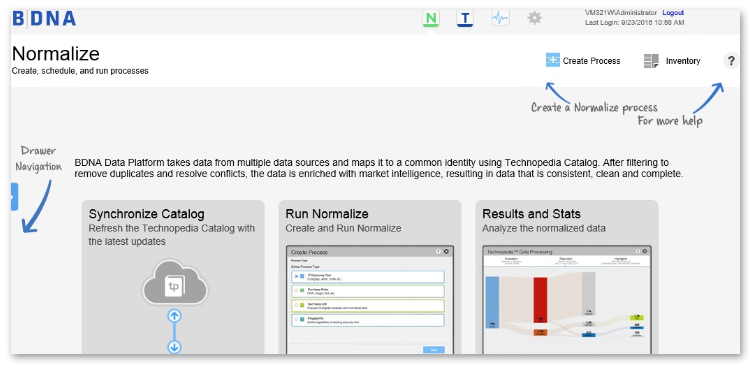
| 12. | When the installation is complete, a confirmation message appears. Click Close to close the message and open the BDNA Data Platform Administration Console in a browser. The following image shows the BDNA Data Platform console. |
Note:The BDNA Data Platform Administration Console requires Windows authentication for login. By default, it will only open for the user who installed Data Platform using their Windows username and password. See the Data Platform Administrator Guide for more information about granting console access to a new user.
Optional SAML Authentication Settings and Prerequisites
The SAML Authentication screen appears in the Administrator Console Configuration Wizard and in the User Console Configuration Wizard when the Administrator Console and the User Console are installed on the same machine and the Administrator Console is configured for SAML. Observe the requirements and recommendations and perform the required IdP configurations before completing the SAML Authentications settings, shown below, if you are using SAML to integrate with a single sign-on identity provider (IdP).
Note:When installing Data Platform with SAML authentication support, configure the Administrator Console before you configure the User Console.
SAML Requirements and Recommendations
The following requirements apply to SAML support in Data Platform:
-
The Administrator Console and the User Console must be installed on the same machine. (Follow the system requirements for the User Console machine to ensure the server has sufficient compute and memory to accommodate both applications.)
-
Windows Server 2016 or later required.
-
Data Platform version 5.5.60 or later required.
-
Web Server Certificate: Requiring access to Data Platform over HTTPS using a proper web server certificate (not self-signed) is highly recommended.
-
Signing/Encryption Keys: Data Platform enforces signed and encrypted authorization requests. This requires the administrator to create a valid x509 certificate (which may be self-signed). Only one certificate is required to both sign and encrypt the SAML requests. The certificate should be exported in both PKCS12 format and binary format according to the following guidelines:
-
PKCS12 format with private key (but do not include the certificate chain in the export).
-
Binary format without the private key.
-
The private key should be protected with a password of at least 8 characters (minimum).
-
IdP Configurations: Administrators must perform additional configurations and create SAML 2.0 applications in their IdP vendor’s utilities and obtain IdP Metadata URL values for those applications.
IdP Configurations Required for SAML Authentication
Data Platform’s SAML configuration is tested and supported for Okta, for Microsoft's ADFS and Entra, and for Ping Federate. In your IdP vendor’s configuration tools, you must create a new SAML 2.0 application. IdP configuration settings are supplied below for supported identity providers:
-
Ping Federate users: contact Flexera technical support for guidance.
Flexera recommends you choose an application URL your users will connect to when accessing Data Platform’s Administrator Console or User Console. This application URL should begin with HTTPS and be resolvable via DNS. For example, the application URL, https://prod.dp.flxra.mydomain.us, could translate to the URL for your production Data Platform instance.
Two separate SAML 2.0 applications must be created: one for the Data Platform Administrator Console and one for the Data Platform User Console. For the SAML 2.0 applications use the following settings in your IdP vendor’s environment.
| Setting | Description |
|---|---|
| Single Sign-on URL |
Administrator Console Use the URL for your application hostname + /bdna-admin/SAML/ACS. For example: https://prod.dp.flxra.mydomain.us/bdna-admin/SAML/ACS
User Console Use the URL for your application hostname + /bdna/saml/SSO. For example: https://prod.dp.flxra.mydomain.us/bdna/saml/SSO
|
| Audience URI | If your organization does not provide or enforce the values set for Audience URI, you can use the same value you provided for Single Sign-on URL. |
| Group Attribute Statements |
|
| Advanced Settings |
|
When the SAML 2.0 application has been created, obtain the IdP Metadata URL for both applications. This can be obtained by the View IdP Metadata action associated with the SHA2 SAML Signing Certificate for the created application. You will need this value for the SAML Authentication Settings in the Configuration Wizard.
Two separate Relaying Party Trusts must be added to ADFS. One for the Data Platform Administrator Console and one for the Data Platform User Console. Use the following settings.
| Setting | Description |
|---|---|
| Relaying Party Identifiers |
Administrator Console Use the URL for your application hostname + /bdna-admin/SAML/ACS. For example: https://prod.dp.flxra.mydomain.us/bdna-admin/SAML/ACS
User Console Use the URL for your application hostname + /bdna/saml/SSO. For example: https://prod.dp.flxra.mydomain.us/bdna/saml/SSO
|
| Advanced | For Data Platform, SHA2. For User Console, SHA1 (this will be enhanced in the future). |
| Signature | Upload the public certificate (binary format) from the Signing/Encryption key created as part of the SAML Requirements and Recommendations. |
| Claims Issuance Policy Transform Rules |
|
Two separate Enterprise applications must be created. One for the Data Platform Administrator Console and one for the Data Platform User Console. Choose "Create your own application" and select "Integreate with other application." In the Single sign-on menu, choose SAML. Use the following settings.
In the Single sign-on menu, choose SAML. Then, use the following settings.
| Setting | Description |
|---|---|
| Reply URL |
Administrator Console Use the URL for your application hostname + /bdna-admin/SAML/ACS. For example: https://prod.dp.flxra.mydomain.us/bdna-admin/SAML/ACS
User Console Use the URL for your application hostname + /bdna/saml/SSO. For example: https://prod.dp.flxra.mydomain.us/bdna/saml/SSO
|
| Entity Id | If your organization does not provide or enforce the values set for Audience URI, you can use the same value you provided for Reply URL. |
| Attributes and Claims |
|
| SAML Certificates | Token signing: Sign response and assertion |
| Token Encryption | Enabled |
Additional Settings and Configuration
The default hashing algorithm for User Console is set to SHA1. This can changed for both new by modifying the saml.signatureAlgorhtim property in the file, pentaho-saml-default.cfg, located in the User Console\Solution\System directory prior to executing the configuration wizard. Currently available settings include the following:
- SHA1
- SHA256
- SHA512
For customers already using SAML and no other changes are needed besides changing hash algorithm, you can update the production configuration file, pentaho-saml.cfg in User Console\Solution\system\karaf\etc. After changes are made, a restart of the User Console service is needed for the new configuration to take effect.
Note:This change should be coordinated with the corresponding changes in your identity provider.
The settings for SAML Authentication to supply in the Configuration Wizard appear in the table below. In each case, use values from your IdP that match the SAML 2.0 application that aligns with the component you are configuring: Administrator Console or User Console.
| Setting | Description |
|---|---|
| IdP Metadata | When using ADFS, this value is always https://<ADFS-SERVER-URL>/adfs//FederationMetadata/2007-06/FederationMetadata.xml. For Okta, the IdP Metadata URL for the SHA-2 Signing Certificate for the SAML 2.0 application you created in your IdP. |
| Issuer URI | The Audience URI chosen in your IdP. |
| IDP SSO URL | The Single Sign-on URL value from your IdP. |
| Logout Redirect URL | The Single Logout URL value from your IdP. |
| Certificate Path | Path to the PKCS12 certificate used to sign and encrypt SAML authentication requests. |
| Certificate Password | Password used to secure the certificate private key. |
| Platform Administrator | Designate a valid user account. This account must have the Administrator roles in the Admin Console and User Console to administer the application and authorize additional application users. |
User Management with SAML Authentication Configured
After configuring the Administrator Console to support SAML authentication, only the Platform Administrator user will be capable of logging in to Data Platform.
When using SAML authentication, Data Platform behaves much like Windows authentication in that you must assign roles to individual users. Data Platform users are still managed on the Security page. The Administrator Guide has instructions for Accessing the Security Screen and Adding a New Role Assignment. Follow the Administrator Guide instructions to grant access to additional users.
Note:When using SAML authentication, Data Platform cannot validate the user names you enter in the Role Assignment dialog box. Administrators must ensure the user names they provide are valid.