To use a database connection as a data source, do the following tasks:
1.
Click Create Process, located in the upper section of the Administration Console. The Process Type screen opens.
2.
Click the Purchase Order radio button.
3.
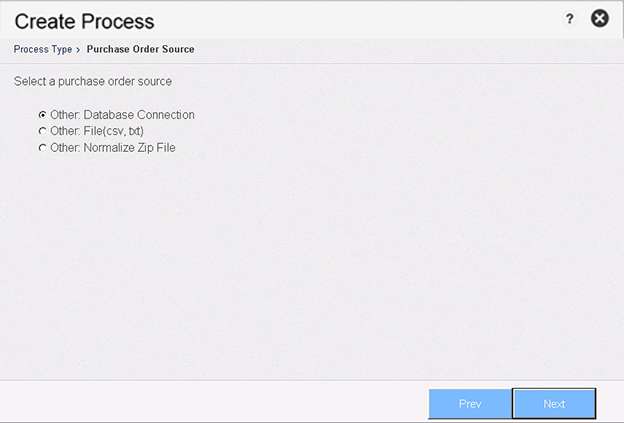
Click Next. The Purchase Order Source screen opens.
Purchase Order Source
4.
Click the radio button—Other: Database Connection.
5.
Click the database connection radio button that is applicable to your situation. Options are determined by the database used by BDNA Normalize.
6.
Select a configuration file (or use a customized configuration file), for the discovery tool you are adding. (For more information about customizing configuration files, see Creating a Purchase Order Configuration File)
7.
Enter configuration values for the discovery tool’s data source and location.
Note • The specific fields that display on the screen will vary, depending on the database connection previously selected.
To configure Process Settings later: Click Finish to add the process to the Administration Console.
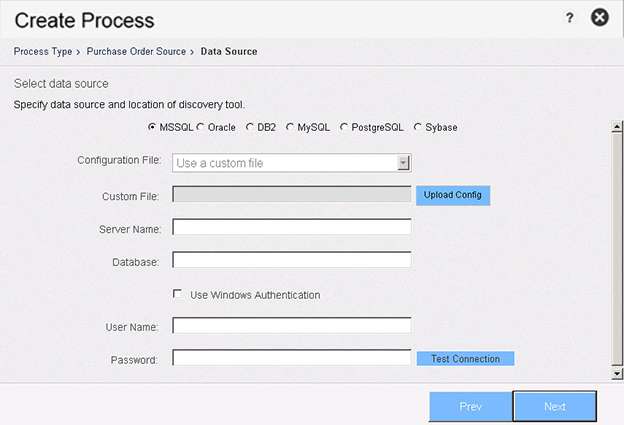
Specifying Purchase Order Data Source Values—MSSQL
When MSSQL is selected as the data source, the Create Process dialog box includes the following properties:
•
Server Name—Enter the name of the database server.
•
Database—Enter the name of the database.
•
Use Windows Authentication—Click the checkbox to enable Windows authentication.
•
User Name—Enter the authentication domain/username that enables access to the database.
•
Password—Enter the password that enables access to the database.
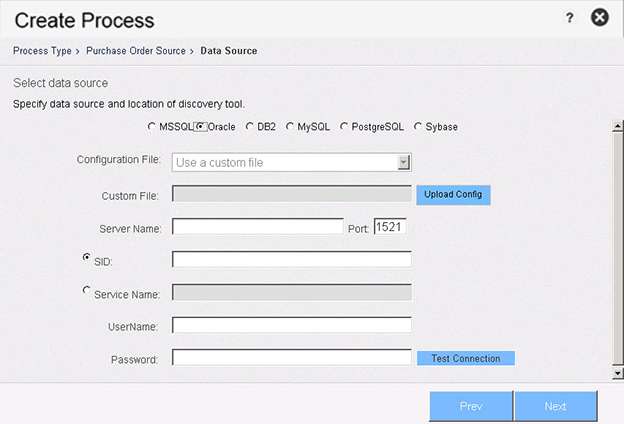
Specifying Purchase Order Data Source Values—Oracle
When Oracle is selected as the data source, the Create Process dialog box includes the following properties:
•
Server Name—Enter the name of the database server.
•
Port—Enter the port used to connect to f the database.
•
SID—Click this radio button to enable use of the System Identifier (SID) that identifies the database instance, and then enter the system identifier (database name + instance number; e.g. database3).
•
Service Name—Click this radio button to enable use of a ‘connector’ to one or more instances of the database, and then enter the Service Name (e.g., sales.us.example.com).
•
User Name—Enter the username that enables access to the database.
•
Password—Enter the password that enables access to the database.
Specifying Purchase Order Data Source Values—DB2
When DB2 is selected as the data source, the Create Process dialog box includes the following properties:
•
Server Name—Enter the name of the database server.
•
Port—Enter the port used to connect to the database.
•
Database—Enter the name of the database.
•
UserName—Enter the username that enables access to the database.
•
Password—Enter the password that enables access to the database.
Specifying Purchase Order Data Source Values—MySQL
When MySQL is selected as the data source, the Create Process dialog box includes the following properties:
•
Server Name—Enter the name of the database server.
•
Database—Enter the name of the database.
•
UserName—Enter the username that enables access to the database.
•
Password—Enter the password that enables access to the database.
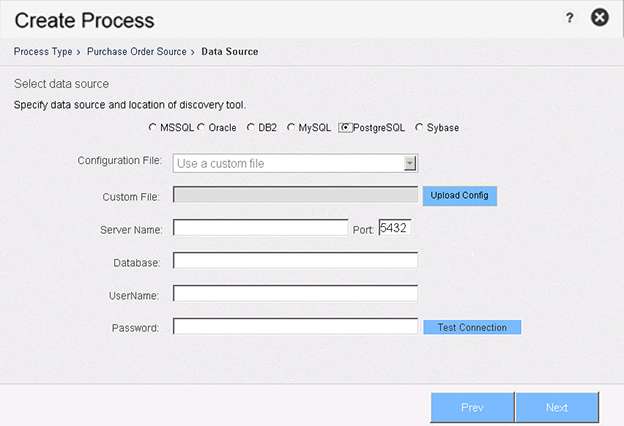
Specifying Purchase Order Data Source Values—PostgreSQL
When PostgresSQL is selected as the data source, the Create Process dialog box includes the following properties:
•
Custom File—Click Upload Config and select the custom file to be used for this process. (This option may be greyed-out and not available, depending on the database settings.)
•
Server Name—Enter the name of the database server.
•
Port—Enter the port used to connect to the database.
•
Database—Enter the name of the database.
•
User Name—Enter the username that enables access to the database.
•
Password—Enter the password that enables access to the database.
Specifying Purchase Order Data Source Values—Sybase
When Sybase is selected as the data source, the Create Process dialog box includes the following properties:
•
Server Name—Enter the name of the database server.
•
Port—Enter the port used to connect to the database.
•
Database—Enter the name of the database.
•
UserName—Enter the username that enables access to the database.
•
Password—Enter the password that enables access to the database.
BDNA Data Platform 5.5 Administration Help Library