Attribute Filters
Note:
Attribute filters are used to selectively display data by defining specific criteria based on attribute values, enabling users to narrow down and focus on relevant information for analysis and visualization in their dashboards.
Note:Dashboards do not override attribute filters from insights. For details about interactions of date filters, see Filtering Measures by Date and Date Filters in Dashboards.
To filter data by attributes on the dashboard:
| 1. | Open the dashboard that you want to filter by attributes. |
| 2. | Click Edit. |
| 3. | Drag the Attribute filter to the filter bar at the top of the dashboard. |
| 4. | Select an attribute from the dropdown list. |
Note:Hovering over the ? icon next to the attribute name displays a preview of the attribute’s values, which can be useful when trying to distinguish between multiple attributes of the same name.
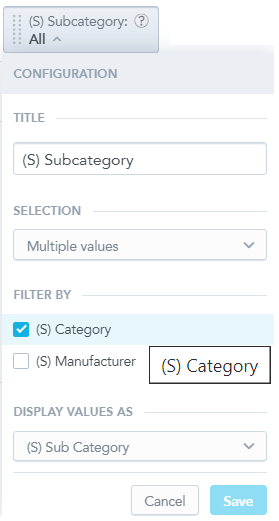
| 5. | To customize the attribute filter such as changing its display name, the type of selection, and the way the individual attribute’s values are displayed, click the attribute filter, and then click the Configuration icon. The Configuration properties box opens. You can do the following: |
| a. | If the attribute has multiple labels, in the Display values as section, select another attribute label from the dropdown list. |
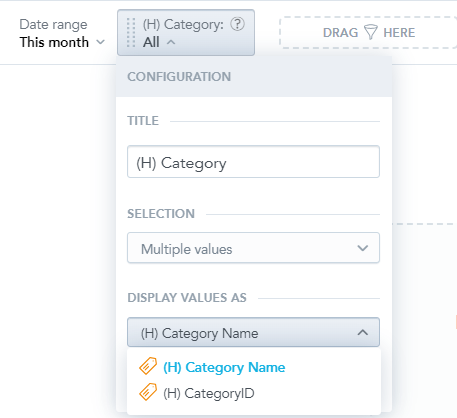
| b. | To set a new name for the label, in the Title box, enter the title. |
Note:To change the name back to the default name, click Reset that is located next to the Title box.
| c. | To select only one value at a time to filter by, in the Selection section, select Single value from the dropdown list. |
Note:By default the selection type is set to Multiple values, enabling you to select any combination of attribute values to filter for.
| d. | Click Save. |
| 6. | To change the order of the filters, drag a filter to a new position in the filter bar. |
| 7. | To remove the attribute filter, drag the filter back to the sidebar. |
| 8. | Click Save. |
Dependent Attribute Filters
If you have multiple attribute filters with many items, you can configure the filters to create a hierarchy. Filters then show only the items that correspond with the selections in their parent filters.
To configure the filters to create a hierarchy:
| 1. | Open the dashboard that you want to filter by attributes. |
| 2. | Click Edit. |
| 3. | Drag the Attribute filter to the filter bar at the top of the dashboard to add attribute filters. |
| 4. | Select attributes from the dropdown lists. |
| 5. | For each attribute to display items filtered by another attribute, click the attribute filter and then click the Configuration icon. The Configuration properties box opens. |
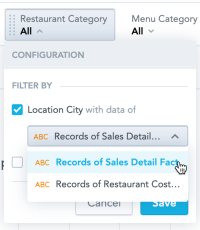
| 6. | In the Filter by section, select a parent attribute filter. You can select multiple parent filters |
| 7. | If there are multiple connections between the attributes, select one from the dropdown list. |
| 8. | Click Save. |
Now if you narrow the selection in the parent filter, the dependent filters show only items corresponding with the parent filter selection.
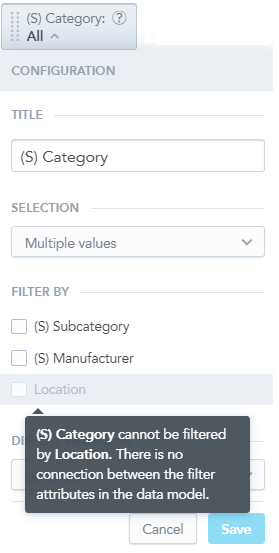
| • | To connect filters, their associated attributes must be connected in the logical data model. If the attributes are not connected, the option to connect them is disabled in the filter configuration. |
| • | You cannot use the date range filter as a parent or child. |
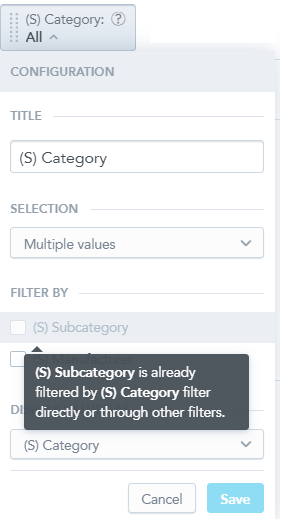
| • | You cannot connect a parent filter back to the child. This applies also to connections through other filters as well. For example, if you filter Subcategory by Category, you cannot configure Category to be filtered by Subcategory. |
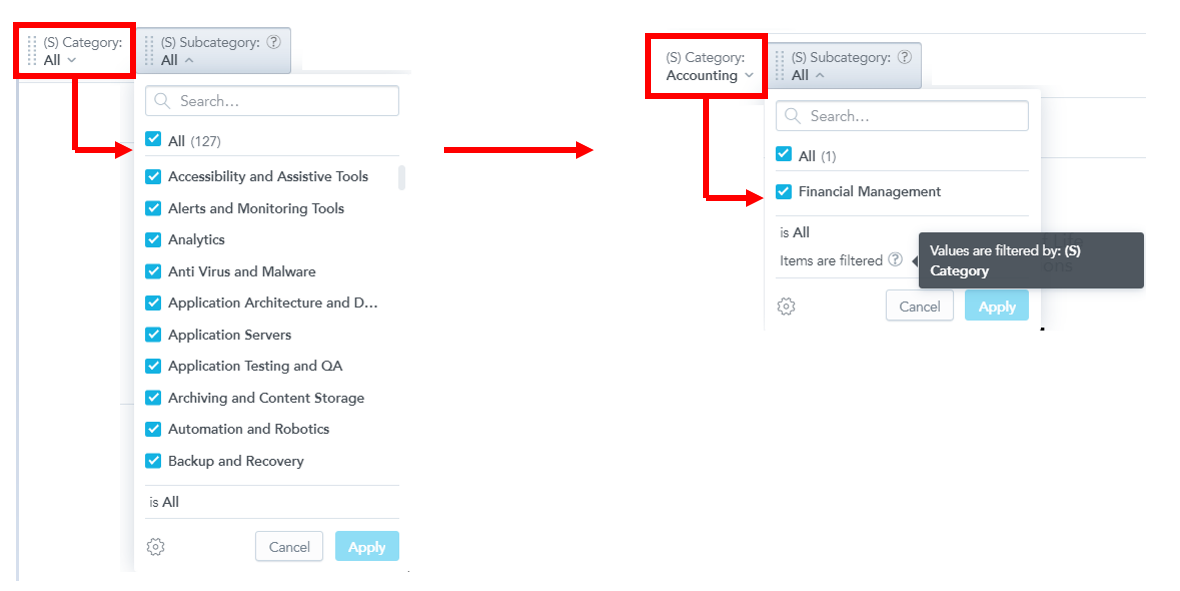
Example
You have two attribute filters on your dashboard: Category and Subcategory.
Subcategory is filtered by Category (Category is a parent filter of the Subcategory).
You narrow the Category to display only Accounting. The Subcategory then displays only a limited set of items that correspond with Accounting.
These visually appealing, interactive dashboards are easy to use, easy to create, and to customize providing embedded flexibility and extensibility.