Viewing Scheduled CSV Job Logs
The path of the CSV job logs is C:\ProgramData\FlexeraIngestionUtility\Flexera_Log_Directory
Note:The path of the CSV job logs is not configurable.
To view the CSV job logs:
| 1. | Go to the CSV Jobs page (CSV Jobs > CSV Jobs. |
| 2. | Select the Jobs Logs tab. |
| 3. | Use the Filter pulldown menu to filter job logs by SaaS application. |
| 4. | Go to the appropriate Job ID table row. |
| 5. | In the View column, click the View link to open the CSV job log. The following table describes the CSV Job Logs table columns. |
|
Table Column |
Description |
||||||
|
Job ID |
Each CSV job you create has a unique identifier, which is automatically generated by FSM Data Ingestion Utility. |
||||||
|
Job Name |
This is the Job Name you entered while Adding a New Scheduled CSV Job. |
||||||
|
Application |
This is the SaaS Application name that was selected while Adding a New Scheduled CSV Job. |
||||||
|
Start Time |
This column displays the date and time when the scheduled CSV job started. The scheduled job frequency was selected while Adding a New Scheduled CSV Job. |
||||||
|
Run Time |
This column displays the duration of the scheduled CSV job run. |
||||||
|
Status |
After the scheduled CSV job run, FSM Data Ingestion Utility moves the Selected File from the Data Mapping for Scheduled CSV Jobs process into one of two types of categorized folders in Windows File Explorer: Processed or Failed.
|
||||||
|
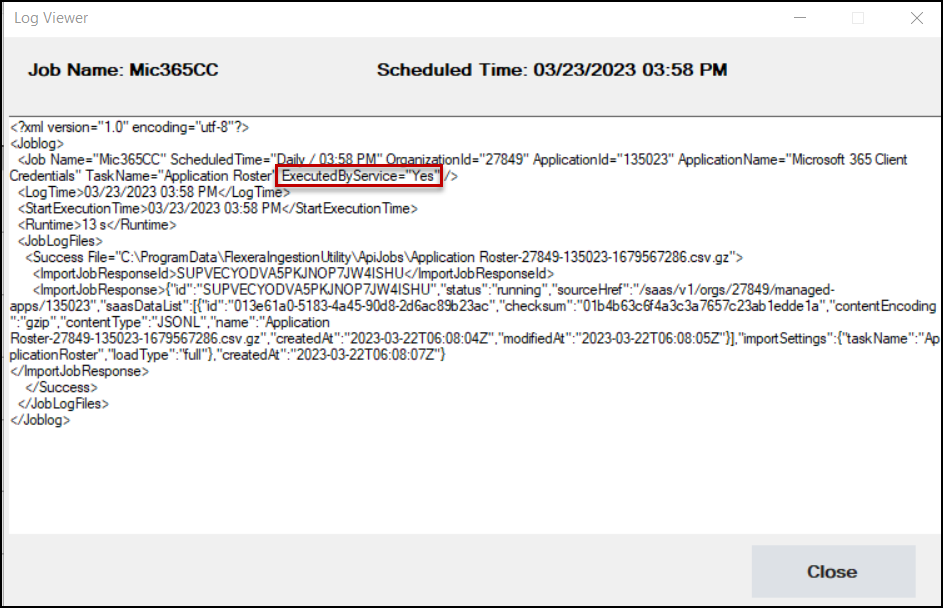
View |
Click the View link to open the Log Viewer, which displays the Job Log information for the scheduled job run. See the following sample screenshot. Note:If you selected the Advanced installation option in Installing FSM Data Ingestion Utility to run FSM Data Ingestion Utility as a Windows Service, the Job Log information displays the XML attribute ExecutedbyService=“Yes” next to the TaskName. For details, see the red box in the following screenshot. |