Workflow Manager 2014
To add a specific Workflow Manager account or a directory service account or group to the Role/Account/Email Address list on the Workflow Request Notifications Override page or the Notification tab of the Template Details page, do the following:
To add accounts or groups to the default email notifications list:
| 1. | Do one of the following: |
| • | Open a workflow template in the Template Details page and open the Notification tab. |
| • | Open a workflow request’s Workflow Progress page (see Workflow Progress Page (Administrator)) and click Override Notifications in the Action menu. The Workflow Request Notifications Override page opens. |
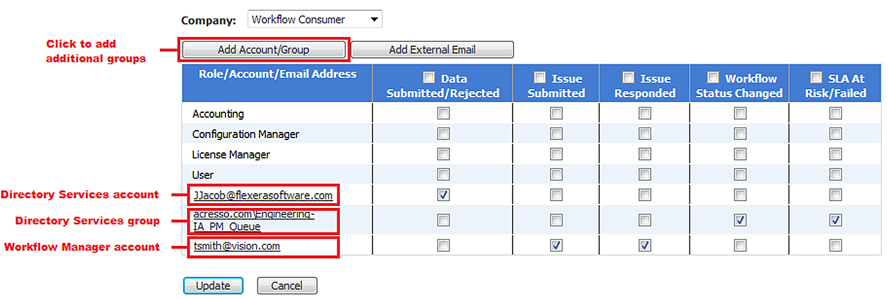
| 2. | Click the Add Account/Group button. The Add Account/Group dialog box opens. |
| 3. | Search for the account you are interested in, as described in Searching for Accounts, then click Apply. |
| 4. | Specify which of the listed events should trigger a notification to be sent to your new account, by selecting the appropriate check box next to the account name. |
| 5. | Click Update to apply your changes. |
Caution: When you click Update, any accounts or groups that you added but did not yet assign notification events to will be removed from the list. So, please make sure that you assign an email notification event to each account as soon as you add it.
See Also
Adding External Email Addresses to an Email Notification List
Overriding Default Email Notification Settings for an Individual Workflow Request
Workflow Manager 2014 Help LibrarySeptember 23, 2014 |
Copyright Information | Contact Us |