Creating a New Issue
Workflow Manager 2016
You create new issues on the Issues tab of a workflow request’s Workflow Request page.
To create a new issue:
|
2.
|
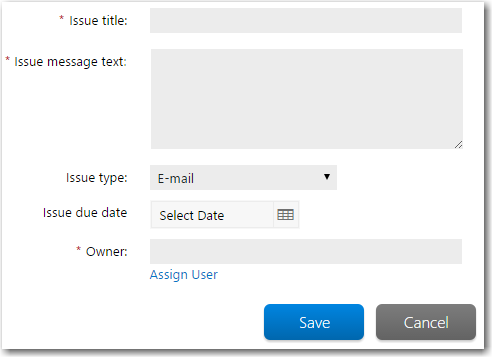
Click the Create New button. An issue details area appears above the list of existing issues. |
|
3.
|
In the Issue title box, enter a short description for the issue so it can be readily identified in lists. |
|
4.
|
In the Issue message text field, provide enough information to describe or reproduce the issue. |
|
5.
|
Select an Issue type from the list. You may choose one of the following: |
|
•
|
Knowledge Base—Choose this option if you want to post this issue on the Issues tab but do not want to notify anyone by email. A Knowledge Base issue is used to share information between several people in a discussion board forum. Other people must open the Issues tab for the workflow request in order to read the issue, and any responses made are listed below the original issue. |
|
•
|
E-mail—Use the E-mail type for issues that you do not consider critical, but which require that people associated with the project be notified. Such issues appear on the Issues tab once they are raised, and also notification emails are sent to every person belonging to a role with the Issue Submitted right turned on for the project. |
|
•
|
Critical—Use this option if you want to stop all work on this workflow request until the issue is resolved. Whenever a workflow request has an open Critical issue, the request becomes read-only until the issue is resolved. Only people with the right to edit workflows will be able to raise or close critical issues. When a critical issue is open, the following conditions apply: |
|
•
|
The note Open Critical issue present in Workflow appears near the top of the Issues tab |
|
•
|
The note The Workflow is READ-ONLY because of Critical issues appears at the top of the Progress tab. |
|
•
|
Every time a person opens the Issues tab of a workflow request with an open Critical issue, the Issue Details section automatically appears below the list of issues, showing you the details of the critical issue. |
Note • The amount of time taken to close a critical issue is tracked and listed on the Workflow Report.
|
6.
|
Use the calendar icon next to the Issue due date field to choose a target due date for issue. |
|
7.
|
Specify someone as the owner of this Issue by clicking the Assign User button and selecting an account from the list. Refer to Searching for Accounts for more information about finding an appropriate account. |
|
8.
|
Click the Save button to create the issue. The issue is raised and automatically included in the list on the Issues tab. Any other actions that need to be taken, as described above, are also completed at this time. |
See Also
Responding to or Closing an Issue
Working With Issues
Open topic with navigation