Modifying Default SLA Calendar Settings
Workflow Manager 2020
When you create a new project, or update an existing project, you can specify the calendar settings to use when reporting on the workflow request’s compliance with that project’s associated Service Level Agreement due dates. The following information is important in elapsed time calculations:
| • | Work Week Information—Work week information includes the length of an average work day (in hours and minutes), and whether weekends are considered as part of the working week. |
| • | Holiday Information—Any public holidays or office shut down periods need to be specified, so that those days are not included in the elapsed time. |
You can define the default SLA calendar settings by using the Calendar Settings Administration page. These settings are then automatically applied to all new projects.
Note:You can override the default calendar settings for an individual project on the Project Details page. See Project Details Page for details.
To set default SLA Calendar settings:
| 1. | In the navigation bar, click Calendar Settings on the Administration menu. The Calendar Settings Administration page opens. |
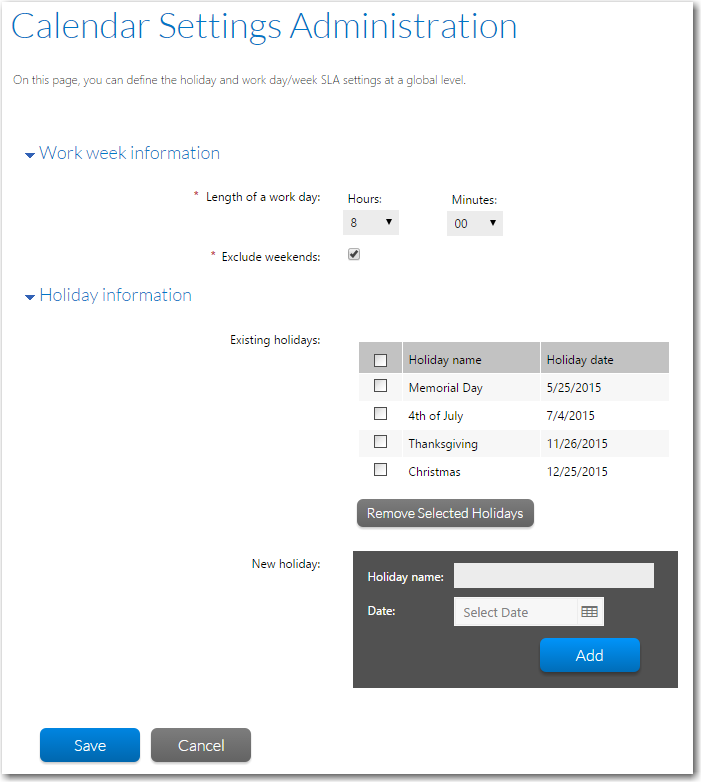
| 2. | In the Work week information area, specify the Length of a work day, by making selections in the Hours and Minutes lists. |
Note:The Length of a work day value is used to convert hours into days when calculating elapsed time. For example, if the elapsed time for a particular workflow step is 45 hours, and a standard working day is 8 hours long, Workflow Manager will convert the 45 hours into 5 days and 5 hours in relevant reports.
| 3. | To exclude Saturday and Sunday from the work week, select the Exclude weekends option. |
Note:For example, if a workflow request was submitted on Tuesday June 28, 2011 with a Workflow due period of 5 days and with the Exclude weekends option turned on, the due date for the workflow would be calculated as Tuesday July 5, 2011. If this option was turned off, then the due date would be Sunday July 3, 2011.
| 4. | The Existing holidays grid lists the public holidays or office shut down periods that have already been identified for your company. These days will be excluded from elapsed time calculations. To add a new holiday, perform the following steps: |
| a. | In the Holiday name field, enter a short description of the holiday. |
| b. | Click the calendar icon next to the Date field and select the date of the holiday. |
| c. | Click Add. |
The holiday you entered is automatically displayed in the grid. To remove an existing holiday, do the following:
| a. | Locate the holiday you want to remove in the Existing holidays list and select its checkbox. For details about sorting or filtering the holiday list, see Using Lists. |
| b. | Click Remove Selected Holiday. The holiday is removed. |
See Also
Modifying Due/At Risk Period for a Specific Workflow Request