Data Element Data Types
Workflow Manager
You can define a data element with any of the following data types:
|
Data Type |
Description |
||||||||||||||||||||||||
|
Text Entry Box |
A single-line, editable text box. To validate the data that a user enters into this text box, set the Validation Type option to Mask or Regular Expression. When you select Mask or Regular Expression, two additional options appear: Validation Expression and Validation Message. See Text Entry Box Data Type Validation Options for more information. |
||||||||||||||||||||||||
|
Text Area |
A multi-line, scrollable, and editable text box. |
||||||||||||||||||||||||
|
Single Selection |
A drop down list prompting the user to select one value from a list of values. When this option is selected, the Selection list items field appears, where you enter the list values, one per line. Important:Because a user can only select one value, Single Selection lists can be used to control branching. |
||||||||||||||||||||||||
|
Multiple Selection |
List in which the user is permitted to select more than one value. When this option is selected, the Selection list items field appears, where you enter the list values, one per line. |
||||||||||||||||||||||||
|
Check Box |
Square box that is selected or cleared to turn on or off an option. More than one check box can be selected. When this option is selected, the Selection list items field appears, where you enter the check box values, one per line. |
||||||||||||||||||||||||
|
Radio Button |
A round button used to select one of a group of mutually exclusive options. When this option is selected, the Selection list items field appears, where you enter the radio button values, one per line. Important:Because a user can only select one value, Radio Buttons can be used to control branching. |
||||||||||||||||||||||||
|
Date |
A text box where the user is only permitted to either enter a date in date format (such as MM/DD/YYYY) or select a date by clicking on the field's associated Calendar icon. |
||||||||||||||||||||||||
|
Document Upload, Application Upload, Dependency Upload, Upload Folder Content |
An upload link in a workflow step which enables a user to upload application, documentation, or dependency files to a specific location on the Workflow Manager file server for the selected workflow request. Tip:In Uploaded Files Tab, You can find all the uploaded files for the selected workflow request. Note:The data type Upload Folder Content allows you to create a folder and sub folder structure. |
||||||||||||||||||||||||
|
Downloadable File Upload |
An upload link in a workflow step that occurs after the initial data entry step. These files are stored in the Workflow Manager Downloadable Files directory and are listed on the Downloadable Files tab for the selected workflow request. Typically after an administrator has completed his tasks, his next workflow step would be to upload the revised application file. |
||||||||||||||||||||||||
|
Directory Service |
Select to map the data element to an attribute in a directory service, so that when this field is presented to the user, its value will be pre-populated by the value of the attribute for the current user. When Directory Service is selected in the Data Type field, two additional fields appear: the Directory Services list, where you pick the directory service that contains the attribute that you want to use, and the Data element list, where you select the attribute that you want to map to. |
||||||||||||||||||||||||
|
Dynamic Pick List |
A selection list which is populated with values from a user-supplied XML file. When this option is selected, the Data Source File field appears, where you specify the XML file that you want to use, and the Column Value to Select field appears, where you select which column's value in the XML file will be passed to Workflow Manager. By default, the first column is selected. When a data element with a data type of Dynamic Pick List is displayed in a request, the user is prompted to click a link to make a selection. When the user clicks the Click to Select link, the Dynamic Pick List dialog box opens containing a list of the data in the selected XML file. After the user selects one or multiple items in the list and clicks OK, the selected values then populate the text area, with entries separated by pipes. Note:See Dynamic Pick List Data Type Options for more information. |
||||||||||||||||||||||||
|
DB Driven Type |
Select this option to populate a single-selection list with real time data values obtained from an associated SQL Server or Oracle database. When you select DB Driven Type from the Data Type list, three new fields appear:
Note:See DB-Driven Type Data Type Options for more information. |
||||||||||||||||||||||||
|
Web Service Call |
Select this option to return information from across a web service connection. For more information, see Web Service Results Dialog Box and Defining a Web Service Call Element. |
||||||||||||||||||||||||
|
AdminStudio Package Upload |
Select this data type to prompt the requester to click a button to upload packages to the AdminStudio Application Catalog from any accessible location. When the requester clicks the Upload Package Content button, the File Upload dialog box opens, and the requester can upload multiple files. Note:For more information, see Uploading Individual Packages. Note:The supported deployment types that can be imported into AdminStudio are described in Supported Package Deployment Types for Import. Important:After creating an AdminStudio Package Upload data element, you also need to create a workflow step with a step type of AdminStudio Integration / Package import to collect this data element and process the import. See Creating a Workflow Step to Process the Import. Note:The AdminStudio Package Upload method is not recommended to import large packages because of the length of time it takes to upload and test, and also because it requires you to manually select all dependent files, such as .mst and .cab files. When importing larger files and files with dependent files, you should use the AdminStudio Package Upload from Import Path method, as described in Uploading Packages from a Directory. |
||||||||||||||||||||||||
|
AdminStudio Package Upload from Import Path |
Select this data type to prompt the requester to upload a directory of packages to the AdminStudio Application Catalog. With this data type, the user is first prompted to copy the files that they want to upload into the workflow-request-specific subdirectory, which is created automatically when the workflow request is created. Note:The root path to this import directory is specified in the AdminStudio Import Base Directory field on the Company Preferences page. See Setting Preferences on the Company Preferences Page. When using this type of data element, dependent files are automatically imported along with the selected packages, and you are able to use Workflow Manager to perform other tasks while the files are being imported and tested. All packages of the specified deployment types in the selected directory will be imported. Note:The supported deployment types that can be imported into AdminStudio are described in Supported Package Deployment Types for Import. Note:For more information, see Uploading Packages from a Directory. Important:After creating an AdminStudio Package Upload from Import Path data element, you also need to create a workflow step with a step type of AdminStudio Integration / Package import to collect this data element and process the import. See Creating a Workflow Step to Process the Import. |
||||||||||||||||||||||||
|
AdminStudio Package Content Upload |
Select this data type to prompt the requester to click a button, which allows him to create a folder and subfolder structure, upload packages to the AdminStudio Application Catalog from any accessible location. When the requester clicks the Upload Package Content button, the Upload windows pane opens, and the requester can create folders, sub folders and upload multiple program files and supporting files. Tip:You can upload multiple program files and supporting files in to the folder structure created, however you can import single application and supporting file into the AdminStudio Catalog Note:For more information, see Uploading Uncompressed Setup Files. Note:The supported deployment types that can be imported into AdminStudio are described in Supported Package Deployment Types for Import. Important:After creating an AdminStudio Package Upload data element, you also need to create a workflow step with a step type of AdminStudio Integration / Package import to collect this data element and process the import. See Creating a Workflow Step to Process the Import. |
||||||||||||||||||||||||
|
Existing AdminStudio Package |
Select this data type to create a workflow step that prompts the requester to select existing packages from the AdminStudio Application Catalog to associate with the workflow request. Once you associate packages with a workflow request, you can perform other AdminStudio tasks on those packages as part of subsequent workflow steps such as performing testing in AdminStudio, viewing test results, and distributing packages to specified distribution systems such as System Center Configuration Manager. Note:For more information, see Selecting Existing AdminStudio Packages. |
||||||||||||||||||||||||
|
Set AdminStudio Property |
Select this data type to set an AdminStudio package property in a workflow step for packages associated with the workflow request. After you select this data type, select the property that you want to set from the Property Name list, and enter the Property Value that you want to set. For example, if you want to set the App Portal category of all of the packages associated to a Workflow Request to Utilities, you would select Categories from the Property Name list and enter Utilities in the Property Value list. When this data element is displayed in a workflow request, the status of the property update is listed. Note:For more information, see Setting Package Properties in a Workflow Request. Note:To set package properties in a workflow step, you need to first associate packages with a workflow request, as described in Selecting Existing AdminStudio Packages or Importing New Packages into AdminStudio. |
||||||||||||||||||||||||
|
Get AdminStudio Property |
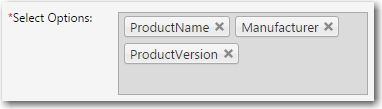
Select this data type to display selected AdminStudio properties for the packages associated with a workflow request. The following package properties can be displayed:
When you select this data type, you need to also select the properties that you want to display from the Select Options list. You can select multiple properties.
When a Get AdminStudio Property data element is displayed in a workflow request, the properties you selected are listed in table format. Note:For more information, see Displaying Package Properties in a Workflow Request. Note:To display package properties in a workflow step, you need to first associate packages with a workflow request, as described in Selecting Existing AdminStudio Packages or Importing New Packages into AdminStudio. |
||||||||||||||||||||||||
|
AdminStudio Package Formats |
You can use the AdminStudio Package Formats data element to prompt the user to specify data about applications as part of an application rationalization process. For example, after performing testing on an application, you may want to specify that you want to distribute the package in a different package format than its current format, which may require application virtualization. You may also want to create workflow templates where package format could be used as a branching condition. When you select the AdminStudio Package Formats data type, you also need to click in the Select Options field and select the package formats you want to include in the selection list. You can select multiple items from the list. When this data element is displayed in a workflow request, the user will be able make selections from a drop down list. Note:For more information, see Specifying Package Formats and Target Environments. |
||||||||||||||||||||||||
|
AdminStudio Target Environments |
You can use the AdminStudio Target Environments data element to prompt the user to specify data about applications as part of an application rationalization process. For example, after performing testing on an application, you may want to specify the supported target operating system for the package. You may also want to create workflow templates where target environment could be used as a branching condition. When you select the AdminStudio Target Environments data type, you also need to click in the Select Options field and select the target environments you want to include in the selection list. You can select multiple items from the list. When this data element is displayed in a workflow request, the user will be able make a selection from a drop down list. Note:For more information, see Specifying Package Formats and Target Environments. |
||||||||||||||||||||||||
|
AdminStudio Distribution Connections |
When creating a workflow step to distribute packages associated with that workflow request to a distribution system that is configured in AdminStudio, you first need to create an AdminStudio Distribution Connections data element that identifies the named connection to the distribution system. In the Select Options field, select which of the named connections to distribution systems defined in AdminStudio that you want to provide as an option in this workflow step. Note:For more information, see Distributing Packages. |
||||||||||||||||||||||||
|
Contacts |
When you select this option, your prompting the requester to add contact information that are related to the workflow request. Note:For more information, see Defining a Contact Data Element to Enable Predictive Search. |
||||||||||||||||||||||||
|
LinkUrl |
Select LinkUrl to prompt the requester to click a link to open a specified Url or UNC path in a new window/dialog box. With this data type you have two options:
Note:When a Display name is not entered, then the specified Url or UNC path will appear as the Display name. Note:For more information, see LinkUrl Data Type Options. |
||||||||||||||||||||||||
|
User Role |
When you select User Role option, you are prompting requester to select the desired role from the Select a role drop down in a Workflow template. Note:For more information, see User Role Data Type Options. |